Your car won’t turn over and the headlights barely glow—classic dead battery. Instead of flagging down strangers for cables, a palm-sized jump starter can fire your engine in under two minutes. These pocket powerhouses bypass the need for a second vehicle by delivering a controlled lightning bolt straight to your starter motor. Unlike common belief, a jump starter never recharges your battery. It acts like an external defibrillator, shocking the starter motor into action while your alternator takes over restoring the car’s battery once the engine runs. You’ll learn exactly how this lifesaver works, why lithium models dominate modern kits, and the critical mistakes that turn roadside rescues into dangerous failures.
Lithium vs Lead-Acid: Why Modern Jump Starters Weigh 1 Pound, Not 20

Lithium-Ion’s 18-Month Standby Power Advantage
Today’s lithium jump starters store energy in high-density cells that weigh one-twentieth of old lead-acid units. A fully charged NOCO GB40 retains 80% power after 12 months in your glovebox—no trickle charger needed. Compare this to lead-acid models that self-discharge 20% monthly, requiring monthly recharging just to stay functional. Lithium’s secret? Minimal internal resistance lets it dump 1,000+ amps instantly without voltage sag, even in freezing temps. Pro tip: If your unit feels warm after cranking, it’s working correctly—lithium converts stored energy to power with 95% efficiency versus lead-acid’s 70%.
Why Lead-Acid Batteries Fail in Cold Weather Rescues
Legacy lead-acid jump starters (like those 20-pound bricks in auto shops) struggle below 32°F. Their thick electrolyte fluid thickens in cold, slowing chemical reactions needed for high-current bursts. At 0°F, they deliver less than 40% of rated amps—often enough for a push-button start but not for stubborn winter cranks. Worse, they self-discharge completely in 3-4 weeks if unused. Critical mistake: Never store lead-acid units in freezing garages—they can crack from electrolyte expansion. Lithium models handle -4°F with no performance drop, making them the only reliable choice for emergency kits.
How Jump Starter Safety Circuits Prevent Explosive Short Circuits
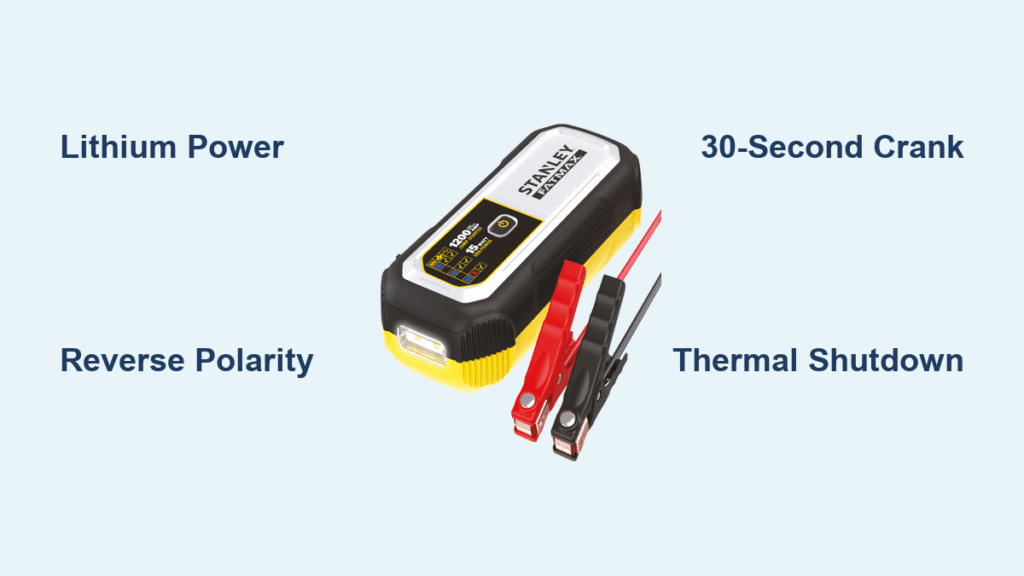
Reverse Polarity Protection: The #1 User Error Fix
Connecting red clamp to negative terminal causes catastrophic sparks—but modern units prevent this. Microprocessors detect reverse polarity within 0.2 seconds and cut power before damage occurs. You’ll see rapid red LED flashes (3 blinks = polarity error). Visual cue: Always connect black clamp to an unpainted engine bracket—not the battery’s negative terminal—to avoid accidental contact with positive posts. This creates a safer ground path through the engine block.
Thermal Shutdown Before 60°C Meltdowns
During repeated cranking attempts, copper cables heat rapidly. Built-in thermal sensors trigger automatic shutdown at 60°C (140°F)—the threshold where insulation begins melting. If your unit enters recovery mode (amber light pulsing), wait 3 full minutes before retrying. Pushing further risks permanent circuit damage. Urgent warning: Never cover the unit while cranking—adequate airflow prevents heat buildup that could trigger thermal cutoff mid-crank.
30-Second Direct Connection: Avoid These Deadly Polarity Mistakes
Why You Must Ground to Engine Bracket (Not Negative Terminal)
Step 1: Clip red clamp to battery’s positive (+) terminal (shiny metal post).
Step 2: Attach black clamp to unpainted metal bracket—not the negative terminal. Why? The negative terminal often connects directly to the engine block. Grounding elsewhere creates distance from battery fumes, eliminating spark ignition risks. Look for: Clean, rust-free metal near the strut tower or alternator bracket. If you see sparks during connection, disconnect immediately—your clamp likely touched another metal part.
The 30-Second Cranking Window Before Overheating
After pressing the power button, a solid green LED means “ready to crank.” You have exactly 30 seconds before the unit auto-shuts off to prevent overload. Crank for no longer than 5 seconds—longer strains both the jump starter and your starter motor. If the engine doesn’t catch, wait 30 seconds for internal capacitors to recharge before retrying. Exceeding 3 attempts risks thermal shutdown, leaving you stranded in critical situations.
Disconnecting in Reverse Prevents Arcing
Step 1: Turn off the jump starter immediately after engine start.
Step 2: Remove black clamp first—disconnecting positive first could cause arcing if the clamp brushes metal.
Step 3: Pull red clamp off carefully. Pro move: Hold clamps by insulated handles only. Never let metal parts touch each other while connected to the battery.
Rainy Day Rescue: Start Your Car Without Opening the Hood
Cigarette Lighter Method: The 15-Minute Pre-Charge Requirement
When storms make hood access dangerous, use your 12V accessory port:
1. Plug the special adapter cable into your car’s cigarette lighter.
2. Connect the other end to your jump starter’s accessory port.
3. Turn ignition to “Accessory” mode (radio powers on).
4. Wait 15 minutes—this slow pre-charge phase transfers enough energy to crank.
Time-saver: This method eliminates spark risks near battery fumes but adds 12 minutes versus direct connection. Only works if your vehicle’s 12V port has constant power (most post-2010 cars do).
Why This Method Eliminates Spark Risks Near Gas Fumes
Gasoline vapors concentrate near the battery in engine bays. The accessory-port approach keeps all connections inside the cabin, far from explosive fumes. Critical limitation: If your car’s 12V port cuts power when off (common in European models), this method fails—you’ll see no LED activity on the jump starter. Test your port now: plug in a phone charger with ignition off—if it charges, the port works for jumps.
Batteryless Jump Starters: The 3-Minute Self-Charging Miracle
How Ultracapacitors Harvest Energy from “Dead” Batteries
Ultracapacitor units like the Rezervo RZ-550 need no internal battery. They harvest micro-energy from your “flat” battery (as low as 1.5V):
1. Connect clamps normally.
2. Press ON—unit draws residual voltage for 60-180 seconds.
3. Watch for two solid green LEDs—this confirms sufficient charge.
Unlike chemical batteries, ultracapacitors store energy electrostatically with zero degradation after 100,000 cycles. Key benefit: They work instantly after years in storage—no recharging ever needed.
Diesel Glow Plug Sequence: Press GLOW Before Cranking
For diesel engines, skip the standard crank sequence:
1. After ultracapacitors charge (two green LEDs), press GLOW.
2. Wait 10 seconds for glow plug activation.
3. Crank immediately—delaying risks capacitor discharge.
Visual cue: Diesel-specific models have yellow GLOW buttons (vs. standard red power buttons). Ignoring this step causes hard starts that drain capacitor power.
Peak Amps Decoded: Why Your Compact Car Needs Only 800A (Not 5000A)
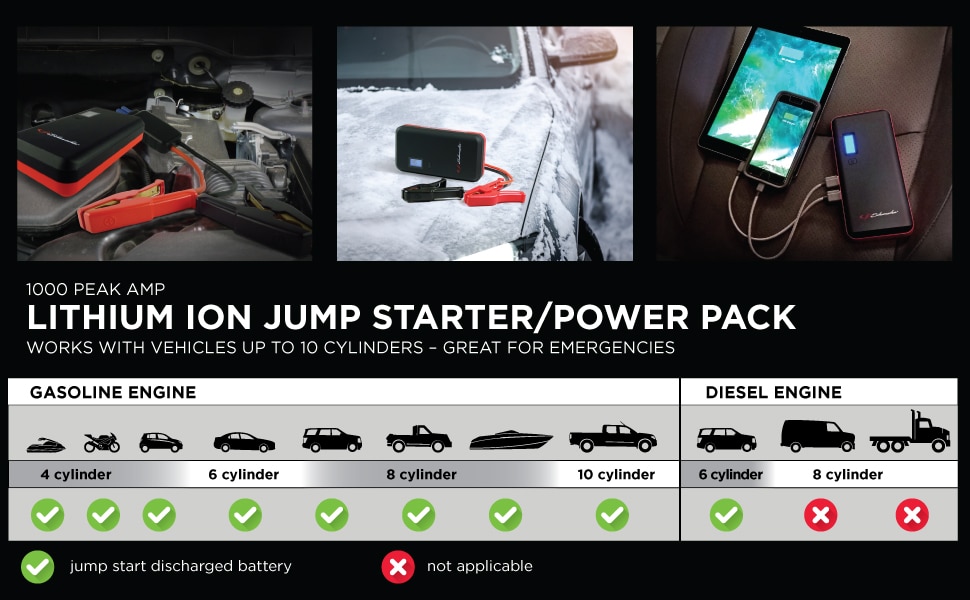
| Vehicle Type | Required Peak Amps | Consumer Model Example |
|---|---|---|
| Compact petrol | 400-800 A | NOCO GB40 (1,000A) |
| V8 truck | 1,500-2,000 A | GB70 (3,500A) |
| Diesel pickup | 3,000-5,000 A | GB150 (4,250A) |
Critical insight: Peak amps matter only for the first 500ms of cranking. A $120 GB40’s 1,000A output handles most four-cylinders even at -22°F—no need for oversized units. Mistake to avoid: Buying “5,000A” models for small cars. Excess capacity adds weight (up to 3x) with zero benefit. Your Honda Civic needs under 600A—verified by SAE J537 standards.
When Jump Starters Fail: 3 Hidden Reasons Your Car Won’t Start
Battery Voltage Below 2V: The Silent Killer
If your car battery reads below 2 volts on a multimeter, most lithium jump starters won’t engage. Their safety circuits detect “no battery” conditions to prevent damage. Diagnose this: Turn on headlights—if they’re completely dead (not dim), your battery is below 2V. Solution: Call roadside assistance; no portable unit can help here.
Alternator Failure: Why Your Car Stalls Minutes After Jump
A jump starter only provides starting power—not continuous charging. If your car stalls within 5 minutes of starting, your alternator failed. The jump starter cranked the engine, but without a functioning alternator, the battery can’t recharge. Test: With engine running, check voltage at battery posts—if below 13.5V, replace the alternator immediately.
Jump Starter Flashing Red? Fix These 4 Emergencies in 60 Seconds
| Symptom | Action | Time Required |
|---|---|---|
| No lights on unit | Recharge via USB-C—discharged units won’t power on | 30 min |
| Rapid red flashes | Swap clamp positions—reverse polarity detected | 20 sec |
| Amber light pulsing | Wait 3 minutes—thermal recovery mode active | 3 min |
| Crank but no start | Check fuel gauge—empty tank mimics dead battery | 10 sec |
Pro tip: If clamps feel warm after use, your cables are undersized. Upgrade to NOCO XGC4 extensions with 4-gauge wire for reliable power transfer.
Lithium Jump Starter Lifespan: The 6-Month Charging Rule You’re Ignoring
Storage at 50% Charge Doubles Battery Life
Lithium cells degrade fastest at full charge or complete discharge. Store units at 40-60% charge—indicated by 2-3 solid LEDs on most models. Check charge level every 6 months; if below 30%, top up for 20 minutes. Never store fully charged—it accelerates capacity loss by 25% annually.
Why Full Discharge Destroys Lithium Cells Forever
If your jump starter shows zero LEDs and won’t accept charge, it’s likely deeply discharged. Lithium protection circuits permanently disconnect cells below 2.5V to prevent fire risk. Prevention: Recharge immediately after every use—even if you cranked only once. A single deep discharge can kill the unit.
Why Your Jump Starter Dies in Winter (And the 1 Critical Pre-Start Check)
The -30°C Cold Cranking Reality Check
Lithium jump starters work down to -4°F, but capacity drops 30% at 0°F. Before winter:
1. Fully charge your unit.
2. Test it on your car (not during an emergency).
3. Store in the cabin—not the freezing trunk.
Visual cue: If the unit feels cold to the touch, warm it against your body for 2 minutes before use. Cold lithium delivers weaker surges.
How to Test Charge Level Before You Get Stranded
Press the power button—most units show charge via LED count:
– 4 LEDs = 100% (safe for 10+ jumps)
– 2 LEDs = 50% (1-2 jumps left)
– 1 flashing LED = <20% (recharge now)
Urgent action: If at 2 LEDs or below, recharge immediately. Units below 30% often fail to crank in cold weather.
Final Note: Your jump starter works by delivering a high-current burst—not battery recharging—to overcome starter motor resistance when your car battery can’t. Lithium models dominate for good reason: 18-month standby life, sub-zero reliability, and pocket-sized convenience. But they only work when properly maintained—check your unit’s charge level today. Most roadside failures happen because the owner assumed it was ready after six months in storage. Keep it at 50% charge, store it in your cabin during winter, and you’ll never wait for help again.