If your vacuum smells musty, loses suction, or leaves behind fur, your Bissell Pet Hair Eraser likely needs a thorough filter cleaning. The quick fix: remove the dirt tank, take out the pre-motor filter, tap it against a trash can to dislodge debris, then rinse with cool water and let it air-dry for at least 24 hours before reinstalling. This simple step can immediately improve airflow and suction.
In this guide, you’ll get a complete, model-aware cleaning routine for Bissell Pet Hair Eraser vacuums (upright, handheld, and stick models), including what filters each has, how often to clean them, the right way to wash and dry, how to reset and test suction, and maintenance tips to keep odors and clogs away. By the end, you’ll have your vacuum running like new—without damaging delicate filter media.
Why Regular Filter Cleaning Is Essential
Bissell Pet Hair Eraser vacuums are designed for heavy pet messes—but fur, dander, and dust quickly clog filters. Cleaning maintains:
– Strong suction and pickup on carpets and upholstery
– Motor health by preventing overheating
– Odor control and fresher exhaust air
– Longer filter life and fewer replacements
Important: A clogged filter can make the motor run hot and loud. If the vacuum shuts off unexpectedly, allow it to cool for 30 minutes and clean filters before resuming.
How Often to Clean Your Bissell Pet Hair Eraser Filter
Frequency varies by home and pets. As a rule of thumb:
| Frequency | Task | Duration |
|---|---|---|
| Every 1-2 weeks | Tap-clean pre-motor filter and empty dust tank | 5-10 minutes |
| Monthly | Rinse pre-motor foam/felt filters (if washable) | 15 minutes (+24 hours dry) |
| Every 3 months | Check HEPA/post-motor filter; replace if discolored, torn, or odor persists | 5 minutes |
| Every 6-12 months | Replace pre-motor foam/felt if losing shape or not cleaning well | 5 minutes |
Note: Some HEPA/post-motor filters are NOT washable. Check your model label or Bissell manual.
Know Your Model: Filter Types and Locations

Bissell uses “Pet Hair Eraser” across several models. Here’s a quick orientation:
- Upright (e.g., 1650/16501/16502 Pet Hair Eraser, 27909 Turbo Rewind Pet): Typically has a pre-motor foam or foam + felt filter under the dirt tank, and a post-motor HEPA filter behind a grille.
- Cordless/Stick (e.g., Pet Hair Eraser Turbo Plus, Icon Pet): Pre-motor cartridge or foam filter near the cyclone; post-motor filter near the battery compartment/exhaust.
- Handheld (e.g., Pet Hair Eraser Lithium Ion 2390/1782): Pre-motor filter in the dirt bowl; some models include a small washable filter and a non-washable screen.
If in doubt, remove the dirt container and look for a round or rectangular foam/felt filter underneath or inside the cyclone assembly. The post-motor filter is often behind a rear cover with a snap latch.
Complete Filter Cleaning Process
Step 1: Power Down and Prep
- Unplug corded models; switch off and remove the battery (if removable) on cordless.
- Move to a trash can outdoors if you’re sensitive to dust.
- Gather: soft brush, dry cloth, mild dish soap (optional), cool water, replacement filters (if needed).
Warning: Never operate the vacuum without filters installed. Do not use hot water, bleach, or harsh cleaners on filters.
Step 2: Empty and Pre-Clean the Dirt Tank
- Remove the dirt tank/canister.
- Press the bottom-release to dump debris.
- Tap the cyclone gently to shake out fine dust.
- Wipe the tank and cyclone shroud with a dry or slightly damp cloth.
Tip: Matted pet hair can cling to the cyclone. Use a soft brush or your hand (with a glove) to pull it free.
Step 3: Remove Pre-Motor Filter(s)
- Locate the pre-motor foam/felt or cartridge under/inside the canister seat.
- Pull out all layers (many uprights have foam on top of a white felt pad).
- Note orientation so you can reinstall correctly.
Important: If your foam/felt set is heavily torn, won’t de-dust, or smells even after washing, replace it.
Step 4: Dry Tap and Brush
- Firmly tap the filter(s) against a trash can to release dust.
- Use a soft brush to loosen stubborn debris from the foam. Avoid tearing felt layers.
For handheld models with fabric/cartridge filters, tapping is often enough for quick maintenance between rinses.
Step 5: Rinse Washable Filters
- Rinse foam and felt filters under cool running water until water runs clear.
- Squeeze foam gently—do not wring or twist aggressively.
- If extremely dirty or oily (from pet hair oils), use a drop of mild dish soap on the foam, then rinse thoroughly.
Warning: Do not wash paper HEPA/post-motor filters unless your manual explicitly states they’re washable. Many Bissell HEPA filters are not washable.
Step 6: Air-Dry Completely
- Place filters on a clean, dry towel in a well-ventilated area.
- Dry for at least 24 hours (thicker foam can take longer). Rotate midway to speed drying.
- Ensure zero moisture remains—damp filters can grow mildew and clog quickly.
Pro tip: Keep a spare filter set so you can vacuum while one set dries.
Step 7: Clean or Replace Post-Motor (HEPA) Filter
- Remove the rear cover and take out the HEPA/post-motor filter.
- If washable per your model: lightly rinse with cool water only; air-dry 24 hours.
- If non-washable: tap gently to remove dust. Replace if gray/brown, crushed, or smelly.
Note: Many Pet Hair Eraser uprights use a non-washable HEPA. Check the label on the filter; if it says “washable,” rinse; if not, replace as needed.
Step 8: Reassemble and Test Suction
- Reinstall fully dry filters in the correct order (felt beneath foam if applicable).
- Seat the canister securely.
- Power on and test suction at the hose and floorhead.
- If suction is weak, check for blockages in the hose, wand, and brush roll area.
Testing tip: Remove the hose and feel for strong airflow. If strong at the hose but weak at the floor, check the brush roll and lower duct for clogs.
Model-Specific Notes
Upright Pet Hair Eraser (e.g., 1650 Series)
- Pre-motor: foam + felt under dirt tank (washable).
- Post-motor: HEPA behind rear cover (often non-washable).
- Also clean the Cyclonic Spool/Screen. Pet hair can wrap and reduce airflow.
Pet Hair Eraser Turbo Rewind (e.g., 27909)
- Similar filter layout to 1650, plus tangle-free brush roll. Remove hair from brush edges and end caps to prevent motor strain.
Handheld Pet Hair Eraser (e.g., 2390 Lithium Ion, 1782)
- Small washable pre-motor filter in dirt bowl. Rinse often; dries quickly.
- Keep the charging contacts clean and don’t run with a wet filter.
Cordless/Stick Pet Hair Eraser
- Cartridge or foam pre-motor near cyclone; some have a small post-motor screen.
- Be diligent about drying—moisture near electronics can cause issues.
Always verify with your model’s manual on bissell.com for exact filter part numbers and washability.
Common Causes of Poor Suction After Cleaning

- Filters not fully dry, restricting airflow
- Filters installed upside down or missing a layer
- Post-motor filter saturated or not reinstalled
- Hidden blockages in the hose, wand, or floorhead
- Overfilled dirt tank or wet debris inside cyclone
Quick checks:
– Feel airflow at hose end. Strong = clog downstream; Weak = filter or upstream clog.
– Look through the hose against a light—kinks or clumps of fur often stick mid-hose.
– Inspect the brush roll chamber for mats of hair at the inlet.
Warning Signs That Need Immediate Attention
- Burning smell or excessive heat near the motor housing
- Vacuum shuts off mid-use (thermal protector triggered)
- Loud whistle or pitch change indicating an air leak
- Visible dust puffing from exhaust (post-motor filter likely compromised)
- Persistent odor after thorough filter cleaning (replace filters and wash canister)
Stop using the vacuum and allow it to cool if any of the above occur.
Pro Tips for Cleaner Filters and Better Performance
- Keep a second set of filters. Rotate sets so one is always dry.
- Pre-groom pets with a de-shedding brush to reduce hair load in the vacuum.
- Use a grooming or rubber rake on carpets before vacuuming to pull up embedded fur.
- Sprinkle a teaspoon of baking soda in the empty canister (not on filters) for odor control—dispose after each use.
- Don’t vacuum large wet clumps or ashes; these clog and damage filters.
- Mark your calendar for monthly filter rinses if you have heavy shedders.
- Replace filters proactively every 6-12 months for peak performance, even if they “look” okay.
Common mistakes to avoid:
– Reinstalling damp filters
– Washing non-washable HEPA filters
– Using hot water or detergents with bleach
– Running the vacuum without a filter to “test suction”
When to Seek Professional Help
Consider service if:
– Suction remains weak after full cleaning and blockage checks
– Motor is louder than normal, rattles, or emits burning smells
– The brush roll doesn’t spin despite a clear head and reset attempts
– Electrical issues (power cutting out, sparking, overheating) persist
What to look for in a service provider:
– Authorized Bissell service center or reputable vacuum repair shop
– Clear estimate, warranty on repair, and availability of OEM parts
Typical costs:
– Filter set replacement: $10–$35 depending on model
– Hose unclog/cleaning: $25–$60
– Motor or wiring diagnosis/repair: $80–$150+
Warranty notes:
– Check Bissell’s limited warranty terms (often 2–5 years on certain models). Damage from misuse (wet filter operation, non-Bissell parts) may not be covered.
FAQs
Q: Can I wash the HEPA/post-motor filter on my Bissell Pet Hair Eraser?
A: It depends on the model. Many HEPA filters are not washable; they should be tapped clean and replaced when dirty or odorous. Check the filter label or your manual—if it says “washable,” rinse with cool water only and air-dry for 24 hours.
Q: How long should filters dry before reinstalling?
A: At least 24 hours for foam/felt filters in a warm, ventilated area. Ensure they’re completely dry to prevent mildew, odors, and clogs.
Q: My vacuum still smells after cleaning. What can I do?
A: Replace both pre-motor and post-motor filters, wash and dry the canister and cyclone thoroughly, and check for hair trapped near the brush roll. Avoid scented cleaners on filters; they can degrade media and void warranties.
Q: How often should I replace filters?
A: Pre-motor foam/felt: every 6–12 months, sooner with heavy pet hair. HEPA/post-motor: every 6–12 months or when discolored, damaged, or smelly. Clean more frequently to extend life.
Q: Can I use compressed air to clean filters?
A: Avoid compressed air directly on foam/felt; it can tear fibers and push dust deeper. Tapping and gentle rinsing are safer. You can use gentle air to clean the cyclone shroud (away from the motor and electronics).
Q: Is it okay to vacuum baking soda or fine powders?
A: Frequent vacuuming of fine powders (baking soda, ash, drywall dust) clogs filters rapidly and can pass through to the motor. Minimize use; clean filters immediately after if you do.
Q: What if my vacuum shuts off during use?
A: The thermal protector likely tripped due to low airflow. Turn it off, unplug, clear clogs, clean filters, and let it cool for 30 minutes before resuming.
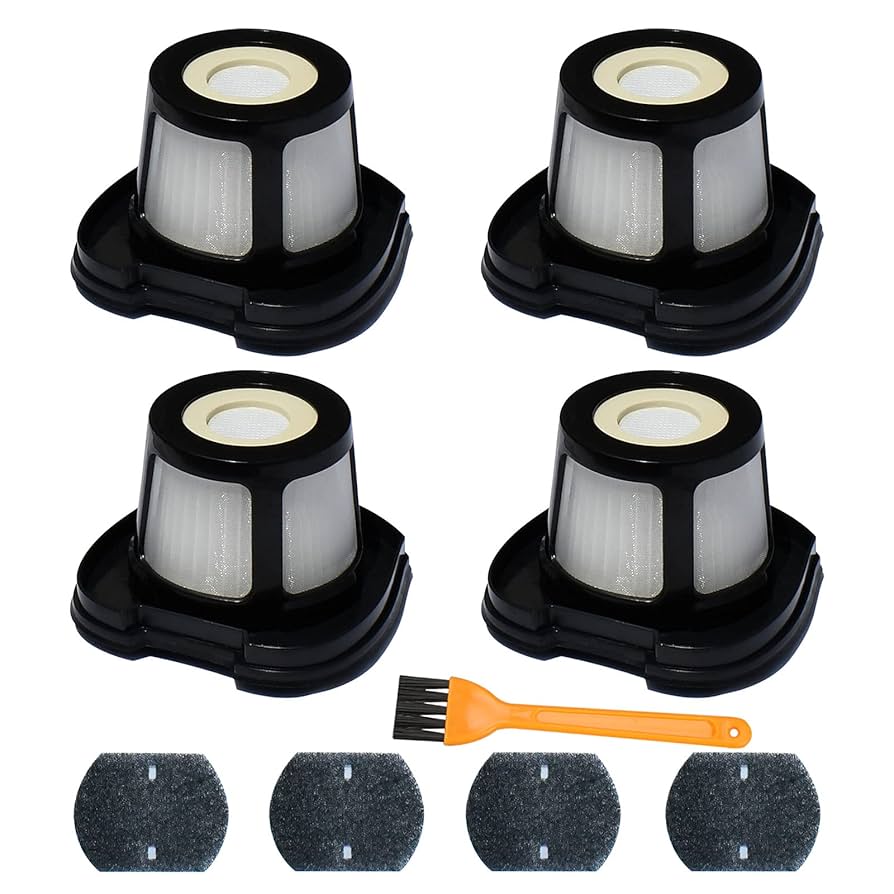
Alternative Solutions: Filter Options and Upgrades

If washing doesn’t resolve performance or odor issues, consider replacement options.
| Solution | Pros | Cons | Best For |
|---|---|---|---|
| OEM foam/felt set | Guaranteed fit, preserves warranty | Needs periodic replacement | Most users |
| OEM HEPA/post-motor | Captures fine dander, reduces odor | Non-washable; recurring cost | Allergy households |
| Washable HEPA (if compatible) | Lower long-term cost | Not available for all models | Users who clean regularly |
| Third-party compatible | Lower upfront price | Variable quality, may void warranty | Budget-conscious users |
Note: Always verify part numbers against your model to ensure proper fit and airflow.
Keep Your Bissell Pet Hair Eraser Running Smoothly
Following this guide, you now have a reliable routine to clean and maintain your Bissell Pet Hair Eraser filters:
– Tap-clean weekly and rinse foam/felt monthly
– Fully air-dry filters for 24 hours before use
– Inspect and replace HEPA/post-motor filters as needed
– Check hoses and brush roll for hidden clogs
Regular filter care restores suction, protects the motor, and keeps pet odors at bay. Don’t wait for performance to drop—build filter cleaning into your routine and your vacuum will tackle fur like a champ.
Have you tried these steps on your specific model? Share your results and model number in the comments below—your tips can help other pet parents keep their Bissell in top shape. Found this helpful? Bookmark it for your next cleaning day.