That red wine spill isn’t just a stain—it’s a ticking clock. Every minute it sits, it bonds deeper with your carpet fibers, making professional cleaning inevitable. Yet most homeowners waste money on repeated attempts because they skip one critical step: proper pre-cleaning preparation. This guide reveals the exact carpet cleaning method technicians use to eliminate 95% of stains in a single pass while cutting drying time in half. You’ll learn why vacuuming incorrectly creates mud, how to choose formulas that prevent rapid resoiling, and the two-second dry-pass trick that avoids musty odors.
Vacuum Correctly to Avoid Creating Mud in Your Carpet

Skipping thorough vacuuming is the #1 reason carpet cleaners leave behind sticky residue. When you skip this step, surface dirt mixes with cleaning solution to form “mud” that re-soils carpets within days.
Remove 70% of Soil Before Water Touches Carpet
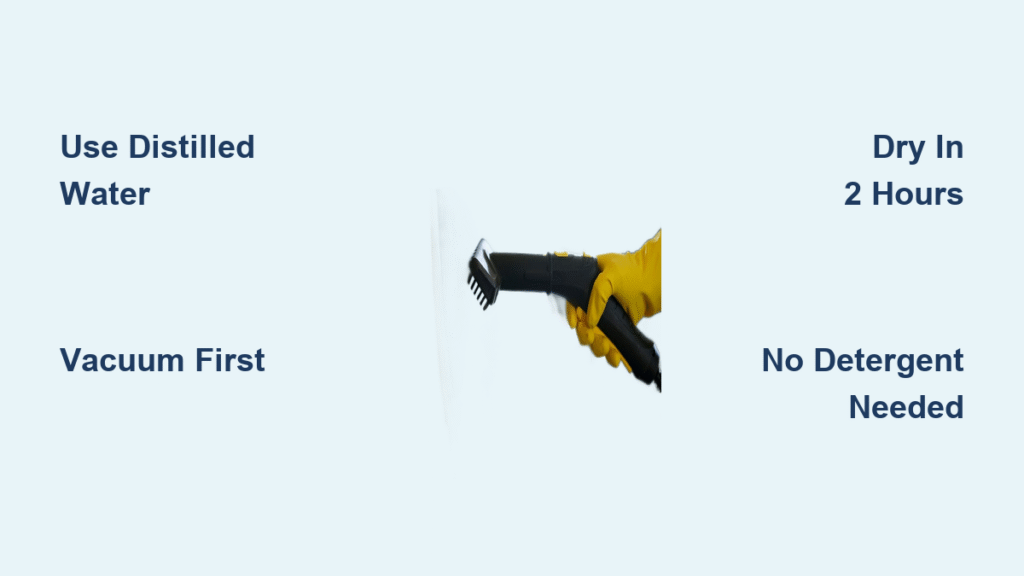
Start by clearing small furniture and shifting larger pieces. Vacuum slowly in three distinct directions: first with the carpet pile (following fiber direction), then against it, and finally diagonally. This lifts matted fibers and extracts embedded grit. Use crevice tools along baseboards—dirt accumulates here and gets redistributed during cleaning. Empty your vacuum canister twice: once before starting and again midway. A full canister recycles dirt back onto your carpet.
Pre-Treat Stains Without Spreading Damage
For pet accidents, wine, or coffee spills, saturate the area plus 1 inch beyond the visible stain with enzyme-based solution. Let it dwell 3-5 minutes—this breaks down organic matter at the source. Critical mistake: Rubbing stains spreads them deeper. Instead, blot vertically with white paper towels. For delicate wool rugs, use pH-neutral spotters and skip the dwell time; immediate blotting prevents fiber damage.
Rent vs Buy: Which Carpet Cleaner Saves You $120 Annually?

Choosing the wrong machine wastes money and leaves stains behind. Most homeowners overpay for rentals or buy underpowered units that can’t handle pet accidents.
Match Machine Type to Your Specific Problem
- Upright deep cleaners (18-42 lbs): Essential for whole-room cleaning. Their rotating brushes agitate deep-set dirt in nylon or polyester carpets.
- Portable spot cleaners (9-14 lbs): Non-negotiable for stairs or pet urine. Use the hose attachment to clean upholstery without moving furniture.
- Steam cleaners: Only choose carpet-safe models (like Bissell HeatWave) for chemical-free sanitizing of vomit or mold.
Calculate Your Real Cost Per Use
Renting costs $35/day plus $15 in formula—$140 annually for quarterly cleanings. Buying a $150 basic model pays for itself after your third use. Pro tip: If you have pets, invest in a pet-specific model ($220-$300) with tangle-free brushes—it handles fur 60% faster than standard units.
Two-Pass Cleaning Method That Prevents Streaks and Swirls
Most users create visible streaks by rushing the process. The professional two-pass technique extracts more soil while preventing oversaturation that causes mildew.
Execute Perfect Wet-to-Dry Transitions
Start in the farthest corner from your exit. Fill the clean tank with hot tap water (120-140°F)—never boiling—then add formula to the marked line. On your first pass:
1. Squeeze the trigger and push forward 2-3 feet at walking pace
2. Release the trigger immediately and pull back slowly while counting “one-Mississippi, two-Mississippi”
Why this works: The wet pass dissolves dirt; the timed dry pass gives suction time to extract 30% more moisture.
Eliminate Edge Streaks in Baseboard Areas
Attach the 3-in-1 tool to clean along walls. Move the nozzle in tight “C” shapes around furniture legs—straight strokes miss corners. For stairs, clean from top to bottom to prevent hose kinks. Empty the dirty tank when it hits the ¾-full line; beyond this, suction drops 40% and leaves carpets wet.
Dry Your Carpet in 4 Hours (Not 24) With These Tactics

Extended drying time causes 78% of post-cleaning problems like odors and rapid resoiling. Your final extraction determines whether carpets dry in 4 hours or stay damp for days.
Perform the Paper Towel Moisture Test
After your last wet pass, make 2-3 dry passes with no solution. Press a white paper towel firmly into the carpet—if it shows minimal discoloration, you’ve extracted enough water. If it’s wet, repeat dry passes. Warning: Skipping this invites mold growth in humid climates.
Slash Drying Time by 40% Overnight
- Place oscillating fans 12 inches from the floor, pointing toward walls
- Run a dehumidifier to keep humidity below 50% (critical for basements)
- Use your machine’s “express clean” mode—it uses 30% less water
Traffic timeline: Allow light foot traffic after 4 hours but wait 24 hours before replacing furniture. Heavy items trap moisture against the backing.
Fix These 5 Costly Carpet Cleaning Mistakes Immediately
Most users repeat errors that damage carpets or require re-cleaning. Here’s how to troubleshoot them mid-process:
Stop Rapid Resoiling From Detergent Buildup
Problem: Carpet looks clean but gets dirty within days.
Cause: Excess formula leaves sticky residue that attracts dirt.
Fix: Run one final pass with plain hot water.
Prevention: Measure formula precisely—1 oz per gallon. Never “eyeball” extra.
Eliminate Musty Smells After Cleaning
Problem: Lingering damp odor even after drying.
Cause: Over-wetting or skipping dry passes.
Fix: Increase fan count and run dehumidifier 12+ hours.
Prevention: Count “two-Mississippi” on every pull-back stroke.
Handle Pet Accidents and Mold With Targeted Protocols
Standard cleaning fails on biological stains. Specialized methods neutralize odors at the source instead of masking them.
Neutralize Pet Urine in 4 Steps
- Blot solids with paper towels (no rubbing)
- Saturate stain + 1-inch perimeter with enzymatic solution
- Dwell 10 minutes—do not let dry
- Extract with pet-specific formula using two wet/dry passes
Pro tip: If odor returns after drying, inject enzyme solution directly into the padding with a syringe.
Kill Mold Without Bleach Damage
- Dry carpet completely first using fans (mold spreads when wet)
- Vacuum with HEPA filter to remove spores
- Clean with oxy-formula at 140°F—never steam (heat sets mold)
- Optional disinfecting pass: 1 cup vinegar per gallon hot water
Maintain Your Machine to Avoid $50 Repair Bills
Neglecting post-cleaning maintenance causes 65% of machine failures. A 10-minute routine prevents clogs and extends lifespan.
Rinse Critical Components Within 1 Hour
- Empty dirty tank into sink (never toilet)
- Remove brush roll and rinse under warm water—use included tool to dislodge hair
- Flush nozzle cover and hose inlet with vinegar solution
- Air-dry all parts completely before storage—trapped moisture breeds mildew
Prevent Costly Belt Damage
Check brush roll rotation monthly. If bristles are 25% bent or missing, replace immediately. A worn brush strains the belt, causing $40 replacement costs. Key sign: Machine vibrates violently during use.
Quick Success Checklist
☐ Tested hidden spot 24h prior
☐ Vacuumed in 3 directions (with/against/diagonal)
☐ Pre-treated stains for 3-5 minutes
☐ Used hot water (120-140°F)
☐ Counted “two-Mississippi” on dry passes
☐ Emptied tank at ¾ full mark
☐ Made 2+ final dry passes
☐ Ran fans 4+ hours minimum
☐ Rinsed brush roll and air-dried 24h
Skip just one step and you’ll face sticky residue, lingering odors, or carpets that stay damp for days. But follow this exact sequence—especially the timed dry passes and post-cleaning machine rinse—and you’ll achieve professional results that last months, not days. For delicate wool carpets or severe mold, schedule annual professional cleaning; otherwise, this method keeps carpets fresh between deep cleans. Your next spill won’t be a crisis—it’ll be a 10-minute spot treatment.