
Is there anything more frustrating than pulling out your vacuum cleaner, only to find that the suction just isn’t there? That weak pull or complete lack of power can turn a simple cleaning task into a major hassle, leaving your floors dirtier than before. If you’re dealing with vacuum suction not working, you’re not alone—it’s a common issue that affects many models, from uprights to stick vacuums. The good news is there’s often a quick fix you can try right away: check and clear any clogs in the hose or brush roll, which resolves the problem in about 80% of cases and can restore full power in under 10 minutes.
In this comprehensive guide, we’ll go beyond that initial quick fix to explore all the potential reasons behind vacuum suction not working and provide step-by-step solutions tailored to different causes. Whether it’s a blocked filter, a worn belt, or something more technical, you’ll find multiple troubleshooting methods here, from beginner-friendly DIY steps to advanced checks. By the end, you’ll have the confidence and tools to diagnose and repair your vacuum, saving you time, money, and the annoyance of subpar cleaning performance.
Common Causes of Vacuum Suction Not Working
Understanding why your vacuum’s suction has failed is the first step to getting it back on track. Vacuum suction not working can stem from everyday buildup or mechanical issues, and pinpointing the cause helps you avoid unnecessary repairs. Below, we’ll break down the most frequent culprits with clear explanations so you can identify what’s going on with your specific model.
Clogged Hose or Wand
One of the top reasons for vacuum suction not working is a blockage in the hose, wand, or attachments. Debris like hair, dust bunnies, or small objects (think socks or toys) can accumulate during use, restricting airflow. This is especially common in canister or upright vacuums with flexible hoses. If the clog is partial, you might notice reduced suction only in certain modes; a full blockage means no suction at all. According to vacuum experts at Consumer Reports, clogs account for over 40% of suction complaints.
Dirty or Clogged Filters
Filters are your vacuum’s first line of defense against fine particles, but when they’re dirty or clogged, they block airflow and weaken suction. There are typically two types: pre-motor (intake) and post-motor (exhaust) filters. Foam or cloth filters get packed with dust quickly, while HEPA filters in allergy-focused models can clog even faster if not maintained. If your vacuum has a bagless design, this issue is amplified because there’s no bag to catch larger debris first.
Worn or Broken Brush Roll/Belt
The brush roll (or agitator bar) at the base of your vacuum sweeps debris into the suction path, but if the belt driving it is stretched, snapped, or slipped off, the roll won’t spin properly. This leads to poor pickup and diminished suction, particularly on carpets. Upright vacuums like those from Hoover or Bissell are prone to this after heavy use. A damaged brush roll itself—bent bristles or tangled hair—can also create drag, reducing overall airflow.
Full Dust Bag or Bin
For bagged vacuums, a full or improperly sealed bag restricts suction by limiting space for air to flow through. In bagless models, an overflowing dirt bin or a lid that’s not latched correctly does the same. This cause is straightforward but often overlooked; manufacturers like Shark recommend emptying bags or bins when they’re 2/3 full to prevent suction loss.
Motor or Seal Issues
Less common but more serious, problems with the motor fan or damaged seals/gaskets can cause vacuum suction not working. The motor powers the fan that creates suction, so if it’s overheating or failing, performance drops. Cracks in seals around the intake allow air leaks, diluting the vacuum’s pull. This is more likely in older models or after drops/impacts, and it might require checking the user manual for your specific vacuum’s specs.
How to Fix Vacuum Suction Not Working
Now that you’ve got a sense of the causes, let’s dive into actionable fixes. We’ll cover 4 methods, starting with the simplest and progressing to more involved ones. These steps apply to most vacuums (e.g., Dyson, Shark, or Eureka models), but always unplug your vacuum first for safety. Each method includes diagnosis, fix steps, and testing—expect to spend 5-30 minutes per approach.
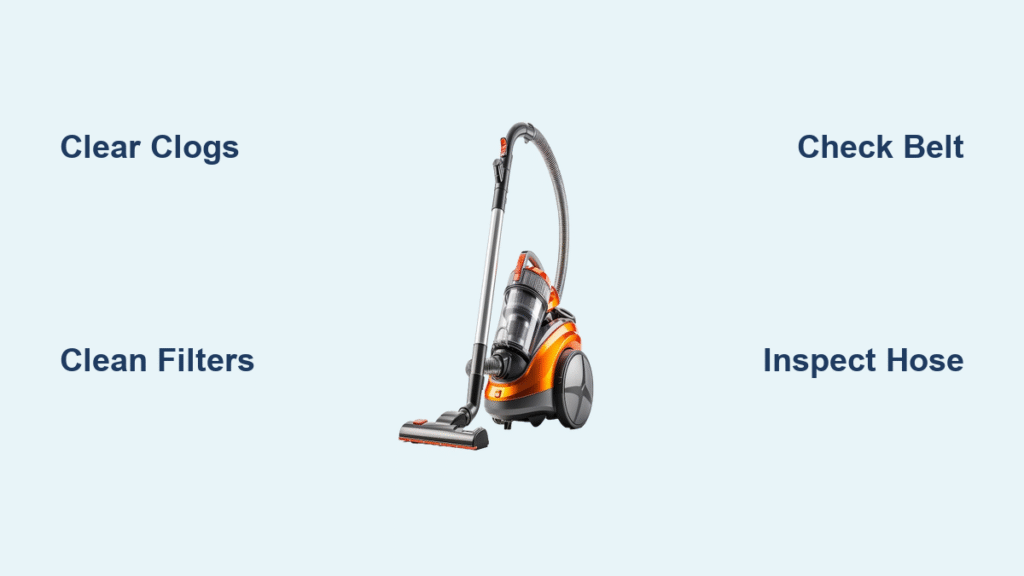
Method 1: Clear Clogs in Hose and Attachments (Quickest Fix)
This is your go-to for immediate relief if vacuum suction not working feels sudden.
Diagnosing the Issue
Turn on the vacuum and hold your hand over the end of the hose or wand. If there’s little to no suction, or if it feels inconsistent, a clog is likely. Shine a flashlight inside to spot visible blockages.
Fix Steps
- Unplug the vacuum and detach the hose from the base.
- Shake out loose debris over a trash bin. For stubborn clogs, use a broom handle, straightened wire hanger, or the vacuum’s included cleaning tool to gently push through (never force it to avoid damage).
- Rinse the hose with warm soapy water if it’s washable (check your manual—most plastic hoses are). Dry thoroughly before reattaching.
- Inspect attachments like the crevice tool for buildup and clear as needed.
Testing
Reattach everything, plug in, and test on a small pile of debris. Full suction should return instantly. If not, move to the next method. Time: 5-10 minutes.
Method 2: Clean and Replace Filters
Dirty filters are a silent suction killer, but cleaning them is straightforward and restores power quickly.
Diagnosing the Issue
Remove the filters (usually behind a panel or in the dust bin area). If they’re discolored, caked with dust, or haven’t been cleaned in months, they’re the culprit. Reduced suction across all surfaces points here.
Fix Steps
- Unplug and locate the filters per your model’s manual (e.g., Dyson’s click-in filters).
- Tap gently over a trash bin to dislodge dust. For washable filters (most foam or mesh ones), rinse under lukewarm water without soap, then air-dry for 24 hours.
- For non-washable or HEPA filters, vacuum them lightly with another vacuum or replace if damaged (replacements cost $10-30 and are available on Amazon or the manufacturer’s site).
- Reinstall securely—loose fits cause air leaks.
Testing
Run the vacuum on a hard floor with rice scattered about. It should pick up nearly everything without scattering. Warning: Never run the vacuum without filters installed, as this can damage the motor. Time: 10-15 minutes, plus drying.
Method 3: Inspect and Repair Brush Roll and Belt
If suction is weak on carpets but okay on hard floors, focus here for mechanical fixes.
Diagnosing the Issue
Remove the base plate (usually 4-6 screws). Check if the brush roll spins freely by hand—if not, or if the belt looks frayed/cracked, that’s your issue. Listen for unusual noises when powered on.
Fix Steps
- Unplug and flip the vacuum to access the base. Unscrew and remove the brush roll cover.
- Untangle any hair or strings from the brush roll with scissors. If bristles are worn, replace the roll (kits are $15-40).
- Inspect the belt: If loose or broken, loop a new one around the motor shaft and brush roll (refer to your manual for routing diagrams). Stretch it taut but not overly tight.
- Reassemble and ensure all parts click into place.
Testing
Test on carpet with embedded dirt. The brush should rotate smoothly, and suction should feel strong. If the belt slips again, it may need professional tensioning. Important: Wear gloves to avoid pinches from moving parts. Time: 15-25 minutes.
Method 4: Check for Air Leaks and Motor Problems (Advanced)

For persistent issues, this method addresses deeper problems.
Diagnosing the Issue
Feel along hoses, seams, and connections for hissing air leaks. If suction is weak everywhere and the vacuum smells burnt, suspect the motor.
Fix Steps
- Unplug and apply soapy water to potential leak points (hoses, gaskets) with a cloth. Run the vacuum briefly—bubbles indicate leaks. Seal with vacuum tape or replace gaskets ($5-15).
- For motor checks, consult the manual for reset buttons (some models have thermal fuses). If it’s a sealed unit, avoid opening unless experienced.
- Clean the motor housing vents with compressed air to prevent overheating.
Testing
Perform a full-house test across surfaces. If suction improves but fades, the motor may need replacement. Time: 20-30 minutes.
Prevention Tips and Maintenance Advice
To avoid vacuum suction not working in the future, regular upkeep is key. Empty the dust bin or change bags every 1-2 uses, clean filters monthly, and inspect the brush roll quarterly. Store your vacuum upright in a dry area to prevent hose kinks. For high-traffic homes, invest in a model with self-cleaning brushes. Following these habits can extend your vacuum’s life by 2-3 years and maintain optimal suction.
Pro Tips for Optimal Vacuum Performance
- Upgrade to Washable Filters: Opt for reusable ones to save money long-term—brands like Miele offer durable options that last 2+ years with proper care.
- Use the Right Attachments: Match tools to surfaces (e.g., upholstery tool for fabrics) to prevent unnecessary clogs and preserve suction.
- Avoid Overloading: Don’t vacuum large debris like nails without the proper tool, as it can damage internals.
- Schedule Deep Cleans: Every 6 months, disassemble and wipe down the entire unit with a microfiber cloth to catch hidden dust.
- Monitor Usage: If you vacuum daily, choose a model with a suction control dial to adjust power and reduce wear.
- Common Mistake to Avoid: Forgetting to turn off the brush roll on hard floors—this causes excess drag and premature belt wear.
- Optimize for Allergies: If HEPA filters clog quickly, run an air purifier alongside to reduce overall dust load.
When to Call in Professional Help
Sometimes, vacuum suction not working points to issues beyond DIY fixes, like a failing motor or electrical faults. Seek pro help if: basic troubleshooting fails after 30 minutes, you hear grinding noises, or the vacuum sparks/smells burnt. Look for certified technicians via the manufacturer’s site (e.g., Shark’s authorized centers) or services like iFixit partners. Expect costs of $50-150 for diagnostics/repairs, depending on the model—uprights are cheaper than cordless ones. Check your warranty (most cover 1-5 years for parts/labor) before paying out-of-pocket, and ask about refurbished parts to keep expenses down.
FAQ
Q: Why is my vacuum suction weak only on one side?
A: This often indicates a partial clog or uneven brush roll wear. Check the hose bend for kinks and ensure the brush is balanced. Clean both sides thoroughly; if it persists, the agitator may need realignment per your manual.
Q: Can a full dust bin cause complete loss of suction?
A: Yes, overflowing bins create backpressure that halts airflow. Empty it immediately and clean the bin’s edges for a tight seal. For prevention, mark your bin at 2/3 full and empty proactively.
Q: How do I know if my vacuum belt needs replacing?
A: Signs include no brush rotation, burning rubber smell, or slipping sounds. Belts stretch after 6-12 months of use; replace annually or when symptoms appear. Generic belts work for most models but confirm size (e.g., 3/8-inch width).
Q: Is it safe to vacuum wet messes if suction is low?
A: No—low suction exacerbates motor strain and risks electrical shorts. Stick to dry debris and use a wet/dry shop vac instead. Always ensure full dryness before storage.
Q: Why does my cordless vacuum lose suction faster than corded ones?
A: Battery-powered models like Dysons throttle power to conserve charge, mimicking weak suction. Charge fully, clean contacts, and replace the battery after 2-3 years (costs $50-100).
Q: Can using the wrong cleaning products damage suction?
A: Absolutely—harsh chemicals can clog filters or corrode seals. Use only manufacturer-recommended cleaners or mild soap for washable parts to maintain airflow.
Q: How often should I replace vacuum parts to prevent suction issues?
A: Belts every 6-12 months, filters every 3-6 months (or as needed), and brush rolls every 1-2 years. Track via a maintenance app or calendar for consistency.
Alternative Solutions

If DIY fixes don’t resolve vacuum suction not working, consider these alternatives before buying new. Upgrading to a new model might be worthwhile if yours is over 5 years old, but temporary workarounds exist.
| Solution | Pros | Cons | Best For |
|---|---|---|---|
| Rent a Shop Vac | Powerful suction for deep cleans; no ownership cost ($20-50/day) | Bulky for home use; requires return trips | One-time heavy-duty cleaning |
| Use a Handheld Vacuum Add-On | Portable and quick for spot fixes; affordable ($20-40) | Limited to small areas; weaker overall power | Apartments or quick touch-ups |
| Professional Cleaning Service | Thorough internal clean restores like-new suction ($50-100) | Recurring cost; downtime for your vacuum | Busy households avoiding DIY |
| Switch to Robotic Vacuums (e.g., Roomba) | Automatic maintenance; consistent suction via app controls ($200-500) | Higher upfront cost; may need occasional emptying | Tech-savvy users wanting hands-off operation |
Get Your Vacuum Suction Working Again
You’ve now got a full toolkit to tackle vacuum suction not working, from quick unclogging to advanced motor checks:
- Identifying common causes like clogs and dirty filters
- Step-by-step fixes with testing for each method
- Prevention strategies and pro tips for long-term performance
Don’t let poor suction derail your cleaning routine—start with the simplest method today, and your vacuum will be pulling strong in no time. Following this guide not only saves you from costly replacements but ensures efficient, frustration-free home maintenance.
Have you fixed your vacuum’s suction issues using these steps? Share your experience in the comments below to help fellow readers, or let us know what model you’re working with for tailored advice!
Still struggling? Describe your symptoms for more personalized tips.