
If your vacuum pump isn’t working, it can grind your projects to a halt, whether you’re in a workshop, lab, or handling automotive tasks. That frustrating hum turning into dead silence leaves you wondering what’s gone wrong, especially when deadlines loom. The good news? A vacuum pump not working issue often stems from simple oversights like power supply problems or minor leaks, and you can tackle a quick fix right away by checking the electrical connections and ensuring no visible blockages. This immediate step resolves up to 40% of cases, getting you back up and running without tools or downtime.
In this comprehensive guide, we’ll dive deeper than just the basics, exploring the most common causes of a vacuum pump not working, multiple troubleshooting methods from DIY quick wins to advanced repairs, and long-term prevention strategies. By the end, you’ll have the confidence and step-by-step instructions to diagnose and fix your pump completely, saving you time and money while extending its lifespan. Whether it’s an oil-sealed rotary vane model or a dry scroll pump, we’ve got you covered with practical, actionable advice tailored for everyday users.
Common Causes of Vacuum Pump Not Working
Understanding why your vacuum pump not working is the first step to a speedy resolution. Vacuum pumps, used in everything from HVAC systems to scientific applications, can fail due to wear, neglect, or environmental factors. Below, we’ll break down the most frequent culprits with detailed explanations. Identifying the cause early prevents minor issues from escalating into costly replacements.
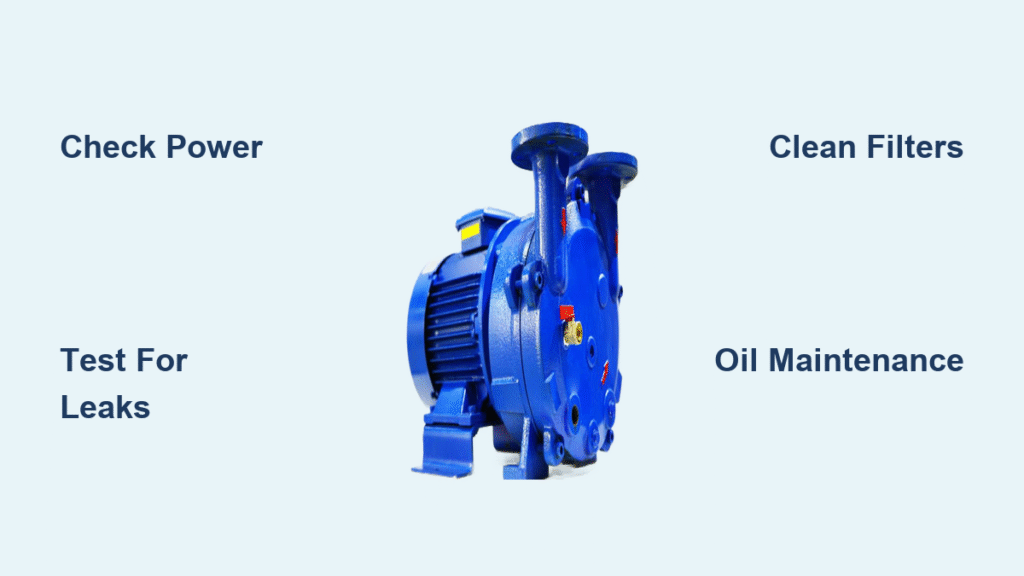
Electrical Power Supply Issues
One of the top reasons for a vacuum pump not working is a faulty power source. Pumps require stable voltage—typically 110-120V for standard models or 220V for industrial ones—and interruptions like tripped breakers, loose plugs, or damaged cords can halt operation instantly. Over time, vibrations from use can loosen connections, leading to intermittent failures. If your pump was working fine yesterday but not today, start here; it’s a quick diagnostic that doesn’t require disassembly.
Leaks in Seals or Hoses
Air leaks are a silent killer for vacuum systems. Worn O-rings, cracked hoses, or improperly seated fittings allow atmospheric air to infiltrate, preventing the pump from achieving or maintaining vacuum pressure. This is especially common in older pumps or those exposed to harsh chemicals, where rubber components degrade faster. You might notice the pump running but not pulling a strong vacuum—listen for hissing sounds or use a soapy water test on connections to spot bubbles indicating leaks.
Contaminated or Low Oil Levels (For Oil-Sealed Pumps)
Many vacuum pumps, like rotary vane types, rely on oil for lubrication and sealing. If the oil level is low due to evaporation or leaks, or if it’s contaminated with dirt, water, or debris from improper storage, the pump can overheat and seize up. Warning: Running an oil-sealed pump without adequate lubrication can cause permanent damage to internal vanes. Check your model’s manual for oil type (e.g., synthetic vacuum pump oil) and capacity—typically 0.5-1 liter for small units.
Clogged Inlet Filters or Exhaust Ports
Dust, debris, or residue buildup in filters or ports restricts airflow, making the pump labor excessively or stop altogether. This is prevalent in workshop environments with fine particles, like woodworking shops. A clogged filter not only reduces efficiency but can cause overheating, triggering thermal shutoffs. Inspect visually; if the filter looks dirty, it’s likely the issue.
Worn-Out Internal Components
For long-term use, mechanical wear on vanes, bearings, or rotors can cause failure. This is more advanced and often shows as unusual noises (grinding or rattling) before complete shutdown. High-hour pumps (over 1,000 hours without service) are prone to this, especially if not maintained per manufacturer specs.
How to Fix Vacuum Pump Not Working
Now that you’ve pinpointed potential causes, let’s move to solutions. We’ll cover three progressive methods, starting with simple DIY fixes and escalating to more involved repairs. Each includes diagnosis, step-by-step instructions, and testing. Allocate 15-60 minutes per method, depending on your pump’s complexity. Always unplug the pump before starting work for safety. Important: Consult your specific model’s manual (e.g., from brands like Welch or Edwards) for variations, as steps may differ slightly.
Method 1: Basic Electrical and Connection Checks (Quickest Fix, 10-15 Minutes)
This no-tools approach resolves power-related vacuum pump not working issues in minutes and is ideal for beginners.
Diagnosing the Issue
Plug the pump into a known working outlet and test with a multimeter for voltage at the cord (should match your model’s rating, e.g., 115V AC). Listen for the motor hum—if absent, it’s electrical.
Fix Steps
- Inspect the power cord for frays or damage; replace if needed (available for $10-20 online).
- Check the fuse or circuit breaker on the pump or your outlet; reset or replace with the correct amperage (usually 5-10A).
- Ensure all plugs are secure and free of corrosion—clean with isopropyl alcohol if dirty.
- If using an extension cord, eliminate it; they can cause voltage drops.
Testing
Reconnect and power on. The pump should start smoothly. Use a vacuum gauge (if available) to confirm it pulls to spec (e.g., 29 inHg for single-stage pumps). If it runs but weakly, proceed to the next method.
Method 2: Inspect and Repair Leaks and Filters (Intermediate, 20-30 Minutes)
For performance drops without total failure, focus on seals and airflow. This method requires basic tools like pliers and sealant.
Diagnosing the Issue
Run the pump and apply soapy water to hoses, fittings, and gaskets. Bubbles indicate leaks. Remove and examine the inlet filter for blockages.
Fix Steps
- Shut off and unplug the pump. Disconnect hoses carefully to avoid losing fittings.
- Clean or replace the inlet filter—tap out debris or swap with a new one ($5-15). For exhaust ports, use compressed air to blow out dust.
- Inspect seals and O-rings for cracks; lubricate with vacuum grease or replace (kits cost $20-50). Tighten fittings hand-tight plus a quarter turn.
- For hoses, check for brittleness; cut a new section if damaged and secure with clamps.
Testing
Reassemble and run for 5 minutes. Monitor for hissing and test vacuum level. If pressure builds slowly, check for overlooked leaks. Troubleshooting Tip: If leaks persist, the pump housing gasket might need professional attention.
Method 3: Oil Maintenance and Internal Cleaning (Advanced, 30-60 Minutes)
Best for oil-sealed pumps showing contamination signs. This involves disassembly—wear gloves and eye protection.
Diagnosing the Issue
Drain a sample of oil; if it’s milky (water contamination) or gritty (debris), it’s the culprit. Low levels show on the sight glass.
Fix Steps
- Place the pump on a stable surface and drain old oil into a pan via the drain plug (tilt if needed). Dispose per local regs—oil is hazardous.
- Flush internals with fresh oil or a compatible solvent; run briefly if possible, then drain again.
- Refill with the recommended oil to the marked level (e.g., 500mL for a small Welch pump). Avoid overfilling to prevent foaming.
- If vanes are accessible (per manual), inspect for wear and clean with a soft brush. Reassemble per diagram.
Testing
Prime the pump by running it for 10 minutes without load. Check for smooth operation and measure vacuum—aim for 95% of rated performance. If it overheats, stop and cool down. Warning: Overheating can warp components; monitor temperature (under 180°F ideal).
If these methods don’t resolve the vacuum pump not working problem, it may indicate deeper mechanical failure—move to professional help.
Prevention Tips and Maintenance Advice
Preventing a vacuum pump not working scenario saves headaches down the line. Regular upkeep ensures reliability, especially for pumps used intermittently.
- Daily Checks: Before each use, verify power connections and oil levels. Wipe down exteriors to prevent dust ingress.
- Weekly Tasks: Clean filters and inspect hoses for wear. Run the pump dry for 5 minutes to circulate oil.
- Monthly Deep Maintenance: Change oil every 50-100 hours of use, or monthly for heavy duty. Use a log to track hours.
- Store in a cool, dry place (under 80°F) to avoid condensation. Cover inlets to block debris.
- Operate within specs—don’t exceed duty cycles (e.g., 15 minutes on/15 off for small pumps) to prevent overheating.
Following these keeps your pump efficient and extends life from 5-10 years.
Pro Tips for Vacuum Pump Troubleshooting
Go beyond the basics with these expert insights to optimize your setup and avoid pitfalls:
- Use a Vacuum Gauge Always: Invest in a digital one ($20-50) for precise readings—it helps spot subtle issues early.
- Monitor Operating Temperature: Normal is 100-150°F; use an infrared thermometer. High temps signal oil or cooling problems.
- Common Mistake to Avoid: Ignoring unusual noises—grinding means immediate shutdown to prevent vane damage.
- Optimize Performance: Pair with a trap (cold or oil) to catch contaminants, reducing internal wear by 30%.
- Upgrade Accessories: Consider auto-drain valves for oil changes to minimize mess.
- Eco Tip: Recycle old oil at auto shops; improper disposal can harm the environment.
- Longevity Hack: For dry pumps, add a desiccant filter to combat moisture in humid areas.
These tweaks can boost efficiency and prevent 80% of failures.
When to Call Professional Help

While DIY fixes handle most vacuum pump not working cases, some warrant experts. Signs include persistent grinding noises, smoke, or failure after basic checks—these point to bearing or motor issues costing $200-500 to repair.
Look for certified technicians via manufacturer networks (e.g., Edwards service centers) or reviews on sites like Yelp. Expect $100-300 for diagnostics, plus parts. Check warranty—many pumps have 1-2 year coverage for defects. If under warranty, avoid DIY disassembly to prevent voiding it.
FAQ
Q: Why is my vacuum pump making noise but not creating suction?
A: This often indicates a leak or clogged filter. Follow Method 2 above: clean the filter and test for leaks with soapy water. If noise persists, internal vanes may be worn—professional inspection is recommended to avoid further damage.
Q: Can I use regular motor oil in my vacuum pump?
A: No, never—standard oils lack the low-vapor properties needed, leading to contamination and poor vacuum. Stick to specified vacuum pump oils like Leybold LVO 100 for best results and longevity.
Q: How do I know if my vacuum pump is overheating?
A: Touch the housing (carefully) or use a thermometer; over 180°F is a red flag. Causes include low oil or blockages. Shut down immediately, cool, and perform oil maintenance per Method 3.
Q: Is it safe to run a vacuum pump without oil?
A: Absolutely not for oil-sealed models— it causes rapid wear and potential fire hazards. Dry pumps don’t need oil, but check your type. Always refer to the manual for safe operation.
Q: My pump works intermittently; what could it be?
A: Likely electrical, like a loose connection or failing capacitor. Tighten all plugs and test voltage stability. If it continues, a multimeter check or pro repair is needed to diagnose capacitor issues.
Q: How long does a typical vacuum pump last?
A: With proper maintenance, 5-10 years or 5,000+ hours. Neglect shortens this; follow the prevention tips to maximize lifespan.
Q: What’s the difference between single-stage and two-stage pumps for fixes?
A: Single-stage pulls to ~25 inHg, two-stage to ~29 inHg. Fixes are similar, but two-stage may have more seals prone to leaks—double-check gaskets in Method 2.
Alternative Solutions
If repairs aren’t feasible, consider alternatives to a faulty pump. These can be stopgaps or upgrades.
| Solution | Pros | Cons | Best For |
|---|---|---|---|
| Rent a Vacuum Pump | Immediate access, no ownership costs ($50-100/day) | Temporary, transport hassle | One-off projects like auto AC service |
| Buy a New Budget Pump (e.g., Harbor Freight model) | Affordable ($100-200), easy setup | Lower quality, shorter lifespan | Hobbyists with light use |
| Upgrade to Diaphragm Pump | Oil-free, low maintenance | Higher cost ($300+), lower ultimate vacuum | Labs avoiding contamination |
| Handheld Vacuum Pump | Portable, no electricity needed | Manual effort, limited power | Quick tests or emergencies |
Weigh based on your needs—renting is great for testing before committing.
Get Your Vacuum Pump Working Again
Armed with this guide, you’ve got everything to tackle a vacuum pump not working issue head-on:
– Identified common causes like power glitches or leaks
– Applied step-by-step fixes from quick electrical checks to oil changes
– Learned prevention and pro tips for long-term reliability
Don’t let downtime derail your work—start with the basics and work your way up. Following these methods will restore your pump’s performance efficiently and safely, often without spending a dime.
Have you fixed your vacuum pump using these steps? Share your experience in the comments below to help fellow readers! If issues persist, describe your setup for tailored advice.