
You’ve plugged in your NOCO Genius 1 charger and noticed that distinctive red light blinking rhythm. Before you panic about a malfunction, understand this: that pulsing red light almost always means your charger is working exactly as designed, aggressively reviving a deeply discharged battery. This guide reveals precisely when red blinking indicates normal operation, how long to expect it to last for your specific battery, and the critical warning signs that actually require intervention.
Most users immediately assume something’s wrong when they see the NOCO Genius 1 red light blinking pattern, but in reality, this is the charger’s standard bulk charging mode. When your battery drops below 75% state of charge (typically around 12.2V), the Genius 1 automatically engages maximum safe current delivery to efficiently restore your battery. This article details exactly what happens during this process, how to verify proper operation, and when that blinking red light actually signals trouble that needs your attention.
Why Your NOCO Genius 1 Red Light Blinks During Bulk Charging
The pulsing red light on your NOCO Genius 1 isn’t an error code—it’s your charger’s visual indicator that it’s in bulk charge mode, delivering maximum current to rapidly restore a significantly depleted battery. This intelligent charging phase activates automatically when battery voltage falls below approximately 12.2V, signaling that your battery has dropped below the 75% charge threshold where standard maintenance charging begins.
Normal Operation vs. Warning Signs
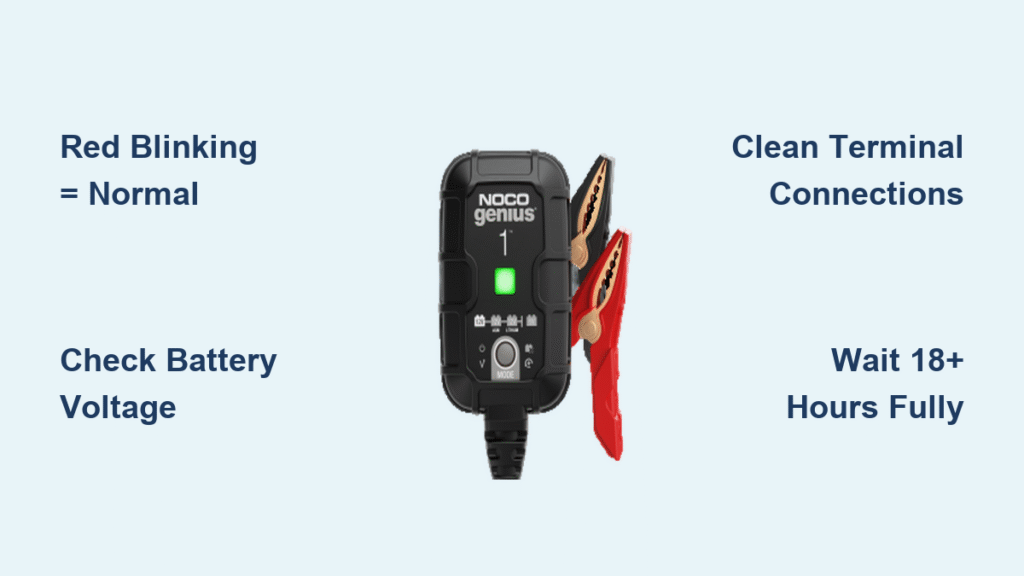
Your charger is working correctly when red blinking occurs with these conditions:
– Battery voltage reads 12.2V or lower on a multimeter
– You’re charging a standard automotive battery (60Ah+) from a partially discharged state
– Ambient temperature stays between 32-104°F
– Both battery terminals and charger clamps show clean, secure connections
Critical warning signs requiring immediate attention:
– Solid red light (no pulsing): Indicates internal fault or overheating
– Alternating red and green lights: Signals reverse polarity connection
– Extremely slow red pulses (more than 4 seconds between flashes): Specific error mode
– No voltage increase after 24 hours: Suggests battery failure or connection issues
Charging Mode Transitions Explained
Your NOCO Genius 1 progresses through three distinct charging phases that you can track visually:
- Pulsing red light → Bulk charging phase where the charger delivers maximum current to bring your battery from deeply discharged (25-75% state of charge)
- Pulsing green light → Optimization phase where charging current reduces as the battery approaches full capacity (75-100% state of charge)
- Solid green light → Full charge achieved with automatic transition to maintenance mode
Pro Tip: The speed of the green pulsing indicates whether your charger is still actively charging (faster pulses) or merely maintaining (slower pulses), though this difference can be subtle to detect without practice.
How Long Should NOCO Genius 1 Red Light Blinking Last?
Understanding the expected duration of red blinking prevents unnecessary concern and stops you from interrupting the crucial bulk charging phase. Based on documented testing with a standard 600 CCA, 60Ah automotive battery, here’s exactly what to anticipate during the red blinking phase.
Real-World Charging Timeline
| Charging Phase | Duration | Battery Voltage Range | Visual Indicator |
|---|---|---|---|
| Bulk charging | 18 hours | 12.2V → 12.9V | Pulsing red light |
| Optimization | 12+ hours | 12.9V → 13.6V | Pulsing green light |
| Maintenance | Ongoing | 13.6V maintained | Solid green light |
Factors That Extend Red Blinking Duration
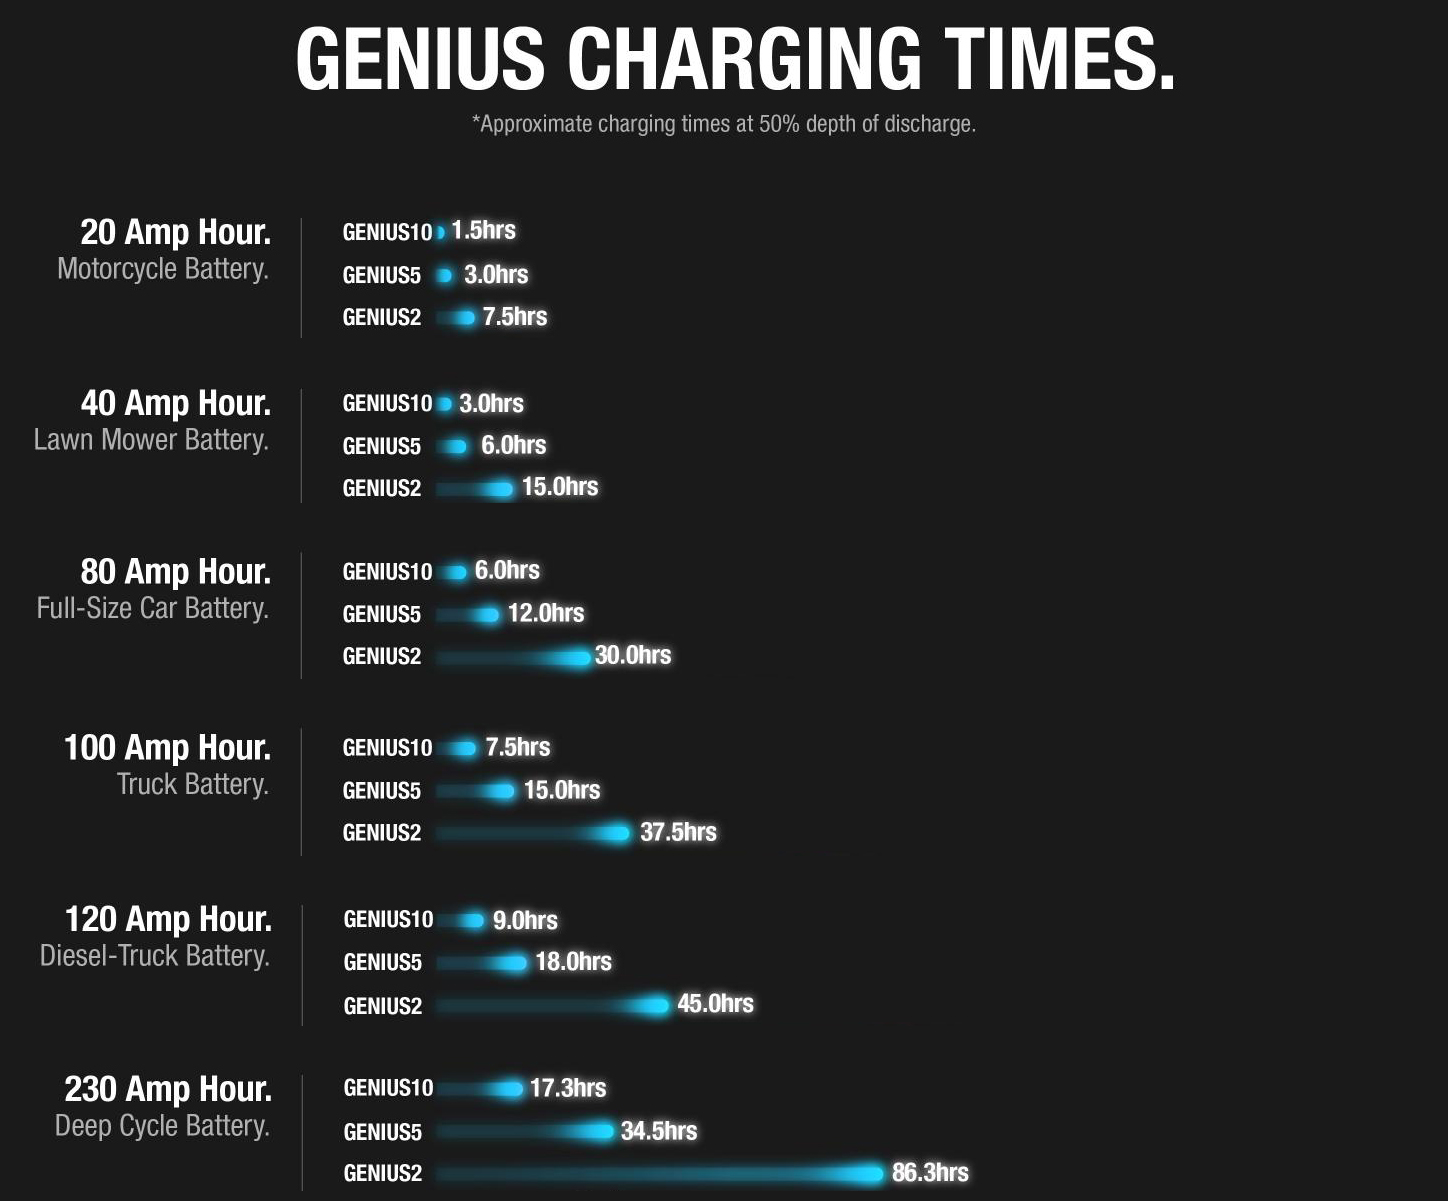
Battery capacity directly impacts charging time:
– 40Ah battery: Approximately 12 hours of red blinking
– 60Ah battery: Approximately 18 hours of red blinking
– 80Ah battery: Up to 24 hours of red blinking
Environmental conditions significantly affect timing:
– Temperatures below 50°F: Add 25-50% to expected charging duration
– Extreme heat above 80°F: May slightly accelerate charging but risks battery damage
– Older batteries (3+ years): Often require 2-3 times longer due to reduced charge acceptance
Essential Diagnostic Steps for Blinking Red Light

Don’t just watch the red light—verify your charging progress with these quick diagnostic procedures that separate normal operation from actual problems.
Step 1: Measure Actual Battery Voltage
Grab your multimeter and check these critical voltage points:
– 12.6V or higher: Battery may already be charged; blinking red suggests connection issue
– 12.2-12.5V: Perfectly normal range triggering red blinking bulk charging
– Below 12.0V: Deeply discharged battery requiring extended charging time
Critical warning: If voltage reads below 11.5V, your battery may have a dead cell and require replacement rather than charging.
Step 2: Verify Connection Quality
Poor connections are the #1 cause of charging issues that mimic malfunction:
– Battery terminals: Clean corrosion with a wire brush until metal shines
– Charger clamps: Ensure bare metal contact with terminal posts (no paint or corrosion)
– Power source: Test wall outlet with another device to confirm proper voltage
Step 3: Monitor Progress After 6 Hours
After six hours of consistent red blinking:
– Voltage increased by 0.2V+: Normal operation—let the charging continue
– No voltage change: Recheck all connections and clean terminals again
– Voltage dropped: Indicates serious battery failure requiring replacement
When NOCO Genius 1 Red Light Blinking Signals Real Trouble
While most red blinking scenarios represent proper operation, certain patterns indicate problems that require immediate action to prevent damage to your charger or battery.
Dangerous Red Light Patterns
Stop charging immediately if you observe:
– Solid red light (no blinking): Unplug charger and let it cool for 30 minutes
– Rapid red/green alternating: Disconnect immediately—check for reverse polarity
– Red light with audible clicking: Indicates internal fault—contact NOCO support
Common user errors that create false problems:
– Disconnecting charger before green light appears (preventing full charge)
– Using extension cords longer than 25 feet (causing voltage drop)
– Charging in freezing conditions without temperature compensation
– Ignoring corroded terminals that prevent proper current flow
Optimizing Your Charging Process for Faster Results

Maximize your NOCO Genius 1’s effectiveness with these preparation and monitoring techniques that ensure the red blinking phase completes efficiently.
Pre-Charge Battery Preparation Checklist
Terminal cleaning procedure:
1. Disconnect negative battery cable first (safety priority)
2. Scrub both battery posts and charger clamps with wire brush
3. Apply thin layer of dielectric grease to prevent future corrosion
4. Reconnect positive cable first when finished
Ideal charging environment setup:
– Indoor location maintained between 50-80°F
– Well-ventilated area (batteries release hydrogen gas during charging)
– Stable surface away from flammable materials
– Direct charger connection to wall outlet (no extension cords)
Progress Monitoring Without Guesswork
Reliable indicators that charging is advancing:
– Red pulses gradually become slightly more rapid as battery charges
– Battery case feels mildly warm (not hot) to the touch
– Voltage measurements show consistent 0.1-0.2V increases every few hours
– Charger fan may increase speed as charging progresses
Post-Charge Battery Health Assessment
Once your NOCO Genius 1 transitions to solid green, verify your battery’s actual condition with these simple tests before assuming everything is perfect.
Battery Validation Protocol
After 24 hours of solid green indication:
1. Resting voltage test: Should read 12.6-12.9V after disconnecting for 24 hours
2. Load test: Must maintain 10.5V or higher when cranking engine
3. In-vehicle measurement: 12V reading is normal under vehicle electrical load
Replace your battery immediately if:
– Fails to hold 12.4V+ after full charge cycle
– Requires frequent water addition (in maintenance-type batteries)
– Shows physical swelling or damage
– Fails load test at auto parts store
Preventing Future Deep Discharge Scenarios
Avoid recurring red blinking situations with these proactive maintenance habits that keep your battery in optimal condition between uses.
Monthly Battery Maintenance Routine
Simple 10-minute prevention protocol:
– Connect Genius 1 for 12-24 hours monthly (even if not needed)
– Clean terminals with wire brush every 3 months
– Check electrolyte levels in maintenance batteries quarterly
– Verify voltage with multimeter before and after storage periods
Long-Term Vehicle Storage Protocol
For seasonal vehicles or extended storage:
1. Charge fully until solid green light appears
2. Disconnect negative battery cable
3. Store in temperature-controlled environment (50-70°F ideal)
4. Reconnect charger for 24 hours every 30 days
That persistent NOCO Genius 1 red light blinking pattern typically represents your charger working exactly as designed—not a malfunction. For standard automotive batteries, expect 18+ hours of red blinking during bulk charging, with larger batteries or colder conditions extending this timeframe. Monitor voltage progress with a multimeter, maintain pristine connections, and allow the full charging cycle to complete before drawing conclusions. When you understand what the red blinking signifies and how long it should last for your specific battery, you’ll eliminate unnecessary worry and ensure your battery receives the complete, proper charge it needs to deliver reliable performance.