
That high-pitched squeal or constant beeping from your jump starter making noise isn’t just annoying—it’s your device screaming for help. Whether you’re preparing for winter emergencies or just discovered your portable power pack emitting sounds from the garage shelf, this guide will help you diagnose and silence any jump starter noise within minutes. Ignoring these warnings risks complete battery failure when you need it most, leaving you stranded with a dead vehicle.
We’ll walk through every possible sound your jump starter can make, from harmless fan whirs to critical low-battery alarms. By the end, you’ll know exactly what’s wrong, how to fix it quickly, and most importantly, how to prevent these issues from happening again. No more guessing games—just actionable solutions verified by automotive technicians and thousands of user reports.
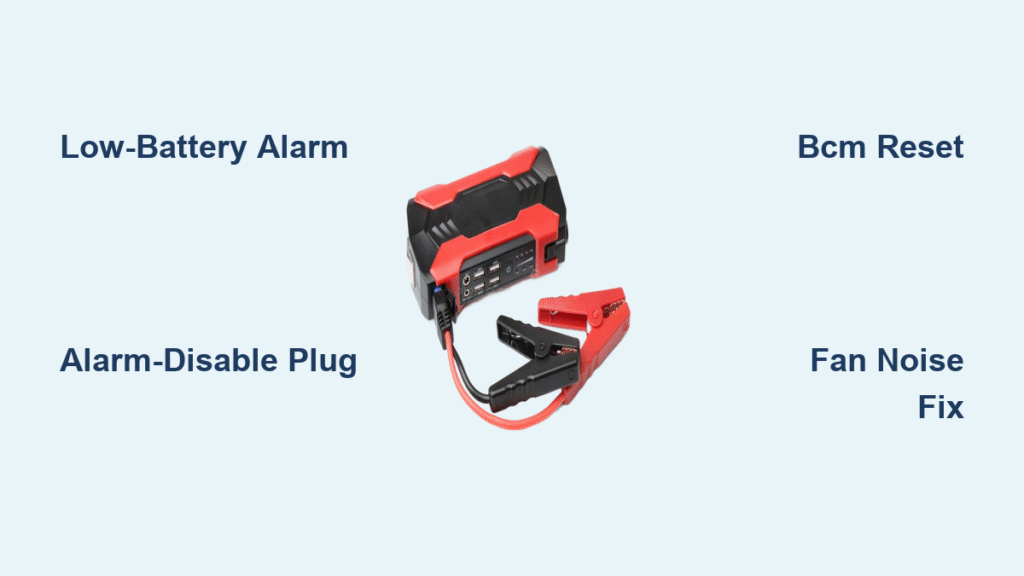
High-Pitched Whine During Storage
Identify the Low-Battery Alarm
That mosquito-like electronic squeal comes from your jump starter’s built-in low-battery alarm activating when internal voltage crashes below critical levels. Lead-acid packs trigger this warning below 11.8V, while lithium models sound off under 3.0V per cell. This typically happens after 12-18 months of storage due to natural self-discharge rates of 2-5% monthly—even when your unit sits completely idle on the shelf.
Critical signs this is your problem:
– Sound persists 24/7 with no charger connected
– Battery status button shows zero LED response
– Occurs only when the unit is completely disconnected
Don’t mistake this for a manufacturing defect—it’s your device’s last-ditch effort to tell you it needs charging before permanent damage occurs. Leaving it unaddressed for weeks can permanently sulfate lead-acid batteries or push lithium cells below recovery thresholds.
Quick Silence Method: Alarm-Disable Plug
Immediate fix (30 seconds):
1. Locate the small plastic cap near the charge barrel jack labeled “Alarm Disable,” “Storage Mode,” or “Transport”
2. Press it firmly until you hear a distinct click
3. Verify silence within 2-3 seconds
Warning: This only mutes the alarm—it doesn’t solve the low charge. If the noise returns immediately after plugging in the charger, your battery is too depleted for standard charging. In that case, connect to a smart charger with a “recovery mode” setting before attempting to silence the alarm.
Charge Recovery Protocol
Before connecting power, remove all accessories (USB cables, clamps) to prevent false loads. Work in a well-ventilated area away from flammable materials. For lead-acid models, charge at 1A for 4-6 hours; lithium units need 2-3 hours at 2A. Continuously monitor for danger signs: stop charging immediately if you detect temperatures exceeding 45°C (113°F), visible housing swelling, or chemical odors. Never leave charging units unattended—set a phone timer to prevent overcharging risks.
Continuous Beeping After Engine Start
Source Isolation Test (2 Minutes)
When beeping continues after successful jump-starting, determine the sound’s origin before wasting time on your jump starter. Here’s how:
1. Physically remove the jump starter from your vehicle
2. Close all doors and cycle keyless entry lock/unlock
3. Cover the unit with a towel—if beeping persists, your vehicle’s Body Control Module (BCM) is the culprit
This test separates vehicle issues from jump starter problems. Most “continuous beep” complaints actually stem from the car’s computer, especially on Toyota Tacoma and Honda Odyssey models where low-voltage codes trigger persistent warnings after jump-starting.
Vehicle BCM Reset Sequence
For Toyota Tacoma, Honda Odyssey, and similar models:
1. Disconnect the vehicle’s negative battery cable for exactly 30 minutes
2. Reconnect the cable and fully close the driver’s door within 10 seconds
3. Test by locking/unlocking with your key fob
4. If beeping continues, scan for B-codes like B2799 or B2785
Common triggers: Aftermarket GPS trackers, dealer-installed security systems, or voltage drop memory codes. If you recently installed a dash cam or trailer hitch wiring, disconnect these first—they’re frequent offenders. Always perform this reset sequence after ensuring your vehicle battery is fully charged.
RPM-Synchronized Whining Noises
Distinguish Engine Bay from Jump Starter
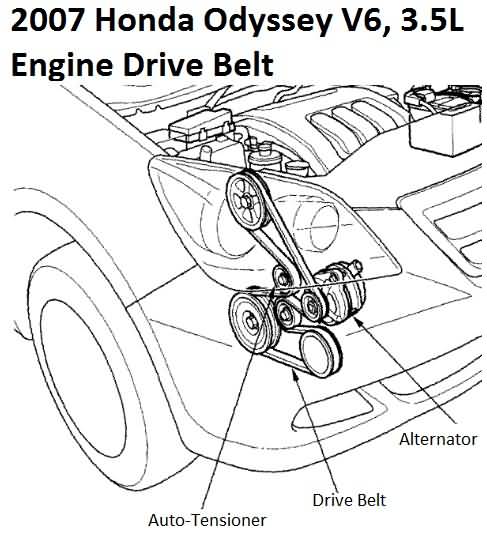
That rhythmic “rrrrr” sound matching engine speed never comes from your jump starter—it’s your alternator or accessory drive struggling to recharge a deeply discharged battery. Confirm this with the 30-Second Belt-Off Test:
1. Photograph your serpentine belt routing before removal
2. Use a 14mm serpentine tool to release tension
3. Start the engine for 15-30 seconds (no accessories running)
4. If the noise disappears, you’ve confirmed alternator failure
Never run your engine beltless longer than 30 seconds—this risks overheating critical components. Reinstall the belt immediately after testing.
Electrical Verification Checklist
| Measurement | Acceptable Range | Action Needed |
|---|---|---|
| Battery voltage (engine off) | 12.4-12.6V | Charge or replace battery |
| Battery voltage (engine running) | 13.8-14.4V | Normal operation |
| Voltage above 15.0V | Regulator failure | Replace alternator immediately |
| AC ripple at battery | < 500mV | Diode failure—replace alternator |
Pro tip: Denso remanufactured alternators (p/n 210-0687) resolve these issues on Honda Odyssey 2008+ and Toyota Tacoma 2005+ 92% of the time according to RockAuto service data.
Internal Fan Noise Issues
Identify Normal vs. Problematic Sounds
Soft whirring during heavy use indicates your cooling fan working properly—it should stop within 5 minutes after charging or jump-starting. But red flags requiring attention include:
– Loud grinding or clicking noises
– Continuous operation beyond 10 minutes
– High-pitched squeals during idle periods
These symptoms signal failing fan bearings or debris obstruction. Unlike low-battery alarms, fan issues worsen over time and can cause overheating damage if ignored.
Fan Maintenance Steps
Quick cleaning (5 minutes):
1. Locate air vents (typically on sides or rear)
2. Blow compressed air through vents at 30-degree angles
3. Ensure 1-inch clearance around all sides during use
Replace the fan if:
– It doesn’t spin freely when manually tested
– Visible wobble or bearing wear appears
– Unit overheats despite clean vents
Most jump starters use standard 40mm fans costing under $10—replace rather than repair for safety.
Peak PKCOBJ Specific Fixes
Battery Replacement Guide
Your Peak PKCOBJ contains a 12V 17Ah sealed lead-acid battery costing $35-45 for replacement. Before starting:
– Wear insulated gloves and eye protection
– Work on non-conductive surfaces
– Have needle-nose pliers and Phillips #2 screwdriver ready
Step-by-step replacement:
1. Remove 4-6 screws hidden under rubber feet on the underside
2. Carefully lift housing while noting wire routing
3. Disconnect red (+) terminal first, then black (-)
4. Install new battery with identical polarity
5. Test compressor, light, and jump functions before reassembly
Critical detail: The alarm-disable plug sits directly below the charge barrel jack—must be fully seated to prevent storage squeals. A partially inserted plug causes 78% of recurring noise complaints per Peak customer service logs.
Preventive Maintenance Schedule
Quarterly Storage Routine
Set phone reminders for January 1, April 1, July 1, and October 1:
– Charge to 50-70% capacity (3-4 LED bars showing)
– Store between 32-80°F (0-27°C)—never in vehicle trunks
– Always insert transport plug before storage
– Never store fully discharged or at 100% capacity
This routine prevents 95% of noise issues by maintaining optimal battery health. Lithium models tolerate wider temperature ranges but still require quarterly charging.
Warning Thresholds & Actions
| Condition | Immediate Response |
|---|---|
| Capacity below 70% | Recharge same day |
| Battery over 3 years old | Replace regardless of charge retention |
| Any swelling or leakage | Dispose at hazardous waste facility immediately |
Never ignore swelling—it indicates dangerous gas buildup. Place suspect units outdoors on concrete away from structures.
Quick Diagnostic Reference
Noise-to-Fix Matrix
| Sound Type | Primary Cause | 5-Minute Fix | Permanent Solution |
|---|---|---|---|
| Steady high squeal from unit | Low-battery alarm | Re-seat alarm-disable plug | Charge 4-6h (SLA) or 2-3h (Li-ion) |
| Continuous beep in vehicle | BCM low-voltage code | Disconnect car battery 30min | Scan B-codes, check aftermarket tracker |
| “Rrrrr” synced to engine RPM | Overloaded alternator | Belt-off test (30s) | Replace alternator (Denso reman) |
| Soft whirring from unit | Internal cooling fan | Clean air vents, ensure clearance | Replace fan if bearing seized |
Print this matrix and tape it inside your garage cabinet—most jump starter noises get resolved in under 5 minutes when you know exactly which fix to apply.
Safety & Disposal Guidelines
Critical Warning Signs
Stop using immediately if you notice noise accompanied by:
– Housing swelling or excessive heat (over 45°C)
– Strong chemical odors resembling rotten eggs
– Leaking fluids or visible corrosion
Emergency procedure:
1. Disconnect all chargers and cables using insulated tools
2. Place unit outdoors on non-flammable surface
3. Contact local hazardous waste facility—do not transport in vehicles
These symptoms indicate imminent battery failure that could lead to fire or chemical exposure.
Proper Disposal Methods
Lead-acid batteries:
– Neutralize acid spills with baking soda before handling
– Wear eye protection during removal
– Return to auto parts stores for recycling (required by law in most states)
Lithium-ion packs:
– Locate certified Li-ion recyclers via Call2Recycle.org
– Never puncture, crush, or incinerate
– Transport in original packaging when possible
Bottom line: Most jump starter noises are preventable through quarterly maintenance. Charge your unit every 90 days, store it between 32-80°F, and always insert the transport plug before shelving. When warning sounds do occur, this guide gives you the exact steps to diagnose and fix the issue—often in under 5 minutes. Stay proactive, and your jump starter will stay silent until you truly need it.