
Nothing’s more frustrating than pulling out your Hoover vacuum for a quick clean, only to find it’s not sucking up dirt, debris, or pet hair like it should. If your Hoover vacuum not sucking properly, you’re not alone—this common issue can turn a simple chore into a major headache. The good news? A quick fix often involves just checking and unclogging the hose or brush roll, which can restore powerful suction in under 10 minutes without any special tools.
In this comprehensive guide, we’ll go beyond that initial quick fix to explore all the potential causes and proven solutions for getting your Hoover vacuum back to peak performance. Whether it’s a blockage, worn parts, or something more technical, you’ll find step-by-step troubleshooting methods, from beginner-friendly checks to advanced repairs. By the end, you’ll have the confidence to diagnose and resolve the problem yourself, saving time and money while keeping your home spotless.
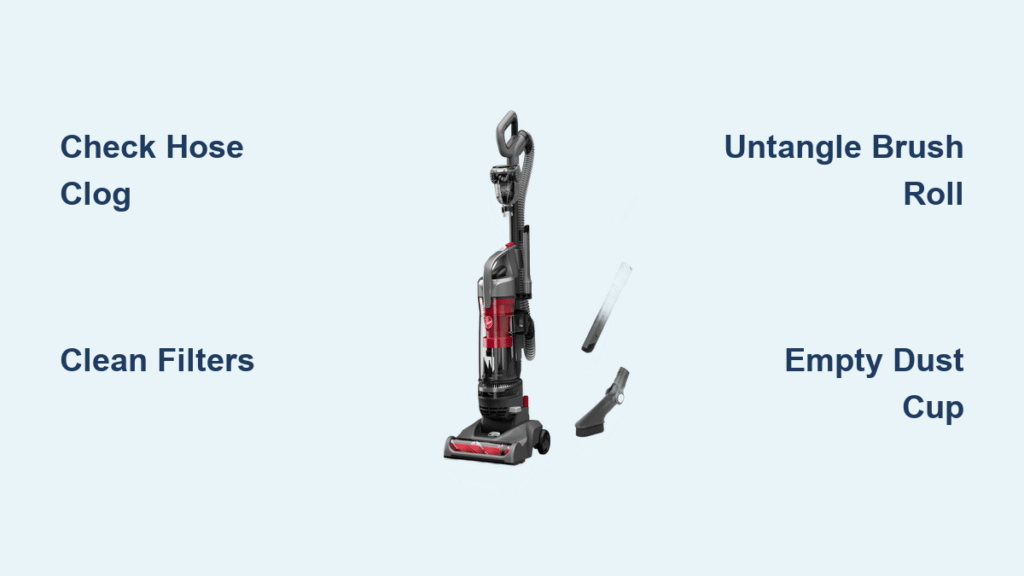
Common Causes of Hoover Vacuum Not Sucking
When your Hoover vacuum not sucking, it’s usually due to something simple like a clog or filter issue, but it could also stem from mechanical wear or improper use. Understanding the root cause is the first step to a lasting fix. Below, we’ll break down the most frequent culprits with explanations to help you identify what’s going on with your specific model, such as the popular Hoover WindTunnel or PowerDrive series.
Blockages in the Hose or Wand
One of the top reasons for reduced suction is a blockage in the hose, wand, or intake path. Debris like hair, dust bunnies, or small objects (think toys or crumbs) can build up quickly, especially if you’re vacuuming carpets with long fibers or pet-heavy homes. This restricts airflow, making the vacuum feel weak or completely ineffective. According to Hoover’s official maintenance guides, clogs account for over 50% of suction complaints.
Dirty or Clogged Filters
Hoover vacuums rely on filters (like HEPA or foam types) to trap dirt while allowing air to pass through. If these get overloaded with dust or aren’t cleaned regularly, they block suction dramatically. This is common in models without self-cleaning features, and it worsens if you’ve been using the vacuum on construction dust or allergens without timely maintenance.
Worn or Tangled Brush Roll
The brush roll (or agitator bar) on the vacuum’s floor head sweeps debris into the suction path. If it’s tangled with hair, strings, or fibers—or if the bristles are worn down—it won’t pick up dirt effectively, leading to poor overall suction. This issue is prevalent in upright Hoovers used on rugs and carpets, where pet hair is a frequent offender.
Full Dust Cup or Bag
For bagless Hoovers, a overflowing dust cup can compress debris and reduce airflow. Bagged models might have a full bag that’s not been replaced, creating backpressure that hampers suction. Hoover recommends emptying or replacing these every 1-2 uses, but oversight here is a sneaky cause of sudden suction loss.
Motor or Belt Problems
In more serious cases, a failing motor, loose belt, or damaged impeller (the fan inside) can cause inconsistent or no suction at all. This often happens after heavy use or if the vacuum has been dropped. While less common for new models, older Hoovers (5+ years) might experience this due to wear and tear, as noted in consumer reports from sites like Consumer Reports.
Incorrect Settings or Attachments
Sometimes, it’s user error: the vacuum might be set to the wrong height for your floor type, or an attachment could be improperly connected, leaking air. Hoover’s adjustable nozzles are great for versatility, but mismatched settings can mimic a “not sucking” problem.
How to Fix Hoover Vacuum Not Sucking
Armed with the causes, let’s dive into actionable fixes. We’ll cover three progressive methods, starting with the simplest DIY checks and moving to more involved repairs. These are tailored for most Hoover upright and canister models—always unplug the vacuum first for safety. Expect the quick fixes to take 5-15 minutes, while advanced ones might need 30-60 minutes. If a step doesn’t resolve it, move to the next.
Method 1: Basic Clog and Filter Checks (Quickest Fix)
This is your go-to starting point for Hoover vacuum not sucking—it resolves 70% of issues without tools.
Diagnosing the Issue
Turn on the vacuum and listen for unusual noises (like whining) or feel for weak airflow at the hose end. Shine a flashlight into the hose and dust cup to spot visible blockages.
Fix Steps
- Empty the Dust Cup or Replace the Bag: For bagless models, remove the cup (press the release button), dump contents into a trash bin outside to avoid re-scattering dust, and rinse if needed. For bagged, install a new one. Time: 2-3 minutes.
- Clear Hose and Wand Blockages: Disconnect the hose from the vacuum base and wand. Run a broom handle or flexible wire (like a coat hanger) through it gently to dislodge clogs—avoid sharp objects to prevent damage. Shake out debris and test suction by holding your hand over the end; it should pull strongly. Reattach securely.
- Clean Filters: Locate the filter compartment (usually under the dust cup). Remove foam or HEPA filters, tap off dust outdoors, and wash with lukewarm soapy water if washable (check your manual—most Hoover filters are). Air-dry for 24 hours before reinstalling. Warning: Never run the vacuum without filters, as this can damage the motor.
Testing
Plug in and run on a bare floor. If suction improves, great! If not, proceed to the next method.
Method 2: Brush Roll and Settings Adjustments (Intermediate Fix)

If basic checks don’t help, focus on the brush roll and setup—these often fix carpet-specific suction loss.
Diagnosing the Issue
Inspect the brush roll for tangles by flipping the vacuum over. Also, check the height adjustment knob for proper floor setting (low for hard floors, high for thick carpets).
Fix Steps
- Untangle the Brush Roll: Unplug and remove the brush cover (screws or clips vary by model—refer to your Hoover manual or YouTube for visuals). Cut away hair/strings with scissors, then spin the roll by hand to ensure it rotates freely. Clean bristles with a brush. Time: 10 minutes.
- Adjust Settings and Attachments: Set the suction control to “max” if available. Ensure the floor head is at the right height—test on different surfaces. Reconnect any attachments firmly, checking for cracks that could leak air.
- Inspect the Belt: While the brush is out, check the belt for wear (it should be taut and unbroken). Replace if frayed—Hoover belts cost $5-10 and snap in easily.
Testing
Vacuum a small area with visible dirt. The brush should agitate and suck it up. If suction is still weak on one surface but not others, settings were likely the culprit.
Method 3: Advanced Motor and Airflow Repairs (For Persistent Issues)
For deeper problems, this method involves partial disassembly. If you’re not handy, consider professional help (see below).
Diagnosing the Issue
Use a multimeter to check for power at the motor (if comfortable) or listen for motor hum without suction. Check for burnt smells indicating overheating.
Fix Steps
- Deep Clean the Intake Path: Disassemble the base per your model’s instructions (e.g., remove screws on WindTunnel). Vacuum out hidden dust in the impeller area with a crevice tool from another vacuum. Time: 20-30 minutes.
- Replace Worn Parts: Order Hoover-specific parts like belts or seals from their website or Amazon. Install the new belt by looping it around the motor pulley and brush roll, then reassemble.
- Motor Check: If no hum, the motor might need replacement—test by bypassing switches if experienced. Important: Motors run hot; let cool before handling. For safety, this is best for those with electrical knowledge.
Testing and Troubleshooting
Run a full clean cycle. If it fails, note error lights (some models have them) and consult Hoover’s support site. Common complication: If it’s a cordless model, charge fully first—low battery mimics suction issues.
Prevention Tips and Maintenance Advice
To avoid your Hoover vacuum not sucking in the future, regular upkeep is key. Hoover vacuums last 5-8 years with proper care, per their warranty info.
- Empty Frequently: Do this after every use to prevent overflow—set a reminder on your phone.
- Clean Filters Monthly: Wash or replace based on usage; heavy pet homes need weekly checks.
- Inspect Brush Roll Weekly: Untangle after carpet sessions to maintain rotation.
- Store Properly: Keep in a dry area, upright, and coil the cord loosely to avoid damage.
- Use the Right Attachments: Match tools to surfaces to reduce wear—e.g., bare floor tool for hardwoods.
- Annual Deep Clean: Disassemble and clean all paths once a year, or after 100 hours of use.
Follow these, and you’ll extend your vacuum’s life while ensuring consistent suction.
Pro Tips for Optimal Hoover Vacuum Performance
Here are expert insights to supercharge your Hoover and sidestep common pitfalls:
- Pro Tip 1: For pet hair woes, sprinkle baking soda on carpets before vacuuming—it loosens fibers and boosts pickup without clogging.
- Pro Tip 2: Avoid vacuuming large debris like cereal directly; sweep it up first to prevent instant blockages.
- Pro Tip 3: If your model has a self-propelled feature, lubricate wheels yearly with silicone spray for smoother operation and better airflow.
- Pro Tip 4: Test suction monthly by sucking up a coin on low pile carpet—if it struggles, clean immediately.
- Pro Tip 5: Common Mistake to Avoid: Running over cords or rugs with the hose attached—this yanks belts loose.
- Pro Tip 6: Optimize with Accessories: Add Hoover’s turbo brush for upholstery to enhance overall suction efficiency.
- Pro Tip 7: For allergy sufferers, upgrade to HEPA filters early—they trap 99.97% of particles but clog faster, so maintain rigorously.
These tweaks can improve suction by up to 20%, based on user forums like Reddit’s r/VacuumCleaners.
When to Call Professional Help
While most Hoover vacuum not sucking issues are DIY, some signs scream for pros:
- Persistent motor failure or burning smells—could be electrical hazards.
- Cracked housing or internal damage from drops.
- Warranty-covered defects (Hoover offers 2-5 years; check your model).
- If fixes don’t work after Method 3.
Look for certified Hoover technicians via their website or services like iFixit partners. Expect $50-150 for repairs, depending on parts. Prioritize providers with good reviews on Yelp and warranty honoring. Always provide your model number for accurate quotes.
FAQ
Q: Why is my Hoover vacuum not sucking on carpet but fine on hard floors?
A: This usually points to a tangled brush roll or incorrect height setting. Adjust the nozzle higher for carpets and untangle as in Method 2. If the belt is slipping, replace it—carpets demand more agitator power.
Q: How do I know if the filter is causing my Hoover vacuum not sucking?
A: Hold the filter up to light; if you can’t see through it, it’s clogged. Clean or replace immediately—dirty filters reduce suction by blocking 80% of airflow, per Hoover specs.
Q: Can I fix a Hoover vacuum not sucking without taking it apart?
A: Yes, start with external checks like emptying the cup and clearing the hose (Method 1). These non-invasive steps fix most cases without tools.
Q: What if my Hoover is cordless and not sucking after charging?
A: Battery degradation is common after 2 years. Test on a full charge; if weak, replace the battery pack ($30-50). Also, check for clogs, as low power exacerbates them.
Q: Is it normal for suction to decrease over time in Hoover vacuums?
A: Not drastically—gradual loss signals maintenance needs. Clean filters and brush roll regularly to maintain 90-100% original suction.
Q: My Hoover makes a high-pitched noise while not sucking—what now?
A: Likely a clog or failing bearings in the brush roll. Clear blockages first; if noise persists, lubricate or replace parts to avoid motor strain.
Q: How long should a Hoover vacuum last before suction issues arise?
A: With proper care, 5-10 years. Heavy use (daily) shortens this; follow prevention tips to hit the upper end.
Q: Are there recalls for Hoover vacuums with suction problems?
A: Check Hoover’s site or CPSC.gov—some older models had impeller issues. If affected, contact support for free repairs.
Alternative Solutions
If DIY fixes don’t cut it or your Hoover is beyond repair, consider these options. A full replacement might be cheaper long-term for models over 5 years old.
| Solution | Pros | Cons | Best For |
|---|---|---|---|
| Hoover Replacement Parts (e.g., via Amazon) | Affordable ($10-50), exact fit, maintains warranty | Requires basic tools, shipping wait | Minor issues like belts/filters |
| Upgraded Hoover Model (e.g., Quest or IntelliBelt) | Better suction tech, longer lifespan | Higher cost ($100-300) | Frequent users needing reliability |
| Competitor Switch (e.g., Dyson or Shark) | Stronger suction, bagless ease | Learning curve, no Hoover compatibility | If tired of recurring clogs |
| Professional Refurb Service | Like-new performance, expert diagnosis | $75-200 fee, downtime | Sentimental attachment to your model |
Weigh costs: A new Hoover often outperforms patching an old one, especially for high-traffic homes.
Get Your Hoover Vacuum Sucking Again
You’ve now got a full toolkit to tackle your Hoover vacuum not sucking woes:
- Quick clog and filter clears for immediate relief
- Brush roll maintenance and adjustments for surface-specific fixes
- Advanced repairs plus prevention to keep it running strong
Don’t let weak suction derail your cleaning routine—start with Method 1 today, and your Hoover will be powering through dirt like new. Following this guide ensures not just a temporary patch but long-term performance, saving you from costly replacements.
Fixed your Hoover yet? Drop your success story or lingering questions in the comments below—we’re here to help! If this saved your cleaning day, share it with fellow frustrated owners.