
Your Dyson vacuum is pulling air from the top instead of the floor? That’s frustrating—and messy. The quick fix is often to clear a blockage in the floorhead or wand, reseat the cyclone bin, and check for a missing or misaligned seal. This simple combo resolves the issue in minutes for most models.
In this guide, you’ll learn all the common causes of a Dyson vacuum sucking from the top (cyclone vents or relief ports) rather than the bottom, and how to fix it step by step for uprights (Ball/Animal/Multi Floor), canisters, and cordless stick models like V7, V8, V10, and V11. We’ll also cover maintenance to prevent it happening again, pro tips, costs, and when to call for service.
Common Causes of Dyson Vacuum Sucking From the Top
- Blocked floorhead/brush bar or wand
- Clogged bin inlet or cyclone shroud
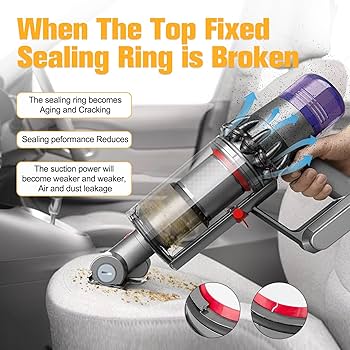
- Air leak: misfitted bin, broken or missing rubber seals/gaskets
- Full or wet filters restricting airflow
- Hair jam in the brush bar end caps or cleaner head ducts
- Wand not fully clicked in or cracked wand
- Relief valve engaging due to severe blockage (whistling/hissing)
- Split hose or torn U-bend seal (uprights)
- Motorhead electrical cable obstructions (cordless) causing head not to spin
How This Problem Happens
Dyson vacuums are engineered to pull air from the floor through a sealed airflow path. If there’s a serious blockage or leak anywhere in that path, the machine will pull easier air from the top vents or open a relief valve, which looks and sounds like suction coming from the top.
How to Fix a Dyson Vacuum Sucking From the Top

Follow these methods in order, from quickest to most thorough. Time: 5–35 minutes depending on severity. Unplug corded models or remove the battery from cordless before servicing.
Method 1: Quick Checks and Reseating Components (5–10 minutes)
Diagnosing the Issue
- Symptoms: Strong suction at the top vents, weak/none at the floor.
- Likely causes: Blockage or an air leak from misaligned bin/attachments.
Fix Steps
1) Power Off and Inspect
– Unplug or remove battery. Empty the bin.
– Look for flashing filter/battery lights (cordless) or unusual pitch changes.
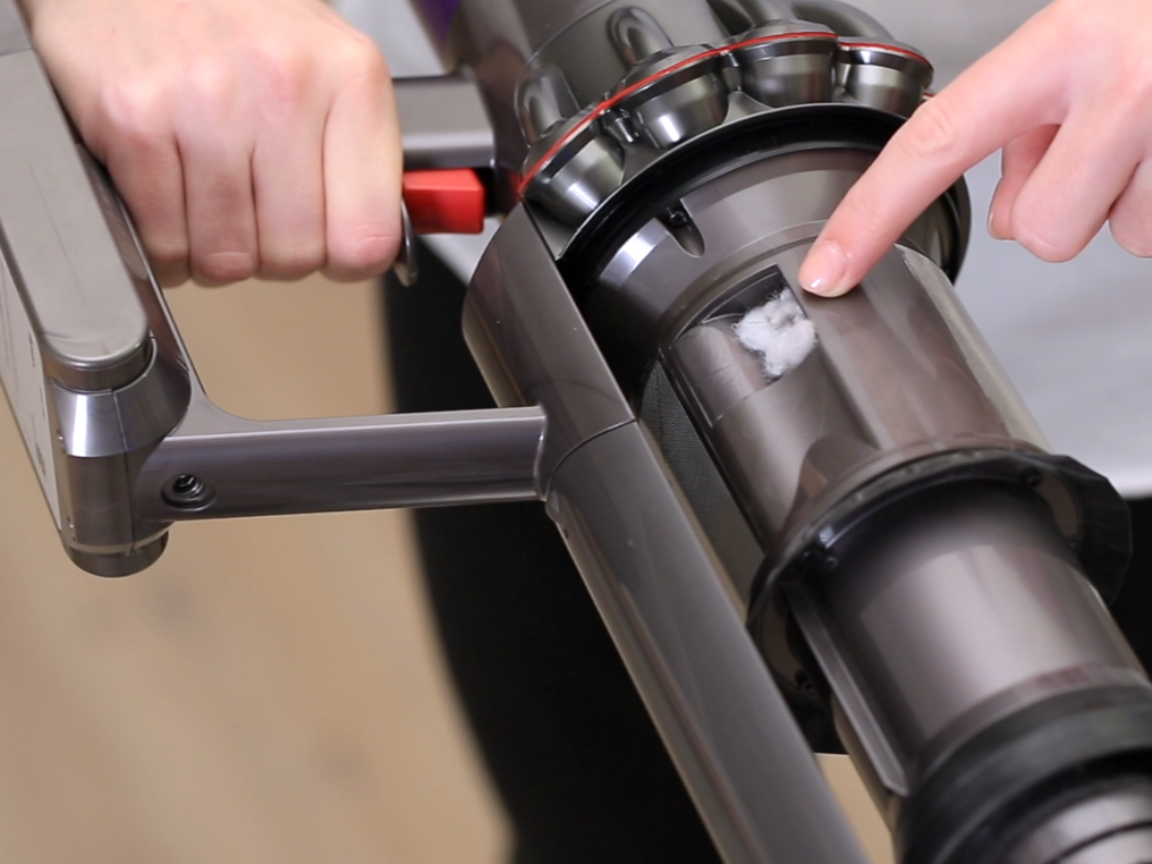
2) Reseat the Bin and Cyclone
– Remove the bin completely. Check the rim seal and the cyclone/belly gasket for tears or debris.
– Wipe the sealing surfaces with a dry cloth.
– Refit the bin until it clicks firmly. A loose bin is a common leak.
3) Check Attachment Seating
– Remove the wand. Inspect both ends for cracks and ensure the click-fit tabs are intact.
– Reattach the wand and cleaner head firmly until you hear a click.
4) Test Suction at the Inlet
– Remove the wand and place your hand over the main inlet (just under the cyclone on cordless; hose inlet on uprights).
– If suction is strong here, the blockage/leak is downstream (wand/head). If weak, it’s in the cyclone or filters.
Testing
- Reattach and test on a hard floor without any additional tools.
- If top suction persists, proceed to Method 2.
Method 2: Clear Blockages in Wand, Hose, and Cleaner Head (10–20 minutes)
Diagnosing the Issue
- Most top-suction cases stem from a blockage, especially in the cleaner head ducts or wand elbows.
Fix Steps
1) Wand/Hose Obstruction
– Remove the wand/hose and look through it against light. If you can’t see through, it’s clogged.
– Push a broom handle gently through to dislodge debris. Do not force bends; use a flexible bottle brush or vacuum another vacuum to pull debris out.
2) Cleaner Head Ducts
– Remove the cleaner head. On V7/V8/V10/V11, unlock the brush bar end cap (coin slot), slide the brush out.
– Remove hair, string, and debris from the brush bar and both end caps. Hair in end caps can seal airflow.
– Inspect the internal duct where the brush sits—check for compacted dust at the rear intake path. Use a long brush or compressed air carefully.
3) U-Bend and Baseplate (Uprights)
– On Ball/Animal uprights, open the U-bend at the base (usually a clip). Clear any blockage. Check the short hose in the baseplate.
– Remove the soleplate if possible to access the intake channel.
4) Cyclone and Bin Inlet
– Check the bin intake (where dirt enters the bin) for packed dust. Use a dry brush to loosen. Do not wash the cyclone unless your manual explicitly allows; most Dyson cyclones must not be wet.
5) Hairpins and Rigid Debris
– Look for items like hairpins, LEGO, popcorn kernels trapped at elbows and bends—they commonly trigger relief airflow.
Testing
- Reassemble. Test suction with wand only first, then with the head. If suction shifts to the floor again, you’ve solved it. If not, continue.
Method 3: Fix Air Leaks and Replace Seals/Gaskets (10–25 minutes)
Diagnosing the Issue
- If blocks are cleared but suction still vents from the top, you likely have an air leak.
- Signs: Bin feels loose, hissing when squeezing joints, visible cracks, or missing gaskets.
Fix Steps
1) Inspect All Seals
– Bin rim seal: rubber ring on the top of the bin.
– Cyclone-to-body seal: gasket between cyclone and main body (cordless).
– Cleaner head neck and wand couplings: look for thin O-rings.
2) Replace Damaged Seals
– Order model-specific gaskets/seals (e.g., Dyson V8 bin seal, part numbers vary; check Dyson Parts, eBay, or appliance part stores).
– Clean seats with a dry cloth and install seals fully seated and un-twisted.
3) Check for Cracks
– Wand and cleaner head necks often crack at the locking tab. If you see hairline splits, replace the part—tape is temporary and leaks persist.
– On uprights, inspect the flexible hose for splits. Flex it under light to reveal cracks. Replace if brittle.
4) Reseat and Tighten Everything
– Fully click the wand, head, and bin. If the bin won’t lock snugly, the latch or bin may be worn; replacing the bin assembly is a common solution on older units.
Testing
- Seal inlet with your palm; the vacuum should clamp down strongly and relief noise should stop. If relief persists with sealed inlet, check filters (next method).
Method 4: Restore Airflow by Maintaining Filters and Cyclone (10–30 minutes)
Diagnosing the Issue
- Clogged filters increase resistance, causing relief air from the top. Wet filters cause immediate flow restriction and can damage motors.
Fix Steps
1) Pre-Motor Filter (Top Filter)
– Remove and inspect. If heavily dusty, wash with cold water only until water runs clear. Squeeze gently—do not wring.
– Air-dry for at least 24 hours until completely dry. Never reinstall damp.
2) Post-Motor/HEPA Filter (if applicable)
– Some models have a rear or base HEPA filter. Tap gently to remove loose dust. If washable per your manual, rinse and fully dry 24+ hours. If non-washable, replace when dirty.
3) Cyclone Shroud Cleaning
– The perforated mesh (shroud) can cake up. Use a dry brush, soft paintbrush, or compressed air outdoors to loosen dust.
– Important: Most Dyson cyclones must not be washed. Only clean the shroud exterior unless your manual says otherwise.
4) Reassemble and Test
– With clean, dry filters installed, test suction again.
Testing
- Suction should be strong at the floor with minimal top vent draw. Relief whistling should stop. If not, continue to model-specific checks.
Model-Specific Notes

Dyson Cordless (V7, V8, V10, V11, V12/V15)
- Common culprits: Blocked cleaner head intake, worn bin seals, clogged pre-motor filter, cracked wand.
- Direct Drive/High Torque heads: Hair wrapped behind the brush and around end caps chokes airflow. Remove brush, clean end caps thoroughly.
- Bin assembly replacements are an effective cure when seals/latches wear.
- If the brush bar doesn’t spin, you’ll still have suction but poor pickup—clean the brush, check for red light errors on the head, and ensure the head cable isn’t damaged.
Dyson Uprights (Ball Animal, Multi Floor)
- Check the base U-bend and short undercarriage hose—these block easily and trigger top relief.
- Split main hose is common: test by running on hose mode and bending hose; if suction drops or you hear hissing, replace.
- Be sure the selector (hard floor/carpet) and brushbar height are set correctly; a closed soleplate gap can hamper airflow.
Dyson Canisters
- Inspect the telescope wand and floor tool neck seals.
- Hose cuff leaks are very common—replace the cuff or hose if loose or cracked.
How to Prevent Future Suction Loss and Top Vent Relief
:max_bytes(150000):strip_icc()/how-to-clean-dyson-vacuum-6746404-01-b1e8e9b4a50f4b26a6db7218ccd7d12c.jpg)
- Empty the bin when it reaches the MAX line or sooner; overfilled bins clog the cyclone shroud.
- Clean the brush bar weekly if you have long hair or pets.
- Wash the pre-motor filter every 1–3 months depending on use; replace annually if worn.
- Inspect seals every 6 months; replace if flattened, torn, or sticky.
- Avoid vacuuming wet debris or fine plaster/ash—these clog cyclones and filters rapidly.
- Store cordless models with a clean bin and dry filters to protect the motor.
Pro Tips
- Keep a spare pre-motor filter so you can rotate while one dries.
- Use a crevice tool to check airway transitions—if it won’t slide through, there’s a blockage.
- A thin flashlight beam helps spot micro-cracks in wands and hoses—look for light leakage while cupping joints.
- If you hear rhythmic pulsing, that’s the motor protecting itself; immediately check for blockages or wet filters.
- For heavy pet hair, consider a motorized mini tool for sofas to prevent clogging the main head.
- Lightly dust rubber seals with a dry microfiber before reinstalling to improve seating—never use oils.
- If you frequently pick up larger debris, start with the hard-floor head or max height setting to prevent jams at the head inlet.
When to Call a Professional
- Persistent top vent suction after full blockage clearing and new filters.
- Cracked cyclone body or motor housing.
- Burning smell, grinding noises, or smoke.
- Electrical faults: head won’t power, intermittent cut-outs not caused by blockages.
- Motor runs but no suction even with sealed inlet.
What to look for:
– Dyson-authorized service or experienced vacuum techs.
– Genuine parts use and 90-day+ repair warranty.
– Transparent diagnostics and quotes.
Typical costs:
– New wand: $30–$80
– Hose (upright/canister): $25–$70
– Cleaner head: $80–$160
– Bin assembly/seals: $20–$90
– Professional labor/diagnostic: $50–$120
Warranty:
– Check your Dyson warranty (usually 2 years for cordless, 5 for some uprights). Using non-genuine parts may affect coverage.
FAQ
Q: Why does my Dyson have strong suction at the top but not on the floor?
A: A blockage or air leak is diverting airflow. The vacuum draws the easiest air available, which can be through the top vents or a relief valve. Clear blockages in the wand and cleaner head, reseat the bin, and check seals and filters.
Q: My filters are new. Why is it still venting from the top?
A: New filters help, but a hidden blockage or cracked wand/hose can still cause the issue. Inspect the cleaner head ducts, U-bend (uprights), and all seals. Hair inside brush end caps is a common hidden choke point.
Q: Can I wash the cyclone?
A: Generally no. Most Dyson cyclones are not designed to be washed and can be damaged by water. You can brush the shroud and gently blow out dust with compressed air outdoors. Always consult your model’s manual.
Q: The brush bar doesn’t spin—does that cause top suction?
A: A non-spinning brush reduces pickup but doesn’t normally cause top vent suction by itself. However, the same debris that jams the brush often clogs the cleaner head’s intake, which can trigger relief airflow.
Q: How often should I wash Dyson filters?
A: Every 1–3 months depending on use and environment. Wash with cold water only and fully air-dry for at least 24 hours. Replace annually or if they remain musty, misshapen, or shed fibers.
Q: What does the pulsing sound mean?
A: Pulsing indicates the vacuum is trying to protect itself from a blockage or major airflow restriction—often wet or fully clogged filters. Power off, clear blockages, and ensure filters are bone dry.
Q: Can a small crack really cause such a big problem?
A: Yes. Even hairline cracks in the wand/hoses or a flattened seal can break the vacuum’s airtight path and force the machine to pull air from the top instead of the floor.
Q: Is it worth repairing or should I replace the cleaner head?
A: If the head housing is warped/cracked or the ducting is damaged, replacement is best. For models V7–V11, a new head often restores performance and is cheaper than replacing the whole vacuum.
Alternative Solutions
When fixes don’t stick or parts are worn, consider these options:
| Solution | Pros | Cons | Best For |
|---|---|---|---|
| Replace wand/hose | Restores airtight path quickly | Added cost | Cracked or leaky joints |
| New cleaner head | Like-new pickup; fixes warped ducts | $80–$160 | Worn head or persistent clogs |
| Replace bin assembly | Fixes latch/seal leaks | May require model-specific parts | Loose bin, missing gasket |
| Professional service | Full diagnosis and motor checks | Labor cost, downtime | Complex or persistent issues |
Get Your Dyson Working Again
Following this Dyson vacuum sucking from the top guide, you now have multiple ways to restore proper floor suction:
– Reseat the bin and attachments to fix air leaks
– Clear blockages in the wand, hose, U-bend, and cleaner head
– Clean and fully dry filters; brush the cyclone shroud
– Inspect and replace worn seals, cracked wands/hoses, or damaged heads
– Use the maintenance habits to prevent clogs and relief venting
Don’t let diverted airflow sideline your cleaning. Work through the methods in order, and you’ll get full suction at the floor again fast.
Have you fixed your Dyson vacuum sucking from the top? Share what worked for your model in the comments to help other readers. Found this helpful? Bookmark it for your next tune-up. If you’re still stuck, describe your exact model and symptoms for tailored advice.