
Your Dyson vacuum’s start button not working is incredibly frustrating—especially when you’ve got a mess to clean and nothing happens when you pull the trigger or press the power button. The quick fix in many cases: fully charge the battery, clean the trigger/button area, and hard reset the machine. For cordless models, reseat or replace the battery if it’s worn out; for corded models, check the power and thermal cutout.
This comprehensive guide will walk you through all the common causes and proven solutions for Dyson vacuums (V6, V7, V8, V10, V11, V15, Gen5 Detect, Outsize, Ball/UpRight corded models). By the end, you’ll know exactly how to diagnose whether it’s a simple blockage, a worn trigger, a battery fault, or a PCB issue—and what to do next to get your Dyson running.
Common Causes of a Dyson Start Button Not Working
- Battery is depleted, faulty, or not seated properly (cordless models)
- Trigger switch or power button stuck due to dust/debris
- Bin, filter, or attachment not seated, tripping the safety interlock
- Thermal cutoff activated from overheating due to blockages
- Charging dock or charger malfunction
- Motorhead or wand connection not making contact
- Faulty microswitch or internal wiring failure
- Moisture ingress or corrosion on contacts
- Firmware or electronics fault (on newer models with LEDs/diagnostics)
How to Fix a Dyson Vacuum Start Button Not Working
Method 1: Quick Checks and Resets (Fastest)
Diagnosing the Issue
- Does any light blink when you press the trigger or button?
- Is the vacuum completely dead (no lights, no sound)?
- Does the bin or filter feel loose or misaligned?
Fix Steps
-
Power reset (2 minutes)
– Cordless: Remove the battery (if removable), wait 30 seconds, reseat firmly. If non-removable (e.g., V11/V15), remove the wand and bin, then reassemble to reseat connections.
– Corded: Unplug for 60 seconds. Hold the power button down for 10 seconds while unplugged, then plug back in. -
Fully charge
– Place on the charger until the light shows fully charged. Most Dysons need 3.5–5 hours.
– Important: If the light flashes rapidly or never turns on while charging, switch outlets and try a different charger if available. -
Clean and free the trigger/power button
– Use a dry toothbrush or compressed air around the trigger/power button to remove dust buildup.
– Lightly tap around the button to free stuck debris. Do not use liquids. -
Reseat bin, filter, and attachments
– Remove and reinstall the filter(s) until they click. Many models will not start with the filter removed or improperly seated.
– Empty and reinstall the bin; ensure it clicks locked.
– Remove and reattach the wand and motorhead to ensure electrical contacts align.
Testing
- Press the trigger/power button. If the vacuum briefly starts and stops, proceed to Method 2.
- If no lights/no response, go to Method 3 (battery/charger).
Method 2: Fix Overheating and Blockages (Thermal Cutoff)
Overheating can disable power until the unit cools and airflow is restored.
Diagnosing the Issue
- Vacuum runs for a moment, then cuts out.
- Pulsing on/off behavior when pressing the trigger.
- Filter light or airflow indicator illuminates.
- Unit was used for a long session or on high power.
Fix Steps
-
Let it cool down
– Leave the vacuum off for 30 minutes. -
Clear all blockages
– Remove bin and empty.
– Inspect cyclone inlets for clogs.
– Check the wand: look through both ends; push out clogs with a dowel or broom handle.
– Inspect the brush bar and motorhead: remove hair, threads, and debris from the brush and axle areas. Many heads have a coin slot to remove the brush. -
Clean or replace filters
– Wash pre-motor filters under cold water only (no detergent). Squeeze gently until water runs clear. Air-dry for 24 hours until completely dry.
– If your model has a post-motor HEPA filter (e.g., V10+), remove and tap out dust; wash if Dyson specifies. Dry thoroughly.
– Important: Do not operate with damp filters—this can permanently damage the motor. -
Reassemble and test
– Confirm all parts click securely.
Testing
- Start the vacuum. If pulsing or immediate cut-out stops, you’ve fixed airflow. If still dead, proceed to Method 3.
Method 3: Battery and Charger Troubleshooting (Cordless Models)
On cordless Dysons, a bad or uncharged battery is the top reason for a dead trigger.
Diagnosing the Issue
- No lights or a blinking light when pressing the trigger.
- Battery doesn’t hold charge or dies in seconds.
- Charger light does not illuminate, or it blinks error codes.
Common LED cues (may vary by model; check your manual):
– Solid blue while in use: normal
– Flashing blue: no power/low charge or fault
– Flashing red: battery fault
– Solid amber while charging: temperature issue
– Flashing amber: fault or charging problem
Fix Steps
-
Confirm outlet and charger function
– Plug charger into a known-good outlet.
– Try a different Dyson charger with the same voltage if available. If the charger is defective, replace it with a genuine Dyson charger. -
Reseat or replace the battery
– V6–V8: Remove two screws holding the battery; slide out and back in; retighten. If heavily worn (2–5 years old), consider replacement.
– V10–V15/Gen5: Some are internal or bolt-on; follow the user manual for removal. Use only compatible OEM or high-quality replacements. -
Temperature and environment
– Charge and use at room temperature (59–77°F / 15–25°C). If the battery is too cold/hot, it may not start. Let it acclimate for 1 hour. -
Check contacts
– Inspect battery and vacuum contacts for dust/corrosion. Wipe gently with a dry cloth. Do not scrape or use liquids. -
Try without the wand and head
– Attach a simple tool directly to the main body to rule out a motorhead short drawing too much power.
Testing
- Charge fully and test in normal power mode. If red light blinks or the unit remains dead, the battery is likely failing. Replace with a listed-compatible battery (Dyson part numbers vary by model, e.g., V7: 968670-02; V8: 967834-02; V10: 969352-02).
Method 4: Trigger/Button and Safety Interlocks
Physical switches and interlocks can prevent startup if they’re stuck or not engaged.
Diagnosing the Issue
- Trigger feels mushy, sticks, or doesn’t spring back.
- Power button (corded upright/ball) doesn’t click or feels jammed.
- Device only starts when holding parts at certain angles.
Fix Steps
-
Clean around the trigger/power button
– Use compressed air to blow out dust. Tap gently around the housing. Avoid liquids. -
Inspect the trigger spring and linkage (cordless)
– Shine a light into the trigger cavity. If broken or displaced, the trigger assembly may need replacement. -
Check safety interlocks
– Filters: Ensure pre/post filters click into place.
– Bin/lid: Ensure the bin door is fully closed and locked.
– Wand/head: Ensure the wand is fully inserted until it clicks.
– Some models refuse to run with certain accessories off. -
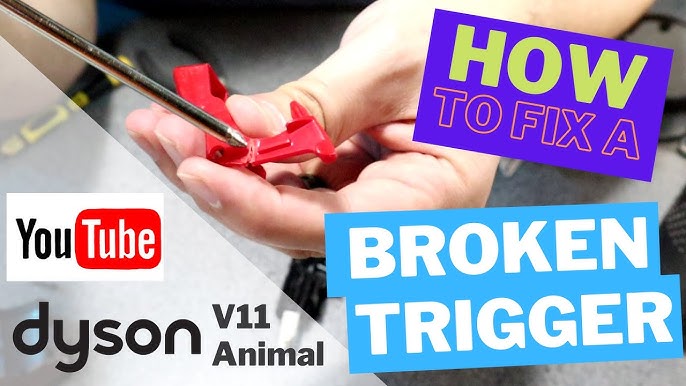
Replace worn trigger or switch
– Many models have replaceable trigger kits or switch boards. Search by model number (e.g., Dyson V7 Trigger 967400-01). If out of warranty, third-party parts exist, but OEM is recommended.
Testing
- After cleaning and ensuring all locks click, press the trigger. If intermittent, move to Method 5.
Method 5: Head, Wand, and Contact Issues
A short in the motorhead or poor contact can make the vacuum seem dead or cut off immediately.
Diagnosing the Issue
- Vacuum runs without the motorhead but stops when it’s attached.
- Brush bar doesn’t spin, and the unit cuts out.
- LED on head flashes (on some models).
Fix Steps
-
Test the main unit alone
– Run the vacuum with a non-powered tool (crevice, dusting brush) directly on the main body. If it works, the issue is in the head/wand. -
Inspect the wand pins and head contacts
– Look for bent or dirty metal contacts. Clean gently with a dry microfiber cloth. -
Clear brush bar and bearings
– Remove the brush bar; cut away hair and fibers. Spin by hand; it should rotate freely.
– Check the end caps for tangled debris and dust. -
Replace the motorhead or wand if faulty
– If the head stalls or shorts, replace with the matching part (e.g., V8 Direct-Drive head 967483-01, V10 Torque Drive 969852-05). Use the exact model-compatible part.
Testing
- Reassemble and test across Low/Med/Boost. If only Boost fails, it can indicate battery health issues.
Method 6: Corded Dyson Models (Ball, Multi Floor, Animal)
If your upright’s power button does nothing, focus on power delivery and thermal protection.
Diagnosing the Issue
- No power and no lights.
- Recently overheated or smelled hot.
- Power turns off mid-use and won’t restart.
Fix Steps
-
Check outlet and cord
– Test another appliance in the same outlet.
– Inspect the power cord for cuts, kinks, or soft spots; cords commonly fail near the plug or handle entry. -
Reset thermal cutout
– Unplug, let cool for 30–60 minutes.
– Clear blockages: hose, wand, brush bar, and cyclone.
– Clean/replace filters. Reassemble fully. -
Brush bar reset
– Many uprights have a brush bar reset button near the head. Press it after clearing tangles. -
Power switch and internal fuse
– If the power button feels broken or loose, the switch may need replacement.
– Cord reels and switches can fail; internal fuses may blow during surges. These typically require professional service.
Testing
- Plug into a known-good outlet and press the power button. If dead, proceed to Professional Help.
How to Prevent Future Start Button Issues
- Charge properly: Avoid storing the battery completely drained; keep it on the dock if recommended.
- Keep filters clean: Wash pre-motor filters monthly (or per model guidance) and replace every 6–12 months if worn.
- Clear brush bar regularly: Remove hair from the roller and end caps every 1–2 weeks.
- Avoid overheating: Don’t block vents; empty the bin before it reaches MAX.
- Dry environment: Keep the vacuum away from moisture; never use wet filters.
- Gentle trigger use: Don’t force the trigger; clean around it periodically.
- Use genuine parts: OEM batteries, filters, and heads help prevent compatibility faults.
Pro Tips
- If your Dyson only runs when the filter is removed, the filter may be saturated—wash and dry it for 24 hours or replace it.
- Flashing red light on cordless Dysons usually means a battery fault; flashing blue can indicate low charge or a connection issue.
- Test the main body without the wand and head to quickly isolate battery/motor vs head issues.
- For V11/V15, Boost mode stresses older batteries—if it dies instantly on Boost but runs on Eco, the battery is near end-of-life.
- If a trigger feels sticky, a very light application of dry PTFE powder on the hinge (applied off-device to a cotton swab) can help; avoid oils or liquids.
- Label your filters with the last wash date to maintain a regular cleaning schedule.
- Store and charge between 59–77°F (15–25°C) to maximize battery lifespan.
When to Call a Professional
- No response after trying new charger and/or battery.
- Persistent error lights even with known-good battery and clean filters.
- Burnt smell, crackling sounds, or visible sparking.
- Physical damage to the trigger, wiring, or PCB.
- Corded units with suspected switch, cord reel, or internal fuse failure.
What to look for in a service provider:
– Dyson-authorized service center or technicians experienced with your exact model.
– Warranty-compatible parts and clear diagnostics.
– Upfront estimates and parts availability.
Typical costs (varies by region/model):
– New charger: $25–$60
– Battery replacement: $50–$150 (model-dependent)
– Motorhead replacement: $80–$180
– Trigger/switch repair: $60–$150
– In-shop diagnostics: $40–$90
Warranty notes:
– Check your Dyson warranty (commonly 2 years for parts/labor, 1–2 years for battery on some models). Using non-OEM batteries can void coverage.
FAQ
Q: My Dyson is dead with no lights. Is it the battery or charger?
A: Test a different outlet and examine the charger light. If the charger shows no light across outlets, the charger may be bad. If the battery never charges or shows flashing red when triggered, the battery is likely faulty. Reseating or trying a known-good charger helps isolate the issue.
Q: The vacuum pulses on and off. Is the start button bad?
A: Pulsing is usually an airflow or blockage issue, not the button. Clean filters, empty the bin, and clear wand/brush blockages. Let it cool and try again.
Q: Can I replace the trigger on a Dyson V7/V8 myself?
A: Yes, with basic tools. You’ll remove the bin and a few screws to access the trigger. Use the correct replacement part for your model and follow a reliable guide. If under warranty, contact Dyson first.
Q: My Dyson only runs without the motorhead attached. Why?
A: The motorhead may be jammed or shorting. Clean the brush bar and bearings, check contacts, and try another head if available. If the main body works with non-powered tools, the head or wand is the issue.
Q: How long should my Dyson battery last?
A: Typically 2–5 years depending on usage, storage temperature, and charging habits. Heavy Boost usage and frequent full discharges shorten lifespan.
Q: What do flashing red or amber lights mean?
A: Flashing red commonly indicates a battery fault. Amber often points to temperature or charging issues. Check your model’s manual for exact codes, but cleaning filters, letting the unit cool, and verifying charger health are first steps.
Q: My corded Dyson won’t power on. What’s the first thing to check?
A: Try a different outlet, inspect the cord for damage, and let the vacuum cool if it overheated. Clear blockages and reset the brush bar if applicable. If still dead, the switch or internal components may need service.
Q: Can moisture cause the trigger or button to fail?
A: Yes. Liquids or damp filters can lead to corrosion and electronic damage. Keep the vacuum dry and ensure filters are fully air-dried for 24 hours before use.
Alternative Solutions
If repairs aren’t economical, consider these options:
| Solution | Pros | Cons | Best For |
|---|---|---|---|
| Replace battery (cordless) | Cheapest fix; restores runtime | May not fix head/switch faults | Units with flashing red or short runtime |
| Replace motorhead | Fixes cutouts due to head faults | Costly; must match model | Units that run without head attached |
| Trade-in/upgrade via Dyson | Discount on new model; warranty | Higher upfront cost | Older units with multiple faults |
| Third-party repair shop | Can fix switch/PCB issues | Variable quality; parts sourcing | Out-of-warranty devices |
Get Your Dyson Working Again
Follow these steps to revive a Dyson vacuum with a start button not working:
– Do quick resets, fully charge, and reseat battery and filters
– Clear blockages and fix overheating; wash and dry filters for 24 hours
– Test without wand/head to isolate motorhead faults
– Diagnose charger vs battery issues; replace failing components
– Inspect and address trigger/power switch and safety interlocks
With careful diagnostics, most no-start issues come down to battery health, airflow blockages, or connection problems—not a catastrophic failure. Try the methods in order, and you’ll likely get your Dyson running again today.
Still stuck? Describe your model (e.g., V8, V11, Ball Animal) and the light behavior in the comments for personalized help. Found this guide useful? Bookmark it for future reference so your Dyson stays in top shape.