
You’re mid-clean, glance at your Dyson, and realize there’s no red light when charging—or it blinks strangely and the vacuum won’t power up. Frustrating. The good news: a missing or blinking red light usually points to a simple issue like a faulty charger, dirty contacts, or a safety cutoff. A quick fix to try first: reseat the battery and charger, clean the charging contacts with a dry cloth, and plug the charger directly into a known-good wall outlet (no power strips). In many cases, the red light returns and charging resumes.
In this guide, you’ll learn exactly what the Dyson vacuum red light indicates (or why it’s missing), the most common causes across models (V6, V7, V8, V10, V11, V15, and others), and step-by-step solutions from the easiest checks to advanced fixes. By the end, you’ll know whether it’s a charger, battery, blockage, or motor issue—and how to prevent it from happening again.
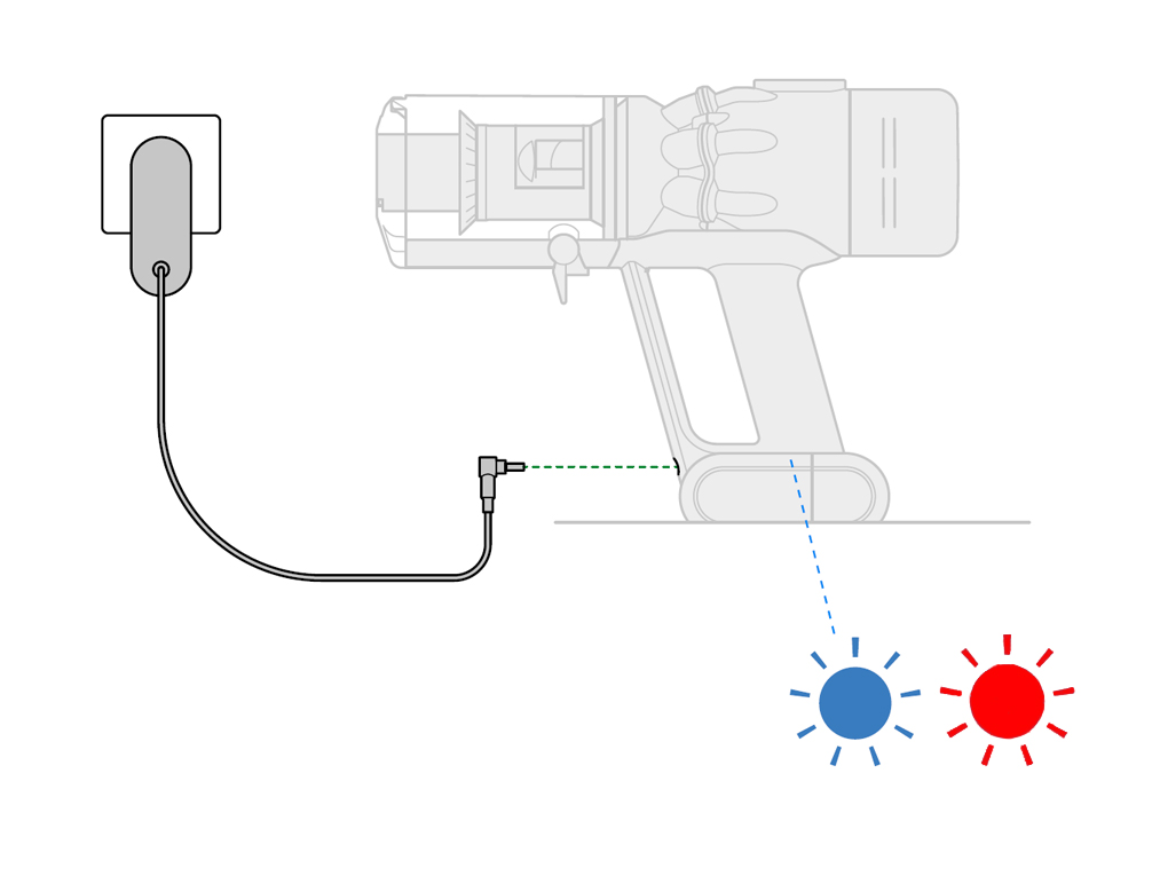
What the Red Light Means on Dyson Vacuums
Dyson stick vacuums use an LED indicator near the battery or handle:
– Solid light (usually blue or white during use): Normal operation.
– Flashing blue light: Low battery or not charging properly.
– Flashing red light: Battery fault or serious error.
– No light during charging: No power to charger, loose connection, dead battery, or defective charger.
– Amber light (on newer models): Temperature or charging status warning.
Important: Different models vary slightly. V7/V8 typically flash red for battery faults, while V10/V11/V15 may show an amber warning for temperature and a red error for faults. Check your model’s manual for exact LED patterns.
Common Causes of Dyson Vacuum Red Light Not Working
No Light at All While Charging
- Outlet or power strip isn’t delivering power
- Charger plug not fully seated into the battery or wall
- Defective or incorrect charger (wrong voltage/brand)
- Dirty or corroded battery contacts
Flashing Red Light
- Battery failure (aged, deep discharged, or faulty cells)
- Battery too hot or too cold to charge
- Internal battery BMS (battery management system) error
Blinks When Trigger Is Pulled (No Power)
- Battery is depleted and not charging
- Blocked airflow causing thermal cutout
- Stuck brush bar or jammed motor head drawing excess current
Intermittent Red or No Light
- Loose battery fitment (worn latch or screws)
- Damaged charge port on dock or wall mount
- Firmware/board issue in the main body (less common)
How to Fix Dyson Vacuum Red Light Issues

Method 1: Quick Power and Connection Checks
Estimated time: 5-10 minutes
Diagnosing the Issue
- Are any lights showing when plugged in?
- Does another device work in the same outlet?
- Has the vacuum recently overheated or been used heavily?
Fix Steps
1) Test the outlet:
– Plug a lamp or phone charger into the same outlet.
– Avoid power strips; plug directly into the wall.
2) Inspect and reseat the charger:
– Unplug the charger from the wall and vacuum.
– Check for frayed cable, bent pins, or burn marks.
– Firmly insert the charger into the vacuum or battery port until it clicks.
3) Clean contacts:
– Power off the vacuum.
– Use a dry microfiber cloth or a cotton swab to clean battery and charger contacts.
– Do not use liquids. If there’s oxidation, gently rub with a pencil eraser, then wipe clean.
4) Try a different outlet and allow 5–10 minutes:
– Look for any LED response (even a brief blink).
Testing
- If the red light appears or the usual charging light returns, let it charge for 2–3 hours.
- If no light appears, move to Method 2.
Method 2: Battery and Temperature Reset
Estimated time: 10–20 minutes
Diagnosing the Issue
- Have you run the vacuum to empty and immediately tried charging?
- Is the battery warm or cold to the touch?
Fix Steps
1) Temperature normalization:
– If the battery is warm after use, let it sit unplugged for 30–60 minutes to cool.
– If it’s cold (stored in a garage or cold room), bring it to room temperature (68–77°F / 20–25°C) for 1–2 hours.
2) Reseat or remove the battery:
– For detachable-battery models (V7+, V8, V10+), press the release button and remove the battery.
– Inspect for swelling, cracks, or leakage. If present, stop and replace the battery.
– Reinstall the battery until it clicks.
3) Safe soft reset:
– Unplug the charger, wait 30 seconds.
– Plug the charger into the wall first, then into the vacuum.
– Leave it connected for 30 minutes even if no light initially shows; some batteries wake from deep discharge slowly.
4) Dock bypass:
– If you use a wall dock, connect the charger directly to the vacuum to bypass dock issues.
Testing
- If you now see charging lights, allow a full charge (3–5 hours depending on model).
- If you get a flashing red light, proceed to Method 3.
Method 3: Clear Blockages and Reset Thermal/BMS Protection
Estimated time: 20–30 minutes
Diagnosing the Issue
- Does the vacuum shut off quickly with a red blink?
- Is suction weak? Is the bin packed or filters dirty?
Fix Steps
1) Empty and clean the bin:
– Remove the bin and clear debris. Avoid overfilling beyond the MAX line.
2) Check for blockages:
– Wand: Detach wand and look through; remove obstructions.
– Cyclone inlets: Inspect and remove any tangled hair or dust clumps.
– Motorhead/brush bar: Remove the floor head, check for wrapped hair or string, and cut away carefully.
3) Clean filters:
– Wash pre-filter (and post-filter if removable) under cold water only.
– Squeeze out excess water and air-dry for at least 24 hours until completely dry before reinstalling.
– Important: Using wet filters can cause motor damage and trigger errors.
4) Reassemble and try again:
– Ensure all seals and parts click firmly into place.
Testing
- Plug in to charge. If the red fault persists or no light shows, go to Method 4.
Method 4: Verify Charger Output and Replace if Necessary
Estimated time: 10–15 minutes
Diagnosing the Issue
- The charger could be under-volting or dead.
Typical Dyson charger ratings:
– V6/V7/V8: ~26.1V DC, 0.78A (varies slightly)
– V10/V11/V15: ~30.45V DC, ~1.1A (varies)
Check the label on your charger for exact specs.
Fix Steps
1) Visual inspection:
– Look for kinks, crushed cable, heat discoloration, loose barrel connector, or audible buzzing.
2) Multimeter test (optional):
– Set to DC voltage; measure output at the charger plug.
– The reading should be close to rated output. If zero or far below spec, replace the charger.
3) Try a known-good charger:
– Borrow or buy an original Dyson charger for your model. Avoid cheap third-party units—they often underperform and can damage the battery.
Testing
- If the vacuum now shows charging lights, the original charger was faulty.
- If still no lights, move to Method 5.
Method 5: Battery Health Check and Replacement
Estimated time: 15–30 minutes (plus charging time)
Diagnosing the Issue
- Flashing red light during charging or use almost always indicates a failing battery on Dyson stick models.
- Batteries typically last 2–5 years depending on use, storage, and charging habits.
Fix Steps
1) Confirm compatibility:
– Identify your model (e.g., V7, V8, V10, V11, V15).
– Purchase an OEM Dyson battery or a high-quality, certified replacement rated for your model and voltage.
2) Remove the old battery:
– Unplug charger, power off vacuum.
– For V7/V8: Remove two screws at the handle and one near the battery base, slide off the battery.
– For V10/V11/V15: Remove screws under the handle and bottom face; gently detach battery.
3) Install new battery:
– Align and slide into place until it clicks; reinstall screws snugly (don’t overtighten).
– Initial charge: Plug in and allow a full, uninterrupted charge cycle.
4) Calibration run (optional but helpful):
– After fully charging, run the vacuum until it stops to calibrate the battery indicator.
– Fully recharge again.
Testing
- Normal charging lights should appear. If a red fault persists even with a new battery and good charger, proceed to Method 6.
Method 6: Inspect the Dock, Latch, and Main Body
Estimated time: 15–25 minutes
Diagnosing the Issue
- Loose mechanical connections or a damaged main board can prevent charging lights.
Fix Steps
1) Dock inspection:
– If using a wall-mounted dock, check the metal spring contacts for alignment and cleanliness.
– Try charging off-dock to isolate dock faults.
2) Battery latch and screws:
– Ensure the battery sits flush with the handle/contacts.
– Tighten screws gently; a loose battery can interrupt charging.
3) Main body faults:
– Rarely, the control PCB in the main body fails. Symptoms include no lights with a known-good battery and charger.
– If under warranty, contact Dyson. Otherwise, professional repair is recommended over DIY board work.
Testing
- If none of the above restores LED behavior, it’s likely a main-body electronics issue.
How to Prevent Future Charging and Red Light Issues
- Use original or Dyson-approved chargers only.
- Keep the battery at room temperature while charging; avoid cold garages or hot sun.
- Don’t store the vacuum fully depleted; recharge after use.
- Clean filters monthly (or as indicated) and allow them to fully dry before reinstalling.
- Clear hair and debris from the brush bar weekly to prevent overcurrent trips.
- Avoid running the vacuum until it hard-stops every time—occasional partial charges are fine for modern Li-ion packs.
- If you won’t use the vacuum for weeks, store the battery at 40–60% charge and recharge monthly.
Pro Tips
- If you see a flashing red light right after washing filters, the filter may still be damp. Dry for a full 24–48 hours.
- A battery that charges only when the handle is jiggled typically indicates a worn latch or poor contact—reseat and tighten screws.
- For V11/V15, the LCD may show error codes. An “X” battery icon often confirms battery replacement is needed.
- Don’t fast-charge with non-Dyson adapters claiming higher amperage—this can degrade cells and void warranties.
- If your charger gets unusually hot to the touch or emits noise, stop using it and replace it.
- Keep vents around the motor and cyclone dust-free to reduce thermal cutouts that can mimic battery issues.
- Label your chargers if you have multiple Dyson products—mixing chargers with different voltages can cause no-light or fault conditions.
When to Call a Professional
- Persistent flashing red light after replacing both charger and battery.
- Visible battery damage (swelling, leaking, cracked casing).
- Burning smell, smoke, or melted plastic anywhere on the device.
- Main body electronics failure (no LED response with known-good parts).
- Under warranty: Always contact Dyson support first to avoid voiding coverage.
What to look for in a service provider:
– Experience with Dyson models V6–V15
– Genuine parts access and warranty on repairs
– Clear diagnostics and cost estimates
Typical costs (varies by region):
– OEM charger: $25–$60
– OEM battery: $60–$150 (larger models cost more)
– Diagnostic/service: $40–$120
– Main body replacement: Often $150–$250+ (consider upgrade vs. repair)
Warranty notes:
– Batteries and chargers may have separate coverage terms. Keep purchase receipts and serial numbers handy.
FAQ
Q: Why is there no red light when I plug in my Dyson?
A: No light usually means no power to the charger, a loose connection, dirty contacts, or a dead charger. Try a different outlet, reseat the plug firmly, clean contacts, and test with a known-good Dyson charger.
Q: What does a flashing red light mean on Dyson stick vacuums?
A: Typically a battery fault. It can also indicate temperature or protection errors on newer models. If it persists after cooling and reseating, the battery often needs replacement.
Q: Can I fix a Dyson battery that won’t charge?
A: If it’s deeply discharged, sometimes leaving it on a genuine charger for 30–60 minutes can “wake” it. However, most non-charging batteries need replacement. Avoid jump-start hacks—they’re unsafe and can cause fires.
Q: My Dyson works for a few seconds and stops with a blink. Is that the battery?
A: Possibly, but also check for blockages, dirty filters, and a jammed brush bar. Overcurrent or overheating can trigger a protection cutoff that looks like a battery fault.
Q: How long should I charge a Dyson battery?
A: Typically 3–5 hours for a full charge depending on model. Leave it on the charger until the indicator shows full or turns off (model-dependent).
Q: Is it safe to use third-party batteries?
A: Some high-quality third-party batteries are fine, but cheap units can be unsafe and may not communicate correctly with Dyson electronics, causing errors. Use OEM or reputable brands with protections and good reviews.
Q: Why did my Dyson stop showing any lights after a filter wash?
A: The filter may still be wet or moisture may be present. Remove the filter, let it dry completely for 24–48 hours, and try again. Moisture can trigger faults or prevent startup.
Q: Do I need the wall dock for charging?
A: No. You can charge directly using the barrel-plug charger. If the dock is faulty, bypass it to test charging.
Alternative Solutions
If repeated issues persist or repair costs climb, consider these options:
| Solution | Pros | Cons | Best For |
|---|---|---|---|
| OEM Battery Replacement | Highest compatibility and safety | Higher cost | Users keeping their current Dyson for years |
| High-Quality Third-Party Battery | Lower cost, decent performance | Potential compatibility issues, warranty risk | Budget-conscious users out of warranty |
| Upgrade to Newer Dyson Model | Better runtime, features, warranty | Most expensive | Heavy users needing reliability and longer battery life |
| Professional Repair Service | Expert diagnostics, warranty on work | Service fees, downtime | Users unsure of root cause |
Get Your Dyson Vacuum Working Again
By following this Dyson vacuum red light troubleshooting guide, you can quickly restore charging and performance:
– Check outlet, charger, and clean contacts
– Normalize battery temperature and reseat components
– Clear blockages and clean filters thoroughly
– Test with a known-good genuine charger
– Replace a failing battery with an OEM or trusted equivalent
– Inspect dock, latches, and consider main body diagnostics if needed
Don’t let a missing or flashing red light sideline your cleaning routine. Work through these steps in order, and you’ll resolve most charging and power issues at home.
Have you fixed your Dyson vacuum red light issue? Share what worked for you in the comments to help other readers. Found this helpful? Bookmark it for future reference.