
Seeing your Dyson vacuum flashing a red light can be frustrating, especially when you just want to clean and get on with your day. The quick fix in many cases is a battery reset: remove the battery (if your model allows), wait 60 seconds, reseat it firmly, and fully charge the vacuum for 3.5–5 hours using the original Dyson charger. If the red light continues to flash—especially rapidly—it often indicates a battery fault that may require replacement.
In this guide, you’ll learn what the flashing red light means on popular Dyson cordless models (V6, V7, V8, V10, V11, V15, and Gen5), how to diagnose the exact cause, and step-by-step solutions from simple checks to advanced fixes. We’ll also cover maintenance tips to prevent future issues, when to call a professional, and FAQs to get your Dyson running reliably again.
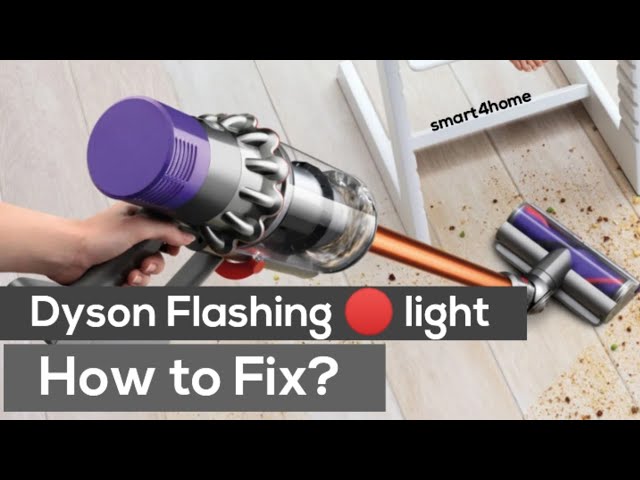
Common Causes of a Dyson Vacuum Flashing Red Light
- Low battery or deep discharge: Battery drained too far and needs a long, uninterrupted charge.
- Faulty or worn-out battery: Lithium-ion cells degrade after 2–5 years or 300–500 cycles; flashing red often signals failure.
- Charger or dock issue: Non-original chargers, damaged cables, or dirty charging contacts prevent proper charging.
- Blockage or overheating: Obstructions cause overheating; some models flash red or amber and cut power.
- Filter issues: A saturated or wet filter can trigger protection modes and error lights.
- Motherboard or connector fault: Internal wiring or PCB issues can mimic battery faults.
- Firmware/logic glitch (newer models): Rare, but a power-cycle or battery reseat can clear it.
Important: On most Dyson cordless vacuums, a single or repeated flashing red light commonly indicates a battery fault. A steady red or amber can point to overheating or charging problems. Check your model’s manual for exact light codes.
How to Fix a Dyson Vacuum Flashing Red Light

Method 1: Quick Diagnostics and Power Reset
Time: 5–10 minutes
Diagnosing the Issue
- Count the flashes: Some models flash a specific number to indicate errors (e.g., continuous flashing = battery fault).
- Note behavior: Does it flash while charging, only when trigger is pressed, or immediately on start?
Fix Steps
- Turn off and unplug the charger.
- Remove the battery (if removable; V7, V8, V10, V11, V15 often have screws; newer click-in batteries detach with a button).
- Hold the trigger/power button for 10–15 seconds to discharge residual power.
- Clean battery and tool contacts with a dry microfiber cloth.
- Refit the battery securely (listen/feel for a click).
- Plug in using the original Dyson charger and charge for a full cycle:
– V6/V7/V8: ~3.5 hours
– V10/V11/V15: ~4–5 hours - Test on Low/Eco mode first.
Testing
- If the light still flashes red repeatedly and the vacuum won’t run, proceed to Method 2 or 3.
- If it runs briefly and stops, check for blockages and filter status (Method 2).
Method 2: Fix Charging and Overheating Causes
Time: 15–25 minutes
Diagnosing the Issue
- Red light appears under load? Likely blockage/overheating.
- Red flashes only when on charger? Likely charger, dock, or contact issue.
Fix Steps
- Verify charger:
– Use the original Dyson charger with matching voltage/amperage.
– Inspect for frayed cables, bent pins, or burn marks.
– Try a different wall outlet (avoid power strips initially). - Clean charging contacts:
– On the battery and dock, wipe with isopropyl alcohol (70%+) on a cotton swab; let dry completely. - Clear blockages:
– Remove wand, bin, and floor head.
– Look through the wand and inlet; clear debris.
– Check brush bar for hair wraps; cut away carefully. - Check and clean filters:
– Pre-filter (purple cone) on V7/V8; pre+post HEPA on V10+.
– Rinse with cold water only; no detergents. Squeeze excess water.
– Air-dry 24 hours minimum until completely dry. Do not reinstall a damp filter. - Cool down:
– If the vacuum feels warm, let it cool for 30 minutes before testing.
Testing
- Reassemble and try Eco/Low mode first. If the flashing red still persists without running, the battery may be at end of life.
Method 3: Evaluate and Replace the Battery
Time: 10–30 minutes (plus charging time)
Cost: $35–$120+ depending on model and capacity
Important: A rapidly flashing red light on many Dyson models is the battery’s built-in protection indicating failure. Batteries are consumables and often need replacement after 2–5 years.
Diagnosing the Battery
- Age: If your Dyson is 2+ years old and performance has dropped, suspect the battery.
- Charge duration: If it charges to “full” in minutes or never reaches full, the pack may be degraded.
- Behavior across modes: If it shuts off instantly on Max/Boost but runs briefly on Eco, the battery likely can’t supply peak current.
Fix Steps
- Confirm your model and battery type:
– V6/V7/V8 typically use screw-in packs.
– V10/V11/V15/Gen5 often use click-in packs (Dyson genuine recommended). - Purchase a compatible replacement:
– Prefer genuine Dyson or reputable third-party with UL certification, overcurrent/overheat protection, and 1-year warranty. - Remove old battery:
– Unplug charger. Remove bin if required (varies by model).
– For screw-in packs (V7/V8): Unscrew the two bottom screws and one at the handle; slide battery out.
– For click-in packs: Press the release button and pull out. - Install new battery:
– Slide until it clicks or align screws and tighten just snug (do not overtighten). - Fully charge before first use:
– Charge uninterrupted to 100% (3.5–5 hours depending on model).
Testing
- Run in Eco first, then Normal/Auto, then Boost. If the red light is gone and runtime is restored, the issue is resolved.
Method 4: Inspect Motorhead, Trigger, and PCB Connections
Time: 20–40 minutes
If a new or known-good battery still triggers a flashing red light, look for connection or control faults.
Diagnosing the Issue
- Wiggle test: If power cuts when moving the wand or head, suspect a loose connector.
- Works with handheld tools but not with the floor head? The motorized head or neck wiring may be shorting.
Fix Steps
- Check the wand connectors:
– Inspect the three-pin connectors for corrosion or bent pins; clean gently. - Test without the wand:
– Attach a small tool directly to the motor unit. If it works, the wand or head is at fault. - Inspect trigger switch:
– If the trigger feels sticky or inconsistent, it may be failing. Contact Dyson support for parts. - PCB/Main board:
– Advanced: If comfortable and out of warranty, inspect for burnt components or broken solder joints. Otherwise, seek professional service.
Testing
- Reassemble and test across modes. If red flashing persists with known-good components, professional diagnosis is recommended.
How to Prevent Future Flashing Red Light Issues

- Charge correctly: Use only the original or certified charger, and allow full charges.
- Store properly: Keep between 39–77°F (4–25°C). Avoid garages or hot cupboards.
- Don’t run to empty every time: Recharge when you notice performance dipping; avoid deep discharges.
- Clean filters monthly (more often with pets): Always dry 24 hours before use.
- Clear brush bars regularly: Hair wraps strain the motor and battery.
- Avoid blocking airflow: Empty the bin at the MAX line to prevent overheating.
- Rotate batteries (if you have two): Keeps cycle counts lower per pack.
Model-Specific Notes: Dyson Red Light Indicators

- V6/V7/V8: Rapid flashing red usually indicates a battery fault. Blue flashing often means charging; solid blue indicates running. Filter or blockage can cause pulsing and cut-out.
- V10/V11/V15/Gen5: On-screen/error lights may include red/amber for battery or temperature issues. Click-in batteries are common and easy to swap. Overheat will sometimes show an amber light and message.
- Corded uprights/balls: Red lights are less common; if present, they usually relate to brush bar jam or thermal cutout.
Always consult your model’s user manual or Dyson’s support site for the exact light code definitions.
Pro Tips
- Keep a spare filter: Rotate filters so you always install a completely dry one.
- Use Auto/Medium for daily cleaning: Reduces stress on the battery compared to Boost/Max.
- Charge after each session: Short top-ups are fine for lithium-ion batteries.
- Avoid third-party high-capacity packs without proper certifications: They can run hotter and reduce lifespan if poorly designed.
- Clean the dock contacts twice a year: Dust buildup can slow charging.
- Don’t store the vacuum fully discharged: Store around 40–60% if not used for weeks.
- If traveling or moving: Remove click-in battery to prevent accidental activation.
When to Get Professional Help
- Persistent flashing red after battery replacement and full diagnostics.
- Visible damage: swollen battery, burnt smell, melted plastic, scorched connectors.
- The vacuum trips breakers or gets excessively hot quickly.
- Water damage: If the vacuum or battery got wet, do not attempt to use it.
- Warranty status: If within Dyson’s 2-year warranty (varies by model/region), contact Dyson first.
What to look for in a service provider:
– Authorized Dyson service or reputable repair shop with parts warranty (90+ days).
– Clear diagnostic fee and quote before repair.
– Use of genuine or certified parts.
Typical costs:
– Genuine battery: $60–$120+
– Third-party battery: $35–$80
– Motorhead replacement: $60–$150
– PCB or internal wiring repair: $80–$200+ (labor-dependent)
Warranty considerations:
– Opening the motor unit or using non-genuine parts may void warranty. Always confirm with Dyson support.
FAQ
Q: What does a Dyson flashing red light mean?
A: On most Dyson cordless vacuums, a flashing red light indicates a problem with the battery—often a fault or end-of-life condition. It can also signal overheating, charging issues, or blockages on some models. Check your manual for model-specific codes.
Q: Can I fix a flashing red light without replacing the battery?
A: Sometimes. Try a power reset, clean contacts, ensure you’re using the original charger, remove blockages, and wash/dry filters. If the light persists, the battery is likely failing and needs replacement.
Q: How long do Dyson batteries last?
A: Typically 2–5 years or 300–500 charge cycles, depending on usage, storage temperature, and how often you use Boost/Max mode.
Q: Is it safe to use third-party batteries?
A: Many work fine, but choose certified packs with overcurrent/overheat protection and solid reviews. Be aware of potential warranty implications and safety risks with low-quality packs.
Q: My Dyson runs for a few seconds then flashes red and stops. Why?
A: This commonly indicates a weak or failing battery that can’t provide the required current, especially in higher modes. It can also be severe blockage or a damp filter causing overcurrent and thermal protection to kick in.
Q: The red light flashes while on the charger. What should I do?
A: Verify you’re using the correct charger, try a different outlet, and clean charging contacts. If it still flashes, the battery may not accept charge and likely needs replacement.
Q: After washing the filter, it still flashes red. Did I damage it?
A: If the filter is even slightly damp, the vacuum may detect moisture and cut power or show error lights. Let it dry at least 24 hours (sometimes 48 in humid climates) before reinstalling.
Q: Can a faulty motorhead cause a red light?
A: Indirectly, yes. A shorted or jammed motorhead can draw excess current, triggering protection that presents as an error light and shutoff. Test the vacuum with a non-motorized tool attached to isolate the issue.
Alternative Solutions
When repair isn’t cost-effective or the main fix doesn’t work, consider alternatives.
| Solution | Pros | Cons | Best For |
|---|---|---|---|
| Genuine Dyson battery replacement | Reliable, safe, best performance | Higher cost | Users within budget wanting OEM quality |
| Certified third-party battery | Lower cost, similar runtime | Potential warranty issues, variable quality | Out-of-warranty units needing value |
| Send to Dyson service | Professional diagnosis, warranty-safe | Turnaround time, labor costs | Complex issues beyond battery |
| Upgrade to newer model | Improved runtime, features, warranty | Highest cost | Old units with multiple failing parts |
Get Your Dyson Working Again
By following this guide, you now have multiple ways to fix a Dyson vacuum flashing red light:
– Quick reset and contact cleaning
– Charger, blockage, and filter checks
– Battery diagnosis and replacement
– Connection and accessory isolation tests
– Prevention practices to extend battery life
Don’t let a flashing red light stop your cleaning routine. Start with the simple checks, then move to battery replacement if needed, and you’ll likely restore your Dyson in under an hour.
Have you solved your Dyson vacuum flashing red light issue? Share what worked for your model in the comments to help others. Found this helpful? Bookmark it for future reference. If you’re still stuck, describe your model and symptoms for personalized advice.