
If your Dyson V7 battery is not charging, you’re not alone—and it’s incredibly frustrating when your vacuum won’t power up. The quickest fix is often to reseat the charger and clean the battery and charger contacts. Unplug the charger for 60 seconds, wipe the metal contacts on both the battery and charger, and ensure the charger LED turns on when plugged in. In many cases, this simple reset and contact cleaning solves the issue.
In this comprehensive guide, you’ll learn all the common reasons a Dyson V7 battery won’t charge and how to fix each one, step by step. We’ll cover quick checks, charger and battery diagnostics, LED error patterns, soft resets, replacing the battery, and preventative tips to keep your V7 running smoothly. By the end, you’ll know exactly how to get your Dyson V7 charging again—or when it’s time to replace parts or call for service.
Common Causes of Dyson V7 Not Charging
- Dirty or oxidized battery/charger contacts: Dust or corrosion blocks proper contact.
- Faulty wall outlet or power adapter: No or unstable power from the outlet or charger.
- Incorrect dock mounting: Wand/dock alignment prevents proper connection.
- Overheated battery or charger: Thermal protection halts charging.
- Battery age and cycle wear: Lithium-ion cells degrade over 2–5 years of use.
- Firmware/logic lockout: A protection state after a fault or deep discharge.
- Faulty battery or BMS (Battery Management System): Internal failure preventing charge.
- Broken charge cable or bent pins: Physical damage to the charger or port.
- Blocked airflow/clogged filters causing overheating: System overheats, preventing charge.
- Moisture ingress: Humidity or spills causing electrical issues.
How to Fix a Dyson V7 That Won’t Charge
Method 1: Quick Checks and Soft Reset (5–10 minutes)
Diagnosing the Issue
Start with the simplest possible causes—most no-charge cases are due to contact issues, a bad outlet, or a soft lockout.
Fix Steps
- Verify outlet and power:
– Plug a lamp/phone charger into the same outlet.
– If using a power strip, plug directly into the wall. - Inspect charger LED:
– When you plug the charger into the wall (without the vacuum connected), the charger LED should briefly light. If there’s no light at all, suspect the adapter. - Reseat and clean contacts:
– Unplug the charger from the wall.
– Remove the V7 from its dock or unplug the charger lead from the battery.
– Wipe the metal contacts on the battery and charger plug with a dry microfiber cloth. If there’s oxidation, lightly rub with a pencil eraser, then wipe clean.
– Important: Do not use liquids or sprays on electrical contacts. - Reconnect and time it:
– Plug the charger back into the wall, then connect to the V7 battery.
– Ensure the plug is fully seated—push until it clicks.
– Leave it connected for at least 30 minutes, even if the LED doesn’t appear right away. - Soft reset the vacuum:
– Remove the charger.
– Hold the trigger for 10 seconds to drain residual power.
– Release, then reconnect the charger and check for charge indicator behavior.
Testing
- Check the battery LED on the V7:
- Solid blue while charging = normal.
- Flashing blue = not charging properly; proceed to Method 2.
- Solid amber = temporary fault (temperature or short-term issue).
- Flashing red or amber = persistent fault; see Method 3–4.
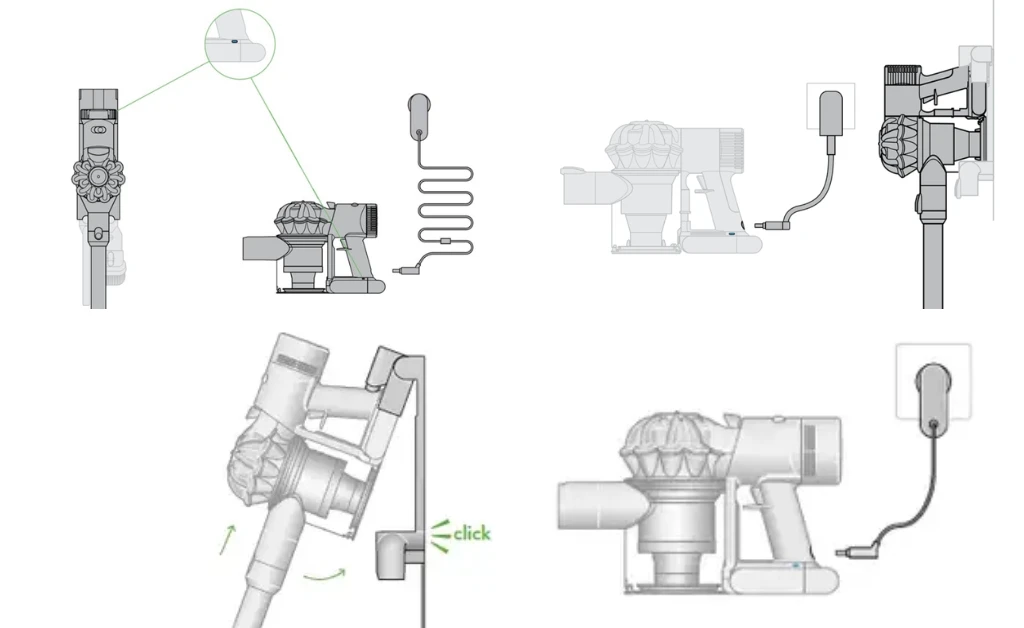
Method 2: Check Charger, Dock, and Alignment (10–15 minutes)
Diagnosing the Issue
Misalignment or a faulty charger prevents power flow. The V7 can be charged via the wall dock or directly with the plug into the battery. Test both if possible.
Fix Steps
- Bypass the wall dock:
– Remove the vacuum from the dock.
– Plug the charger directly into the battery port.
– If it now charges, your dock alignment or dock wiring is the issue. - Test another outlet:
– Try a different wall socket on a different circuit. - Check for physical damage:
– Examine the charger cable for splits, kinks, or crushed points.
– Inspect the charger plug pins for bending or discoloration.
– Look into the battery port for debris; gently blow out dust. - Verify dock mounting:
– If you must use the dock, confirm it’s tightly screwed to the wall and the vacuum sits flush with contacts aligned.
– Ensure the wand is fully clicked in—loose fit can affect docking angle. - Charger spec check:
– The Dyson V7 charger typically outputs ~26.1V DC, 780mA (varies by region). If using a replacement, match voltage and connector type.
Testing
- If the charger LED never lights or gets hot quickly, replace the charger.
- If the charger works on another Dyson (V7/V8 compatible in many regions), your original battery is likely at fault.
Method 3: Temperature and Protection States (15–30 minutes)
Diagnosing the Issue
Lithium-ion packs won’t charge if they’re too hot or too cold, or if the Battery Management System (BMS) has triggered a temporary fault.
Battery LED indicators (typical for V7):
– Solid blue while charging: normal.
– Flashing blue: Not charging; check connections or power.
– Solid amber: Temperature issue or temporary fault.
– Flashing red: Battery fault; service or replacement needed.
– No light: Deep discharge, faulty charger, or battery failure.
Note: LED behavior can vary slightly by batch/region; refer to Dyson’s quick-start guide if available.
Fix Steps
- Normalize temperature:
– Move the vacuum and charger to a room between 60–75°F (16–24°C).
– Let the battery rest unplugged for 30–60 minutes. - Clear thermal/logic lock:
– Unplug the charger.
– Hold the trigger down for 10 seconds to fully discharge capacitors.
– Release, then reconnect charger and watch the LED for 30 seconds. - Check for airflow blockages:
– A clogged filter makes the unit run hot, triggering thermal protection.
– Remove and wash the pre-motor filter (purple cone filter) under cold water until clear, squeeze out, and let it dry 24 hours completely.
– Important: Never charge or run the V7 with a wet filter installed. - Try a long trickle recovery:
– Leave the charger connected for 3–4 hours even if the light doesn’t engage immediately. Deeply discharged packs can take time to wake.
Testing
- If the light transitions to solid blue, charging has resumed.
- If you repeatedly get solid amber or flashing red after temperature normalization, the battery may be failing.
Method 4: Battery Health Check and Replacement (20–40 minutes)
Diagnosing the Issue
V7 batteries typically last 2–5 years depending on use. Rapid flashing red, no LED, or very short runtime indicates cell degradation or BMS failure.
Signs your V7 battery needs replacement:
– Flashing red LED when attempting to charge or run.
– Charges to full quickly but runs for less than 1–3 minutes.
– No response to charger with a known-good adapter.
– Bulging/swollen battery casing or unusual heat.
Fix Steps
- Confirm with another charger (if available):
– Borrow a compatible Dyson charger (V7/V8). If still no charge, it’s likely the battery. - Purchase a compatible battery:
– Choose OEM Dyson V7 battery for best reliability and safety.
– If selecting third-party, match voltage/capacity, ensure integrated protection circuit, and check reviews and warranty. - Replace the battery:
– Important: Unplug the charger before starting.
– Remove the dust bin canister: press the red lever to open, then remove the bin.
– Unscrew the two Phillips screws holding the battery (one at the handle base, one underneath near the front).
– Slide out the old battery.
– Slide in the new battery and reinstall screws snugly (do not overtighten).
– Reattach the bin. - First charge and calibration:
– Charge fully for at least 3.5 hours until the LED indicates full.
– Run the vacuum normally to verify runtime.
Testing
- The V7 should show solid blue while charging and reach full charge in about 3–4 hours.
- Runtime should match your mode (up to ~30 minutes in standard with non-motorized tools; less in Max/Boost).
Method 5: Addressing Overheating, Filters, and Blockages (15–30 minutes)
Diagnosing the Issue
If your V7 overheats, the system can refuse to charge until temperatures normalize. Overheating is often due to restricted airflow.
Fix Steps
- Clean the filters:
– Pre-motor filter: Rinse under cold water until clear; air dry 24 hours.
– HEPA/post-motor filter (if your model has it): Tap out dust; if washable, rinse lightly and dry 24 hours. - Clear blockages:
– Remove the wand and check the inlet and floor head for clogs.
– Inspect the brush bar for hair wraps; cut away carefully. - Inspect vents:
– Ensure motor vents are dust-free; gently brush or blow dust away. - Cool down:
– Let the unit rest at room temperature for at least 30 minutes before retrying charge.
Testing
- After cleaning and cooling, reconnect the charger and check for solid blue charging light.
How to Prevent Future Charging Issues
- Keep contacts clean: Wipe battery and charger pins monthly with a dry cloth.
- Charge at room temperature: Avoid charging in garages or near heaters.
- Don’t store fully drained: After use, put the V7 back on charge; avoid deep discharges.
- Clean filters monthly: Dirty filters cause overheating and premature battery wear.
- Avoid constant Max/Boost: Use only when needed to prolong battery cycles and heat stress.
- Use the OEM charger: Cheap adapters can damage the battery or charge slowly.
- Store between 40–80% if not using for weeks: Charge for 1–2 hours every month to maintain health.
Pro Tips
- If the battery is deeply discharged, leave it connected for several hours—sometimes the LED wakes late.
- Mark the install date on a new battery; typical lifespan is 2–3 years with regular use.
- For wall docks, use solid anchors and ensure a straight vertical mount to avoid poor contact alignment.
- If you switch to a high-capacity third-party battery, expect slightly longer charge times and added weight.
- Keep firmware quirks in mind: A long trigger hold (10–15 seconds) can clear minor logic faults.
- Never cover the vacuum or charger during charging; it traps heat and shortens battery life.
- Watch for heat: If the charger or battery gets too hot to touch, unplug immediately and inspect.
When to Call a Professional
- Persistent flashing red LED after trying a known-good charger and cleaning contacts.
- Battery swelling, chemical smell, or visible damage. Stop using immediately.
- The vacuum cuts out quickly even with a brand-new OEM battery—possible mainboard or motor issue.
- Charger shows no power and you’ve verified the outlet—replace or contact Dyson.
- Under warranty: Dyson typically offers 2-year warranties; check your purchase date and contact Dyson Support before buying parts.
Typical costs:
– OEM Dyson V7 battery: $60–$100+
– Third-party compatible battery: $25–$60 (quality varies)
– OEM charger: $30–$50
– Professional service: $50–$120 depending on region and issue
Warranty considerations:
– Using non-OEM batteries may affect warranty coverage. If you’re within warranty, contact Dyson Support first.
FAQ
Q: Why is my Dyson V7 light flashing blue but not charging?
A: Flashing blue typically indicates the battery isn’t receiving proper power. Clean the battery and charger contacts, try a different outlet, and bypass the dock by plugging the charger directly into the battery. If that fails, test with another charger or consider a battery replacement.
Q: How long should a Dyson V7 battery last?
A: With normal use, expect 2–5 years depending on cleaning frequency, heat exposure, and use of Boost mode. Runtime per charge is up to ~30 minutes in standard mode with non-motorized tools, and significantly less in Max/Boost.
Q: What does a flashing red light mean on the V7?
A: Flashing red usually indicates a battery fault. Try a soft reset and temperature normalization. If it persists with a known-good charger, the battery likely needs replacement.
Q: Can I leave my Dyson V7 on the charger all the time?
A: Yes. The BMS stops charging at full and maintains the battery safely. Avoid hot environments and ensure adequate ventilation during charging.
Q: Does a clogged filter affect charging?
A: Indirectly. Clogged filters cause the vacuum to overheat, which can trigger thermal protection that prevents charging until the unit cools.
Q: How do I know if the charger is bad?
A: If the charger LED never lights, gets unusually hot, or doesn’t charge a known-good Dyson battery, it’s faulty. Testing on another V7/V8 or using a multimeter to check for ~26V DC output can confirm.
Q: Is it safe to use third-party batteries?
A: Many work fine, but quality varies. Choose reputable brands with protection circuitry, proper voltage, and good reviews. OEM offers the best compatibility and safety.
Alternative Solutions
If your V7 is older and needs both a battery and charger, or you’re seeking longer runtime, consider these options:
| Solution | Pros | Cons | Best For |
|---|---|---|---|
| OEM Dyson V7 battery + charger | Maximum compatibility, safest choice, expected performance | Higher cost | Users within warranty or prioritizing reliability |
| High-capacity third-party battery | Longer runtime, lower cost | Heavier, variable quality, possible warranty impact | Budget users needing more run time |
| Upgrade to newer Dyson (V8/V10) | Better suction, improved battery tech | Highest cost, new ecosystem | Heavy users or replacing multiple aging parts |
Get Your Dyson V7 Working Again
To recap, you can solve most Dyson V7 battery charging issues by:
– Cleaning and reseating charger/battery contacts and trying a different outlet
– Bypassing the wall dock and inspecting the charger for faults
– Normalizing temperature, soft resetting, and clearing clogs/filters
– Testing with a known-good charger and replacing the battery if needed
Follow these steps in order and you’ll usually restore charging without a service call. Don’t let a stubborn battery sideline your cleaning routine—get your Dyson V7 back on the charger and running at full power today.
Have you successfully fixed your Dyson V7 battery not charging? Share what worked for you in the comments to help other readers. Found this guide helpful? Bookmark it for future reference and pass it along to anyone struggling with their Dyson.