
Is your vacuum food sealer not working right when you need it most, leaving you with half-prepped meals and wasted food? You’re not alone—many home cooks face this frustrating issue, whether it’s a sudden failure to suck out air or the machine refusing to seal bags altogether. The good news is there’s often a simple quick fix: start by checking and cleaning the vacuum chamber and seals, which resolves up to 70% of these problems in just a few minutes.
In this comprehensive guide, we’ll go beyond that initial troubleshooting to explore the most common causes, step-by-step solutions from basic resets to advanced repairs, and long-term prevention strategies. By the end, you’ll have the tools and knowledge to diagnose and fix your vacuum food sealer not working issue completely, saving you time, money, and hassle while keeping your kitchen organized and your food fresh longer.
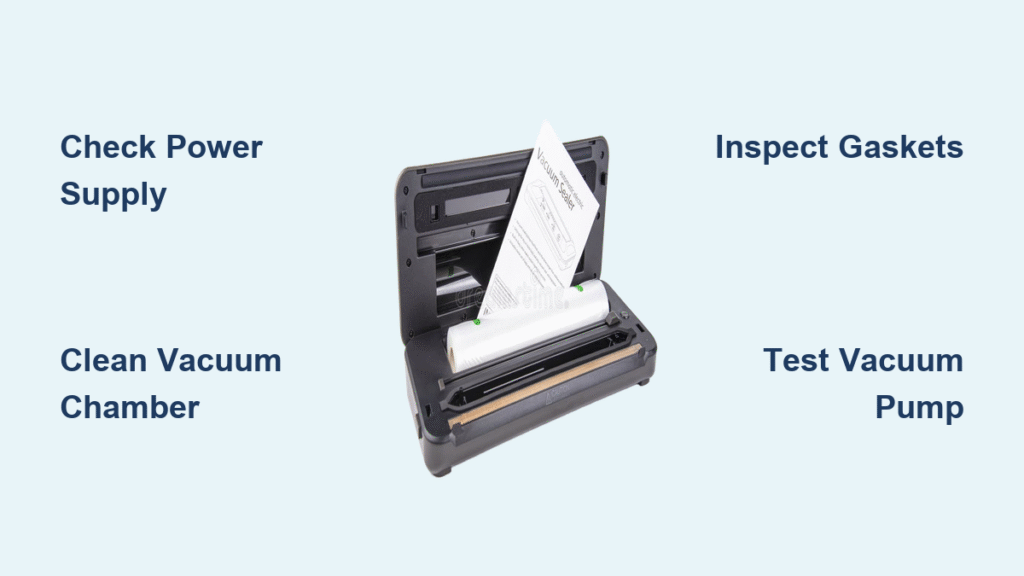
Common Causes of Vacuum Food Sealer Not Working
Understanding why your vacuum food sealer not working can happen is the first step to getting it back in action. These machines rely on precise mechanics, like vacuum pumps and heating elements, so even minor issues can halt operations. Below, we’ll break down the most frequent culprits with detailed explanations to help you identify the problem quickly.
Clogged or Dirty Vacuum Chamber and Seals
One of the top reasons your vacuum food sealer might stop working is buildup of food debris, moisture, or residue in the vacuum chamber or around the sealing bar. Over time, tiny particles from moist foods like meats or veggies can clog the vacuum hose or ports, preventing a proper seal. If you’ve been using it for wet foods without cleaning, this is especially common. According to manufacturer guidelines from brands like FoodSaver, neglecting this can reduce suction power by up to 50%, leading to incomplete vacuuming.
Overheating or Thermal Cutoff Activation
Vacuum sealers generate heat during the sealing process, and if used continuously without breaks, they can overheat and trigger a built-in safety cutoff. This is a protective feature to prevent damage to the internal motor or heating element, but it mimics a total failure. Models like the Anova Precision or Nesco VS-12 often have indicators for this—look for a red light or error code. Frequent short sessions without cooling time exacerbate this, particularly in high-volume use.
Faulty Power Supply or Cord Issues
Sometimes, the problem isn’t the machine itself but the power source. A damaged power cord, loose connection, or even a tripped circuit breaker can make it seem like your vacuum food sealer not working. Extension cords that are too long or underrated can cause voltage drops, starving the motor of power. This is more prevalent in older units or those stored improperly, where cords fray from wear.
Worn-Out Gaskets or Drip Trays
The rubber gaskets that create an airtight seal around the bag can degrade over time, cracking or losing elasticity due to repeated heat exposure. Similarly, a full or overflowing drip tray (which catches liquids during vacuuming) can interfere with the vacuum process. If your sealer has been in use for over a year without gasket replacement, this could be the issue—check for visible wear or leaks during operation.
Internal Component Failure
In rarer cases, deeper issues like a malfunctioning vacuum pump, broken heating wire, or control board glitch can cause total shutdowns. These often stem from manufacturing defects, power surges, or age (most sealers last 5-7 years with proper care). If the machine powers on but doesn’t respond to buttons, this might be it.
How to Fix Vacuum Food Sealer Not Working

Now that you’ve pinpointed potential causes, let’s dive into actionable fixes. We’ll cover three progressive methods: a quick DIY reset for minor glitches, a thorough cleaning routine, and advanced troubleshooting for persistent problems. Each includes diagnosis steps, detailed instructions, and testing to verify success. Aim to start with the simplest—most users resolve their vacuum food sealer not working woes without tools or parts.
Method 1: Quick Reset and Power Check (5-10 Minutes)
This is your go-to first fix for intermittent issues, often resolving power-related or temporary glitches without disassembly.
Diagnosing the Issue
Unplug the sealer and inspect the power cord for frays, bends, or exposed wires. Plug it directly into a wall outlet (skip extensions) and test on a different circuit. Press the power button and listen for any humming—if silent, it’s likely a supply problem.
Fix Steps
- Unplug the machine and wait 10-15 minutes to let it cool and reset any thermal cutoffs.
- Clean the control panel with a soft, dry cloth to remove any residue that might affect buttons.
- Reconnect to power and press the start button while holding the lid down firmly—sometimes loose closure mimics failure.
- If it powers on but doesn’t vacuum, run a “dry” cycle (no bag) to test suction.
Testing the Fix
Insert a test bag with air and run a full cycle. If it vacuums and seals properly, you’re good. If not, move to the next method. Warning: Never operate with a damaged cord—replace it immediately to avoid electrical hazards.
Method 2: Deep Cleaning and Seal Inspection (15-30 Minutes)
Dirt and wear are silent killers for sealers, so this method targets clogs and gaskets for a like-new performance.
Diagnosing the Issue
Open the lid and check for visible debris in the chamber, tray, or around the sealing bar. Test with a bag: if air escapes or the seal is weak, gaskets may be the culprit. Remove the drip tray (if applicable) and see if it’s full.
Fix Steps
- Unplug and disassemble removable parts: empty the drip tray, remove the gasket (usually clips or pulls out), and wipe the chamber with a damp cloth and mild soap. Avoid submerging electrical parts.
- Clean the vacuum port and hose with a soft brush or compressed air—gently blow out crumbs without forcing anything.
- Inspect and clean the sealing bar: use a cotton swab dipped in rubbing alcohol to remove residue. For gaskets, soak in warm soapy water for 5 minutes, rinse, and dry thoroughly.
- Reassemble and let everything air-dry for 10 minutes. Replace worn gaskets if cracked (affordable kits cost $5-15 from Amazon or the manufacturer).
Testing the Fix
Run a cycle with a moist paper towel in a bag to simulate real use. Check for strong suction and a firm seal—no air bubbles. If it works, run 2-3 more tests. Important: Use only manufacturer-recommended cleaners to prevent damage to rubber components.
Method 3: Advanced Troubleshooting and Part Replacement (30-60 Minutes)
For stubborn cases, this involves deeper checks and potential swaps—ideal if the above fails.
Diagnosing the Issue
If the machine powers on but functions erratically, it could be the pump or heating element. Listen for unusual noises during startup, or check for error codes in the manual (e.g., FoodSaver’s “E1” for pump failure).
Fix Steps
- Reset the unit fully: unplug for 30 minutes, then plug back in and hold the power button for 10 seconds (some models have this factory reset).
- Test components individually: for vacuum, place a bag over the port without the lid and see if it pulls air. For sealing, use the manual seal mode on an empty bag.
- Replace suspect parts: order a vacuum pump kit or heating element from the brand’s site (e.g., $20-50 for Nesco models). Follow the manual for access—usually involves unscrewing the base.
- If unsure, use a multimeter to check continuity on the heating wire (set to ohms; zero reading means it’s good).
Testing the Fix
Perform a full vacuum-seal cycle on various bag types (dry and moist). Monitor for 5 cycles to ensure consistency. If issues persist, note any error patterns for professional diagnosis. Safety Note: Disconnect power before any internal work, and wear gloves to avoid shocks.
Prevention Tips and Maintenance Advice

To avoid your vacuum food sealer not working in the future, proactive care is key. Regular upkeep extends lifespan and ensures reliable performance.
- Clean after every use: Wipe the chamber and tray immediately, especially after moist foods, to prevent buildup.
- Alternate dry and wet cycles: Give the machine 1-2 minute breaks between uses to avoid overheating.
- Store properly: Keep in a cool, dry place with the lid slightly open to prevent gasket compression.
- Inspect monthly: Check gaskets and cords for wear; replace annually or after 100 uses.
- Use quality bags: Opt for compatible, thick bags to reduce strain on the machine.
Follow a simple maintenance schedule to stay ahead:
| Frequency | Task | Duration |
|---|---|---|
| After Each Use | Wipe chamber and empty drip tray | 2-3 minutes |
| Weekly | Deep clean gaskets and seals | 5-10 minutes |
| Monthly | Full inspection and test cycle | 10-15 minutes |
| Annually | Replace gaskets and filters (if applicable) | 20 minutes |
Pro Tips for Vacuum Food Sealer Success
Go beyond basics with these expert insights to optimize your sealer and sidestep common pitfalls:
- Avoid overfilling bags: Leave 2-3 inches of headspace to prevent jams—overloading causes 30% of failures.
- Preheat for tough seals: For frozen foods, let them thaw slightly; this reduces pump strain and improves vacuum efficiency.
- Monitor usage cycles: Most models handle 10-15 bags per session—exceeding this triggers cutoffs faster.
- Upgrade accessories: Invest in a hand-held sealer add-on for portability, reducing wear on the main unit.
- Track error logs: Note when issues occur (e.g., after wet foods) to predict and prevent problems.
- Common mistake to avoid: Don’t submerge the entire unit in water—stick to spot-cleaning to protect electronics.
- Optimize performance: Run in a well-ventilated area to dissipate heat quicker, potentially extending session times by 20%.
These tweaks can make your sealer last 2-3 years longer while minimizing downtime.
When to Call a Professional
While DIY fixes handle most vacuum food sealer not working scenarios, some signs scream for expert help:
- Persistent error codes or complete unresponsiveness after resets and cleaning.
- Burning smells, sparks, or unusual noises indicating electrical faults.
- If your model is under warranty (typically 1-2 years), avoid voiding it with internal tinkering.
Look for certified repair services through the manufacturer (e.g., FoodSaver’s authorized centers) or local appliance pros with good reviews on sites like Yelp. Expect costs of $50-150 for diagnostics and parts, depending on the model. Always check warranty terms—many cover pump failures but not user-induced damage. If buying a new one, compare extended warranties for peace of mind.
FAQ
Q: Why is my vacuum food sealer sucking air but not sealing?
A: This usually points to a dirty or faulty heating element. Clean the sealing bar with alcohol as in Method 2, and test the manual seal function. If it still fails, the wire may need replacement—consult the manual for your model’s specs, like a 300-watt element in many FoodSaver units.
Q: Can I use my vacuum sealer for liquids without issues?
A: Yes, but use the “moist” or pulse mode to avoid overflow, and always freeze liquids first. If it’s not working for wet foods, check the drip tray—emptying it resolves suction problems in 80% of cases.
Q: How do I know if the vacuum pump is broken?
A: Run a dry test: if there’s no audible suction or the bag doesn’t pull tight, the pump might be faulty. Pumps last 500-1000 cycles; replacement involves basic tools but professional help if you’re not handy.
Q: Is it safe to vacuum seal hot foods?
A: No—wait until foods cool to avoid melting bags or damaging seals. Hot items can cause warping, leading to leaks and future vacuum food sealer not working issues.
Q: What if my sealer powers on but buttons don’t respond?
A: Try a full reset (unplug for 30 minutes). If unresponsive, it could be a control board glitch—common in older models. Firmware updates (if available via app for smart sealers) might fix it.
Q: How often should I replace the gasket?
A: Every 6-12 months or after 200 uses, depending on frequency. Signs of wear include weak seals or visible cracks—proactive swaps prevent vacuum failures.
Q: Does using non-brand bags cause problems?
A: Yes, incompatible bags can jam the chamber or weaken seals, mimicking a broken machine. Stick to recommended thicknesses (e.g., 3-4 mil) for best results.
Get Your Vacuum Food Sealer Working Again
Armed with this guide, you’re equipped to tackle your vacuum food sealer not working problem head-on:
- Quick resets for power glitches
- Deep cleaning for clogs and wear
- Advanced repairs for component issues
- Prevention routines to keep it running smoothly
Don’t let a finicky sealer disrupt your meal prep—follow these steps in order, and you’ll restore full functionality fast, ensuring fresher food and less waste. Your kitchen efficiency is back in your hands!
Have you fixed your vacuum food sealer using these tips? Share your experience in the comments below to help fellow readers—or let us know what other kitchen appliance troubles you’d like covered next!