
If you’ve ever reached for your central vacuum hose only to find it lifeless and unresponsive, you’re not alone—this is a frustrating issue that can halt your cleaning routine in its tracks. A central vacuum hose not working often stems from simple clogs or connections gone awry, leaving you with a powerless tool when you need it most. The good news? A quick fix like checking and clearing blockages can often restore suction in under 10 minutes, getting you back to spotless floors without much hassle.
In this comprehensive guide, we’ll go far beyond that initial quick fix to explore all the common causes behind a central vacuum hose not working, provide multiple step-by-step solutions from DIY basics to more advanced troubleshooting, and share prevention strategies to keep the problem from recurring. By the end, you’ll have the confidence and tools to diagnose and resolve the issue completely, ensuring your central vacuum system runs smoothly for years to come. Whether you’re dealing with a partial loss of suction or total failure, these actionable steps will empower you to tackle it like a pro.
Common Causes of Central Vacuum Hose Not Working
Understanding why your central vacuum hose isn’t working is the first step to fixing it efficiently. Central vacuum systems, which are installed in walls and powered by a central unit (often in a garage or basement), rely on the hose as the key connection point for suction. When it fails, it’s usually due to everyday wear, user error, or environmental factors. Below, we’ll break down the most frequent culprits with detailed explanations to help you identify the problem quickly.
Clogged Hose or Attachments
One of the top reasons for a central vacuum hose not working is a buildup of debris inside the hose or its attachments. Dust, pet hair, small toys, or even jewelry can get lodged, restricting airflow and reducing or eliminating suction. This is especially common in homes with high-traffic areas or pets, where fine particles accumulate over time. If the clog is near the end of the hose, you might notice weak suction that worsens as you vacuum; deeper blockages can make the hose feel completely dead.
Loose or Damaged Hose Connections
Central vacuum hoses connect to wall inlets via a cuff or adapter, and if this connection is loose, corroded, or damaged, air leaks can occur, causing the hose to lose power. Over time, the plastic or metal fittings can wear out from repeated plugging and unplugging, leading to poor seals. In older systems, mineral buildup from hard water or rust can exacerbate this, making the hose not working a recurring headache.
Issues with the Central Vacuum Unit
Sometimes, the problem isn’t the hose at all but the central power unit itself. If the motor is overheating, the bag is full, or there’s a tripped breaker, the entire system—including the hose—will fail. Electrical issues like faulty wiring or a burned-out motor can mimic hose problems, but these are less common for hose-specific failures. According to the Home Ventilating Institute, central vacuum units should be checked annually to prevent such cascading issues.
Blockages in Wall Inlets or Piping
Debris can travel beyond the hose into the wall inlets or the PVC piping that runs through your home to the central unit. Construction dust during renovations, or even pests like rodents nesting in the pipes, can cause obstructions. This leads to a central vacuum hose not working because the suction path is interrupted, often resulting in unusual noises like whistling or gurgling before total failure.
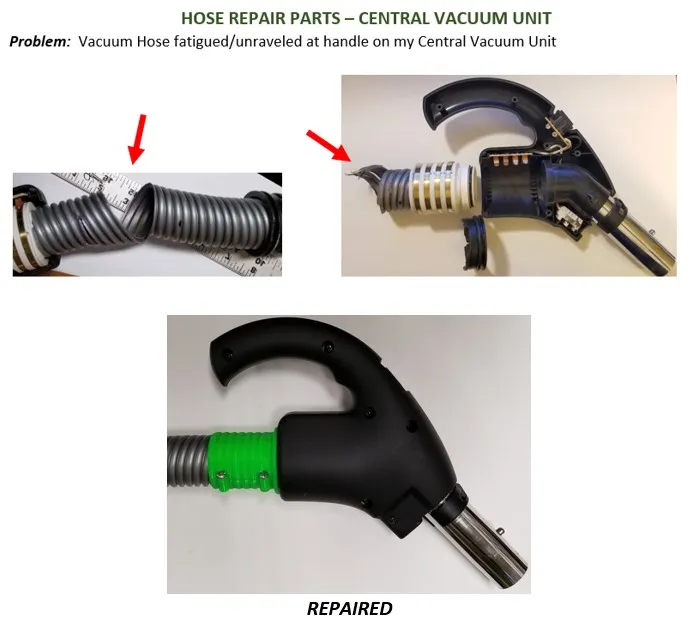
Wear and Tear on the Hose Itself
Hoses aren’t indestructible; cracks, holes, or frayed ends from years of use can cause suction loss. Low-quality hoses or those exposed to extreme temperatures might degrade faster, leading to splits that allow air to escape. If your hose is over 10 years old, natural rubber or plastic fatigue could be the silent culprit behind it not working properly.
How to Fix Central Vacuum Hose Not Working
Now that you’ve pinpointed potential causes, let’s dive into practical solutions. We’ll cover three progressive methods, starting with the simplest DIY fixes and escalating to more involved troubleshooting. Each method includes diagnostic steps, detailed fix instructions, and testing tips. Always unplug the central unit or turn off power at the breaker before starting to avoid electrical hazards. These approaches should resolve most cases of a central vacuum hose not working in 15-60 minutes.
Method 1: Quick Clog Clearance and Connection Check
This is your go-to for the fastest resolution, ideal if the issue is superficial debris or a loose fit. It’s beginner-friendly and requires no special tools.
Diagnosing the Issue
Start by testing suction: Plug the hose into a different wall inlet if possible. If it works there, the problem is inlet-specific. Listen for unusual sounds and feel for airflow at the end of the hose. A sudden drop in power often points to a clog.
Fix Steps
- Disconnect and Inspect: Remove the hose from the wall inlet. Shine a flashlight inside both ends to spot visible blockages like hairballs or dirt clumps.
- Clear the Clog: Use a long, flexible rod like a straightened wire hanger or a vacuum hose cleaning tool (available for $10-20 online) to gently push out debris. For stubborn clogs, attach the hose to a shop vac in reverse mode to blow it out—do this outdoors to avoid mess. Takes about 5-10 minutes.
- Tighten Connections: Wipe the cuff and inlet with a dry cloth to remove dust. Ensure the hose snaps or twists securely into place. If it’s loose, apply a thin layer of silicone lubricant to the fittings for a better seal.
- Test Attachments: Check wands and tools for blockages; disassemble and tap them gently to dislodge debris.
Testing the Fix
Reconnect and vacuum a small area with fine debris like flour on the floor. Full suction should return immediately. If not, proceed to the next method. Warning: Never force tools into the hose, as this can cause tears.
Method 2: Deep Cleaning and Hose Inspection
If the quick fix doesn’t cut it, a thorough clean and visual check can address wear-related issues. This method is great for hoses showing signs of age or heavy use.
Diagnosing the Issue
Run water through the hose (if it’s a wet/dry compatible model) or use compressed air to test for hidden leaks. Look for cracks by flexing the hose and checking under bright light.
Fix Steps
- Full Disassembly: Detach all attachments and lay the hose flat. If it’s a retractable model, extend it fully to access the entire length.
- Deep Clean: Mix a solution of warm water and mild dish soap. Use a bottle brush or hose cleaning kit to scrub the interior, then rinse thoroughly with a garden hose. For drying, hang the hose vertically for 24 hours to prevent mildew. Estimated time: 20-30 minutes.
- Repair Minor Damage: For small cracks, wrap with electrical tape or use a hose repair kit (kits cost $15-25 and include patches). Cut out severely damaged sections with a utility knife and reconnect with hose couplers if you’re handy.
- Check Electrical Components: If your hose has a power head (for carpets), inspect the switch and cord for frays. Replace the cord if needed—most are modular and available from manufacturers like Beam or Nutone.
Testing the Fix
Plug in and run for 5 minutes on a test surface. Monitor for consistent suction and any new noises. If suction builds slowly, the central unit might need attention. Important: Avoid using harsh chemicals, as they can damage the hose material and void warranties.
Method 3: System-Wide Troubleshooting and Inlet Checks

For persistent problems, this advanced method targets the broader system. It’s suitable if you’ve ruled out hose-specific issues.
Diagnosing the Issue
Access the central unit (usually in a utility area) and check the dirt canister or bag for fullness. Use a vacuum pressure gauge (under $20) at the hose end to measure suction levels—normal is 100-150 inches of water lift.
Fix Steps
- Empty and Clean the Central Unit: Turn off power, remove the collection bin, and dispose of debris. Vacuum out the unit’s filter and intake with a separate handheld vac. Replace the filter if it’s clogged (filters last 1-3 years).
- Inspect Wall Inlets and Piping: Remove inlet covers (usually screwed in) and use a flashlight or plumbing snake to check for blockages. For deeper pipe issues, rent an air compressor to blow out the lines—seal other inlets with tape first. This step takes 30-45 minutes.
- Reset Electrical Components: Check the breaker panel for trips and reset if needed. If the unit has a thermal overload switch, let it cool for 30 minutes before retrying.
- Professional-Grade Test: If accessible, verify the motor by listening for humming when powered on without the hose attached.
Testing the Fix
Test across multiple inlets and hose lengths. Full system performance should be restored. If the hose still isn’t working, it may indicate a motor failure—move to professional help. Warning: Working with electrical components requires caution; if unsure, consult an electrician.
Prevention Tips and Maintenance Advice
Preventing a central vacuum hose not working starts with routine care, extending your system’s life and avoiding costly repairs. Central vacuums are low-maintenance compared to portables, but neglect can lead to frequent downtime.
- Regular Cleaning Schedule: Vacuum the hose interior monthly using a cleaning tool. Empty the central unit’s canister after every 4-6 uses or when 2/3 full to maintain suction.
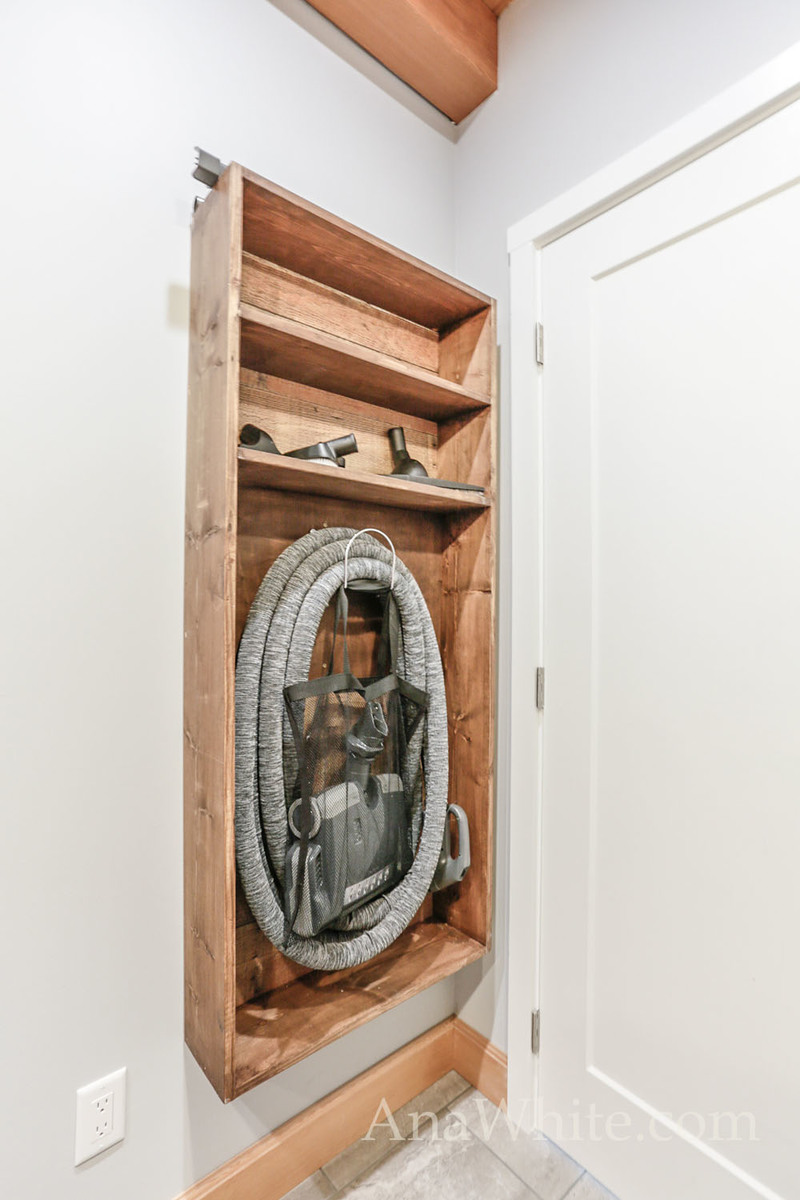
- Gentle Handling: Avoid kinking the hose during storage—use wall-mounted holders. Don’t vacuum up large objects like coins that could cause clogs.
- Annual System Inspection: Have a pro check pipes and the motor yearly. Replace hoses every 10-15 years or at signs of wear.
- Filter Maintenance: Clean or replace filters quarterly; dirty ones reduce overall power, mimicking hose issues.
Use this maintenance schedule table for easy reference:
| Frequency | Task | Duration |
|---|---|---|
| Weekly | Empty canister and wipe hose exterior | 5 minutes |
| Monthly | Clean hose interior and check connections | 15 minutes |
| Quarterly | Replace or wash filters | 10 minutes |
| Annually | Full system inspection | 30-60 minutes (DIY) or pro service |
By following these, you’ll minimize instances of your central vacuum hose not working and keep performance optimal.
Pro Tips for Central Vacuum Hose Maintenance
To elevate your troubleshooting game and ensure long-term reliability, here are expert insights from central vacuum specialists:
- Use High-Quality Accessories: Opt for hoses with reinforced construction (e.g., 1.5-inch diameter for better airflow) to resist wear. Brands like Vacuflo offer durable options that last 20+ years.
- Monitor for Early Warning Signs: Weak suction or unusual odors signal impending clogs—address them immediately to prevent escalation.
- Optimize Storage: Coil hoses loosely and store in a dry, temperature-controlled area to avoid material degradation.
- Eco-Friendly Cleaning: Use baking soda and vinegar for natural clogs instead of chemicals, preserving hose integrity.
- Upgrade for Better Performance: Consider adding a hose with built-in static reduction if you have carpet, reducing friction-related issues.
- Common Mistake to Avoid: Overloading the system with wet debris—central vacs handle dry messes best; use a shop vac for liquids.
- Track Usage: Log cleaning sessions to spot patterns, like seasonal pet hair spikes, and adjust maintenance accordingly.
These tips can boost efficiency by up to 30%, per industry benchmarks from the Central Vacuum Association.
When to Call Professional Help
While DIY fixes resolve most central vacuum hose not working issues, some situations demand expert intervention to avoid further damage or safety risks.
- Signs You Need a Pro: Persistent no-suction after all methods, strange electrical smells, or visible damage to the central unit’s motor. If pipes require invasive access (e.g., wall openings), don’t DIY.
- Choosing a Service Provider: Look for certified technicians from brands like Nutone or Electrolux, with reviews on sites like Angi or HomeAdvisor. Ensure they offer warranties on repairs.
- Typical Cost Ranges: Hose replacement: $50-150 (parts and labor). Full system diagnostic: $100-200. Motor repair: $300-600, depending on model and location.
- Warranty Considerations: Most systems have 5-10 year warranties; check your manual and provide proof of purchase. Professional service often preserves coverage.
Contacting a pro early can save hundreds in the long run.
FAQ
Q: Why is my central vacuum hose not working in one room but fine in others?
A: This usually indicates a blockage or issue in that room’s wall inlet or piping section. Start by removing the inlet cover and clearing debris with a snake tool. If unresolved, the pipe may have a kink from installation— a pro can use a camera inspection to confirm, which takes about 30 minutes and costs $100-150.
Q: Can I use a regular vacuum hose with my central system?
A: Not directly—central systems require specific cuffs and diameters (typically 1.25-2 inches) for proper fit and suction. Adapters exist ($10-20), but they may reduce performance. Stick to compatible hoses for best results and to avoid voiding warranties.
Q: How do I know if the problem is the hose or the central unit?
A: Test by bypassing the hose: Plug a short test hose directly into the unit’s intake. If suction is strong, the issue is hose-related. Weak unit suction points to motor or filter problems—clean the unit first, as full bags cause 40% of system failures per manufacturer data.
Q: Is it safe to repair a central vacuum hose myself if it has electrical parts?
A: For basic hoses, yes, but if it includes a powered brush head, unplug everything and test with a multimeter for continuity. If you’re not comfortable with electrics, call a pro to prevent shocks or fires. Always follow OSHA safety guidelines for home appliances.
Q: How long does a central vacuum hose typically last?
A: With proper care, 10-20 years. Factors like household size and usage speed this up—replace if you notice cracks or 20% suction loss. High-end models from brands like Husky endure heavier use.
Q: What if my hose is stuck in the wall inlet?
A: Gently twist and pull while supporting the inlet plate. If stuck due to vacuum seal, release pressure by turning off the unit. Use lubricant sparingly; persistent issues may need inlet replacement ($20-50).
Q: Does hard water affect central vacuum hoses?
A: Indirectly, yes—mineral deposits can build in pipes, reducing flow. Flush the system annually with a vinegar solution to prevent this, especially in areas with water quality issues.
Alternative Solutions for Central Vacuum Hose Problems
If repairs don’t appeal or your hose is beyond fixing, consider these alternatives. They’re useful when the main system is outdated or incompatible.
| Solution | Pros | Cons | Best For |
|---|---|---|---|
| Hose Replacement | Affordable ($30-100), restores full compatibility, easy install | Doesn’t fix underlying system issues | Minor wear or clogs in otherwise good systems |
| Portable Vacuum Add-On | No installation needed, versatile for spot cleaning | Less powerful than central suction, requires carrying | Temporary fixes or multi-home use |
| Full System Upgrade | Modern features like HEPA filters, longer lifespan | Higher cost ($500-2000), involves installation | Older homes with frequent breakdowns |
| DIY Pipe Cleaning Kit | Inexpensive ($20-50), targets inlets without pros | Limited to accessible areas, risk of damage | Budget-conscious users with simple blockages |
Weigh these based on your setup—a new hose often suffices for isolated central vacuum hose not working scenarios.
Solve Your Central Vacuum Hose Issues Today
Armed with this guide, you’re equipped to tackle and prevent a central vacuum hose not working, from quick clogs to deeper system tweaks:
- Identifying common causes like blockages and loose connections
- Applying multiple fix methods with step-by-step instructions
- Implementing prevention and pro tips for lasting performance
- Knowing when to seek professional help or explore alternatives
Following these solutions will save you time, money, and frustration, restoring your cleaning powerhouse to peak efficiency. Don’t let a faulty hose disrupt your home—start with the quick fix today and enjoy uninterrupted suction.
Have you fixed your central vacuum hose not working with these steps? Share your experience in the comments below to help fellow readers!