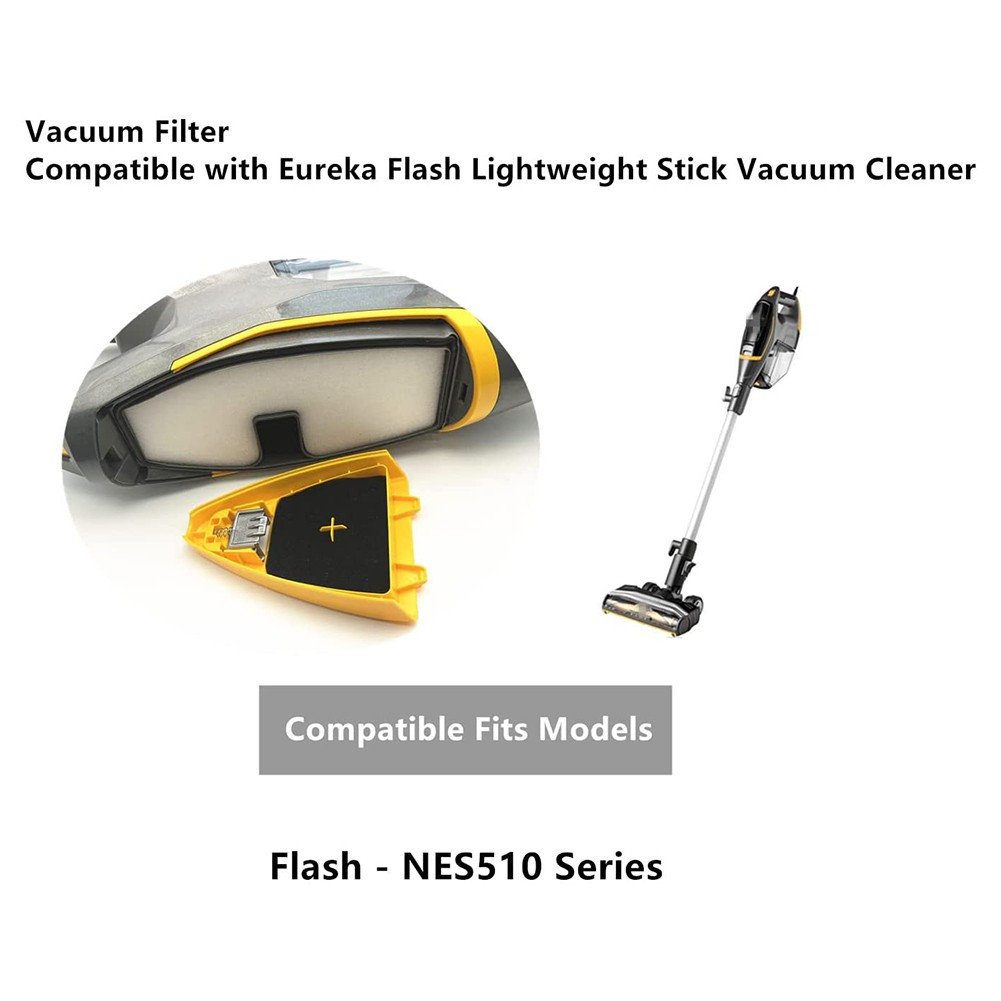
If your Eureka Flash stick vacuum isn’t picking up like it used to, the roller won’t spin, or the suction feels weak, chances are a worn or clogged part is to blame. The good news: most Eureka Flash stick vacuum parts are easy to identify and replace, and a quick clean or swap of the brushroll, belt, filter, or nozzle can get you back to full power fast.
In this guide, you’ll learn exactly which parts the Eureka Flash uses, how to diagnose what’s failing, where to buy replacement parts that fit your model, and step-by-step fixes to restore suction and performance. By the end, you’ll know how to maintain your Eureka Flash like a pro and avoid repeat issues.
Common Eureka Flash Stick Vacuum Parts and Fail Points

- Brushroll (floor nozzle roller)
- Belt (brushroll drive belt, model-dependent)
- Floor nozzle assembly (with LED light strip and motor)
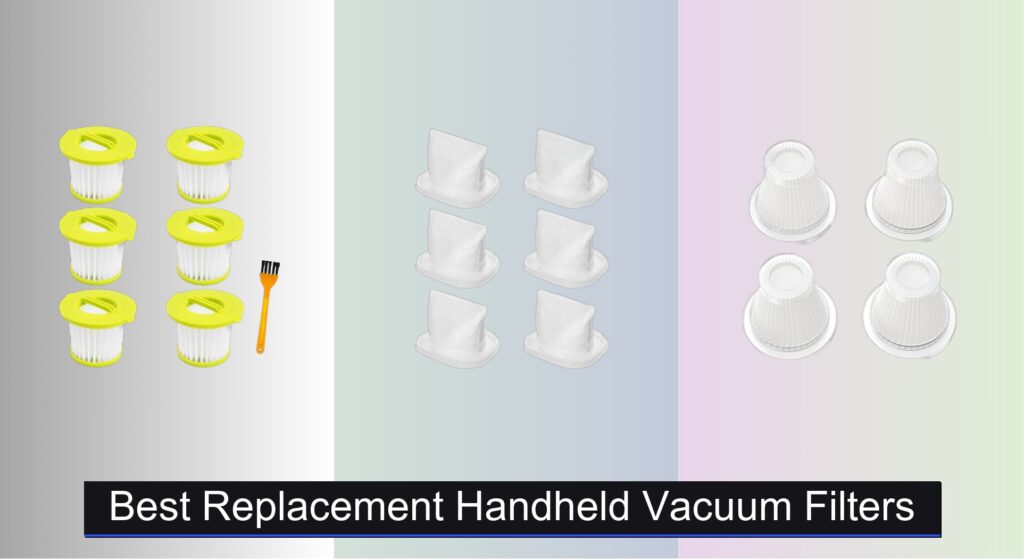
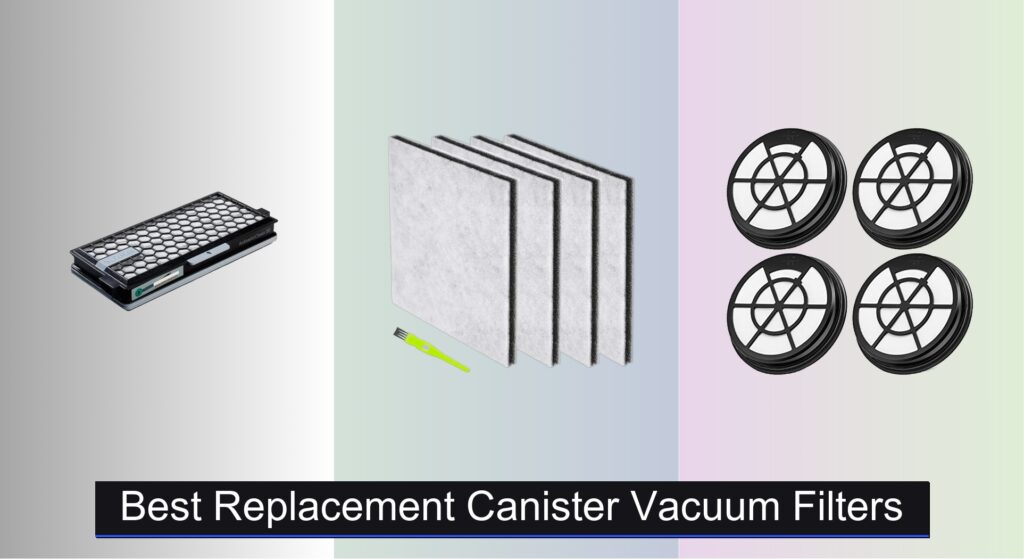
- Foam and felt filters (pre-motor)
- HEPA/exhaust filter (post-motor)
- Dust cup and cyclone assembly
- Wand and quick-release latch
- Crevice tool and 2-in-1 dusting brush
- Power cord and strain relief
- Motor housing and thermal cutoff
- Gaskets and seals around dust cup and nozzle
Important: There are multiple Eureka Flash variants, including Eureka Flash Lightweight Stick Vacuum (models like NES510, NES511, NES512, NEC480-series), and some rebrands regionally. Always confirm your exact model number on the product label (usually behind the dust cup or on the motor housing) before ordering parts.
How to Identify Your Eureka Flash Model

- Check the product label: Look near the base of the motor housing or behind/under the dust cup.
- Common formats: NES510, NES511, NES510A, NES512; NEC480-series for some Flash Pro variants.
- Note voltage and region: Parts like the power cord assembly may vary by region.
- Photograph your label and nozzle: Helps match parts accurately when ordering.
Common Causes of Poor Performance
Clogged or Worn Brushroll
Hair and threads wrap around the roller, blocking bristles and jamming end caps. This reduces agitation and pickup.
Stretched or Slipping Belt
If your variant uses a belt-driven roller, a stretched or frayed belt leads to a non-spinning or weakly spinning brushroll.
Blocked Filters (Foam/Felt/HEPA)
Overloaded filters throttle airflow, causing weak suction, overheating, and frequent thermal shutoffs.
Nozzle Obstructions
Debris clogged in the neck of the floor nozzle, wand, or where the dust cup inlet meets the cyclone.
Dust Cup or Seal Leaks
A misseated dust cup or worn gasket lets air leak, reducing suction at the floor.
Thermal Cutoff Tripping
When airflow is restricted, the motor overheats and a thermal fuse temporarily shuts it down until cooled.
Broken Wand Latch or Tool Port
Cracked latches lead to poor nozzle connection and air leakage.
Where to Buy Eureka Flash Stick Vacuum Parts
- Eureka Official Parts Store (EurekaClean or Eureka direct): Best for OEM filters, brushroll, belts, and nozzle assemblies.
- Authorized retailers: Amazon, Walmart, Home Depot—search by exact model (e.g., “Eureka NES510 brushroll”).
- Third-party parts: Ensure compatibility; read reviews and compare dimensions. Prioritize HEPA-grade filters for post-motor replacements.
- Local vacuum repair shops: Useful for cords, belts, or when you’re unsure of model variants.
Tip: Buy parts kits that bundle pre-motor foam/felt and post-motor HEPA filters; they’re usually cheaper than single components and keep you stocked for a year.
How to Fix Common Eureka Flash Problems
Method 1: Restore Suction with Filter and Seal Maintenance
Diagnosing the Issue
- Suction feels weak at the floor but decent at the dust cup inlet.
- Unit shuts off after a few minutes of use (overheating).
- Visible dust caked on foam/felt filter or greyed-out HEPA.
Fix Steps
- Unplug the vacuum.
- Remove dust cup: Press the dust cup release and empty debris.
- Access pre-motor filters: Take out foam and felt filters.
- Clean pre-motor filters:
– Tap loose dust into trash.
– Rinse foam and felt with cool water until clear.
– Squeeze out excess water; air-dry 24 hours completely.
– Important: Do not use hot water, soap, or a dryer; do not reinstall damp filters. - Inspect HEPA/exhaust filter (post-motor):
– If washable: Rinse gently with cool water and air-dry 24 hours.
– If non-washable: Replace when visibly grey or after 6–12 months of regular use. - Inspect dust cup seals and gaskets:
– Wipe the lip seals with a slightly damp cloth.
– Ensure the dust cup clicks firmly back in place. - Check for clogs:
– Look through the dust cup inlet and the wand for blockages.
– Use a flashlight; clear any debris with a straightened plastic zip tie or dowel.
Testing
- Reassemble with dry filters.
- Turn on and test suction at the wand and floor nozzle.
- Run for 5–10 minutes to confirm thermal cutoff no longer trips.
Time: 20–30 minutes (plus 24 hours dry time for washable filters).
Method 2: Fix Non-Spinning Brushroll (Roller/Jam/Belt)
Diagnosing the Issue
- Roller won’t spin, LED lights on but no agitation.
- Burning smell or intermittent spinning.
- Unusual noise from nozzle.
Fix Steps
- Unplug the vacuum.
- Flip the floor nozzle over.
- Open the brushroll cover:
– Some Flash models have release tabs; others use Phillips screws. Keep screws organized. - Remove hair and strings:
– Cut along the groove with scissors or a seam ripper and pull debris free. - Remove brushroll:
– Lift out from end caps; note orientation for reinstallation. - Inspect bearings and end caps:
– Spin by hand; they should rotate smoothly. Clean hair from the axles. - Check belt (if belt-driven variant):
– Look for cracks, glazing, or slack. Replace if loose or frayed. - Clean nozzle airway:
– Check the neck and internal channels for clogs; clear thoroughly. - Reinstall brushroll and belt:
– Seat belt on motor spindle and brushroll pulley (if present).
– Ensure the brushroll spins freely and the cover clicks/snaps flat.
Testing
- Plug in and test on a hard floor first; listen for smooth operation.
- Switch to rug/carpet and verify consistent rotation.
Time: 15–25 minutes. Tools: Phillips screwdriver, scissors.
Warning: Never run the vacuum with the brushroll cover removed.
Method 3: Clear Nozzle and Wand Blockages
Diagnosing the Issue
- Strong motor sound but weak floor suction.
- Good suction at the dust cup, poor at nozzle.
- Vacuum spits debris or snowplows on hard floors.
Fix Steps
- Unplug and detach the wand and nozzle.
- Inspect wand:
– Look through end-to-end; use a flashlight.
– Push out clogs with a flexible plastic rod or broom handle (gentle). - Inspect nozzle neck:
– Remove visible clogs at the elbow where debris often compacts. - Check cyclone cone inside the dust cup:
– Tap and brush off packed dust on the cone perforations.
Testing
- Reassemble and test suction.
- If still weak, repeat filter maintenance (Method 1).
Time: 10–15 minutes. No special tools.
Method 4: Address Power or Overheating (Cord, Motor, Thermal Cutoff)
Diagnosing the Issue
- Vacuum shuts off mid-use and restarts after cooling 20–30 minutes.
- Intermittent power when flexing the cord near the handle.
- No power at all despite known-good outlet.
Fix Steps
- Rule out airflow issues first: Clean filters and inspect for clogs.
- Check cord and strain relief:
– With the unit off and unplugged, flex the cord near the handle/grommet and at the plug; look for cuts, kinks, or exposed wires.
– If the cord is damaged, replace the power cord assembly (seek OEM or pro service). - Inspect switch and connections:
– If comfortable, remove handle screws and check for loose spade terminals. Reseat firmly. - Thermal reset:
– Allow the unit to cool 30 minutes.
– Clean filters and airways thoroughly; overheating usually indicates restricted airflow.
Warning: If you smell burning plastic, see smoke, or find melted connectors, stop using the vacuum. Seek professional repair.
Time: 15–40 minutes (cord replacement may require a professional for safety).
Essential Eureka Flash Stick Vacuum Parts List (By Function)
- Filtration:
- Pre-motor foam filter
- Pre-motor felt filter
- Post-motor HEPA filter (exhaust)
- Floor Nozzle and Agitation:
- Brushroll (roller with bristles)
- Belt (if applicable per model)
- Nozzle cover and screws
- LED light strip (integrated on many models)
- Airflow Path:
- Dust cup (bin)
- Cyclone assembly/cone
- Gaskets/seals for dust cup and nozzle
- Wand/extension tube
- Power and Controls:
- Power cord with strain relief
- On/off switch and wiring harness
- Motor housing and thermal cutoff
- Accessories:
- Crevice tool
- 2-in-1 dusting brush/upholstery tool
- Clip or onboard storage (model-dependent)
Note: Some Flash models have a direct-drive brushroll motor without a traditional belt; others use a small belt. Always consult your model’s parts diagram.
Preventive Maintenance and Replacement Intervals
- After every use:
- Empty dust cup when debris reaches the MAX line or sooner.
- Check brushroll for hair wrap.
- Weekly (or every 2–3 uses for pet homes):
- Tap out foam/felt filters.
- Inspect nozzle neck and wand for clogs.
- Monthly:
- Rinse foam/felt filters (allow 24 hours to dry).
- Deep clean brushroll and end caps.
- Every 3–6 months:
- Replace foam/felt filters if they no longer rinse clean or are misshapen.
- Every 6–12 months:
- Replace HEPA/exhaust filter (more often with heavy use or allergies).
- Replace brushroll if bristles are worn down or the roller is warped.
- As needed:
- Replace belt (if stretched or cracked).
- Replace dust cup seals if you notice hissing or poor suction despite clean filters.
Pro Tips for Better Performance and Longer Part Life
- Always let washable filters dry at least 24 hours before reinstalling to avoid mold and motor damage.
- Keep a second set of filters on hand so you can swap immediately and dry the wet set later.
- Cut hair from the brushroll along the molded seam to avoid nicking bristles.
- Vacuum large debris in two passes: lift the head slightly on the first pass to prevent “snowplowing.”
- Avoid vacuuming damp material; moisture cakes the cyclone and ruins filters.
- If LEDs dim or flicker, check the nozzle connector pins for dust; clean gently with a dry cotton swab.
- Store the vacuum with the cord loosely coiled to prevent internal wire fatigue at the strain relief.
When to Get Professional Help
- Persistent overheating after thorough filter and airway cleaning.
- Burning smell, melted plastic, or visible arcing in the nozzle or handle.
- Motor sounds rough (bearing whine) or won’t start at all.
- Power cord damage, fraying, or exposed copper.
- Replacing internal wiring harness or switch if you’re not confident with electrical repairs.
What to look for in a service provider:
– Experience with Eureka stick vacuums.
– Access to OEM parts and service manuals.
– Clear diagnostic fee and warranty on repairs.
Typical costs:
– Filter set: $12–$25
– Brushroll: $15–$30
– Belt: $6–$12
– Nozzle assembly: $40–$90
– Cord replacement or internal repair (shop): $60–$120 labor plus parts
Warranty note: If your Eureka Flash is still under warranty, contact Eureka support before opening housings or performing non-routine repairs. Using non-OEM electrical parts may void coverage.
FAQ
Q: Which Eureka Flash models do these parts fit?
A: Most parts in this guide apply to Eureka Flash models like NES510, NES511, NES512 and some NEC480-series. Always match filters, brushroll, and belts to your exact model number printed on your vacuum’s label.
Q: How often should I replace the filters?
A: Wash foam/felt monthly and replace every 3–6 months depending on use. Replace the HEPA/exhaust filter every 6–12 months, or sooner if suction drops or the filter looks grey and clogged.
Q: My brushroll won’t spin—do I need a new belt?
A: First clear hair wrap and clean the end caps. If your model uses a belt and it’s loose, cracked, or glossy, replace it. Some Flash variants are direct-drive without a standard belt; in that case, a new brushroll or nozzle assembly may be required.
Q: The vacuum shuts off after a few minutes—what’s wrong?
A: That’s the thermal cutoff protecting the motor, usually due to restricted airflow. Clean or replace filters, clear clogs in the wand and nozzle, and ensure the dust cup seals tightly. If the issue persists, inspect the motor and cord.
Q: Where can I buy genuine Eureka Flash parts?
A: Start with Eureka’s official parts store or support site. Reputable retailers like Amazon, Walmart, and Home Depot also carry OEM parts. Verify compatibility by model number before purchasing.
Q: Are the filters washable?
A: The pre-motor foam and felt filters are typically washable with cool water and must dry fully for 24 hours. The HEPA/exhaust filter may be washable or replace-only depending on the variant; check your manual or product listing.
Q: Do I need tools to replace the brushroll?
A: Yes, usually a Phillips screwdriver to remove the nozzle cover screws. Some models have tool-free tabs. Keep screws organized and re-seat the cover evenly.
Q: My LED lights stopped working—do I need a new nozzle?
A: Check the nozzle connector pins for debris and ensure the wand seats fully. If LEDs still fail and the vacuum runs, the light strip may have failed; replacing the nozzle assembly is the simplest fix.
Alternative Solutions and Comparable Models
If your Eureka Flash nozzle or motor is failing and replacement parts approach half the cost of a new unit, consider alternatives with easy-to-get parts:
| Solution | Pros | Cons | Best For |
|---|---|---|---|
| Replace with Eureka Flash (current model) | Familiar design, parts availability, cost-effective | Similar maintenance needs | Budget-friendly stick with strong hard-floor pickup |
| Upgrade to Eureka RapidClean Pro (NEC180) | Longer runtime (cordless), lightweight, easy filter access | Battery life limits, replacement battery cost | Quick daily cleans, small homes |
| Step up to Shark Rocket (HV3xx series) | Strong parts ecosystem, robust brushroll options | Higher price, heavier | Mixed floors and pet hair |
| Dyson V8 (refurb/renewed) | Excellent filtration and tools | Expensive filters/batteries | Allergy sufferers, high-performance cordless |
Get Your Eureka Flash Working Again
Following this guide, you now have clear steps to identify, source, and replace the most common Eureka Flash stick vacuum parts:
– Diagnose suction, brushroll, and airflow problems.
– Clean and replace filters for maximum performance.
– Remove hair wraps, replace belts/brushrolls, and clear clogs.
– Address power and overheating issues safely.
– Know when to call a pro or consider an upgrade.
Don’t let a worn filter or jammed brushroll sideline your cleaning routine. With the right parts and a few simple steps, you can restore your Eureka Flash to like-new performance today.
Have you replaced a specific part on your Eureka Flash? Share your model number and what fixed it—your experience can help other readers. Found this helpful? Bookmark it for future maintenance and filter schedules.