
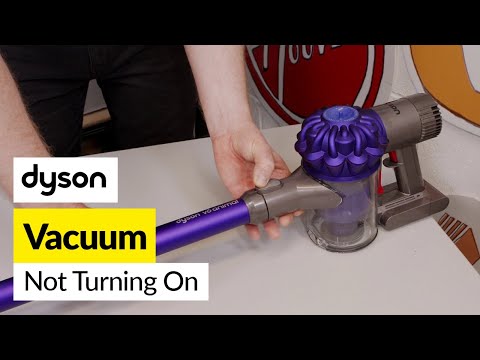
You press the button, the light comes on, but your Dyson vacuum won’t start—frustrating, right? Whether you own a Dyson V7, V8, V10, V11, V15, or a Dyson Ball/Animal upright, this issue is common and often fixable at home. The quickest fix: remove the wand and any attachments, check for clogs in the bin inlet and brush head, reseat the battery firmly, then hold the trigger for 10 seconds to reset. In many cases, a blockage or loose battery connection is the culprit.
In this guide, you’ll learn the most common causes of a Dyson vacuum light coming on but not starting, plus step-by-step fixes from simple to advanced. We’ll cover cordless stick models and uprights, how to diagnose battery vs. motor issues, how to clear blockages, and when to contact support. Follow along and you should have your Dyson running again by the end of this article.
Common Causes of a Dyson Light Coming On But Not Starting
- Battery fault or low voltage: The indicator lights are on, but the pack can’t supply enough current to start the motor.
- Trigger or power switch failure: The trigger microswitch or power button isn’t making proper contact.
- Blockages and airflow restrictions: Clogs in the wand, bin inlet, cyclone, or brush head can prevent startup.
- Overheating/thermal cut-out: The motor overheated and needs to cool or the filter is clogged, triggering a safety shutdown.
- Filter mis-seated or saturated: Wet/dirty filters reduce airflow and can stop the vacuum from starting.
- Stuck brush bar or tangled hair: The motor head locks out when the brush is jammed.
- Charging dock or charger fault: Battery isn’t charging fully due to cable, dock, or charging port issues.
- Battery not seated correctly: Slight misalignment prevents current flow even though the light turns on.
- Firmware/logic lock (certain models): A soft fault that clears with a reset or full power cycle.
- Internal motor or PCB failure: Less common but possible if all else checks out.
How to Fix a Dyson Vacuum That Shows a Light But Won’t Start

Below are multiple methods, progressing from quick checks to more advanced diagnostics. Pick the one that matches your model: cordless sticks (V6–V15) or uprights (Ball/Animal/DC/Allergy).
Method 1: Quick Reset and Basic Checks (Fastest)
Diagnosing the Issue
If your Dyson shows a light when you pull the trigger but the motor doesn’t spin, start with a reset and basic airflow checks.
Fix Steps
1) Remove attachments and wand
– Detach the wand and motorized head. Try running the motor unit alone.
– If it starts without the wand, the blockage is downstream.
2) Reseat the battery
– Remove the battery (screw-in or click-out depending on model).
– Inspect contacts for dust/corrosion. Wipe gently with a dry microfiber cloth.
– Reinstall firmly until you hear/feel a click.
3) Reset the trigger logic
– With the vacuum off and fully assembled (or as a bare motor unit), hold the trigger for 10–15 seconds. Release and try again.
– For V11/V15 with an LCD, switch modes (Eco/Med/Boost) and try again.
4) Check charger and power supply
– Plug charger directly into a wall outlet (avoid power strips).
– Confirm LED behavior: steady charging light indicates normal; rapid flashing often signals a fault. Charge for at least 3–4 hours.
5) Inspect filters
– Remove pre- and post-motor filters. If wet or heavily dirty, do not run the vacuum. Clean and fully dry for 24 hours minimum.
Testing
- Try running the motor without the wand and tools.
- If it runs bare but not with the wand, you likely have a blockage in the wand/brush head.
Method 2: Clear Blockages and Airflow Restrictions
Diagnosing the Issue
A surprising percentage of “light on but won’t start” issues are airflow-related. Dysons monitor pressure and temperature; severe clogs can prevent startup or immediately shut the motor off.
Fix Steps
1) Empty the bin thoroughly
– Remove the bin, clear the cyclone shroud, and check the bin inlet flap for debris.
2) Check the wand
– Look through the wand for obstructions. Use a straightened zip tie or flexible brush to push out clogs.
3) Inspect the motorhead/cleaner head
– Remove the brush bar. Cut away hair, thread, and carpet fibers from both ends and the axle.
– Check the air channel for compacted dust. Clean gently with a soft brush.
4) Examine the cyclone assembly
– Peek into the cyclone’s inlet and outlet. If packed with dust, gently tap it over a bin.
– Important: Do not wash cyclone assemblies unless your model manual explicitly allows it.
5) Inspect seals and flaps
– Torn seals or stuck flaps can disrupt airflow. Ensure flaps move freely and seals are seated.
Testing
- Reassemble and test in Eco/Low mode first, then Medium. If it runs briefly then stops, continue to Method 3.
Method 3: Filters—Cleaning, Drying, and Seating
Diagnosing the Issue
Saturated or wet filters choke airflow and trigger thermal protection. After washing, filters must air-dry for at least 24 hours (often 24–48 hours depending on humidity).
Fix Steps
1) Remove filters
– Cordless: pre-motor filter (top of cyclone), post-motor filter (rear HEPA on V10+).
– Uprights: check pre-motor (near the bin) and post-motor (ball or side housing).
2) Clean filters
– Rinse under cold water only. No soap. Squeeze gently until water runs clear.
– Tap out excess water; do not twist harshly.
3) Dry thoroughly
– Air-dry in a warm, ventilated area for 24–48 hours.
– Important: Never reinstall damp filters. This can permanently damage the motor.
4) Reinstall carefully
– Seat filters securely. A mis-seated HEPA can cause immediate shutoff.
Testing
- Try running without the post-motor filter for a few seconds (if your model allows) to test airflow, then reinstall.
Method 4: Battery Health and Charger Checks
Diagnosing the Issue
Your lights may come on, but the pack can be too weak to spin up the motor, especially in Boost/Max mode. Lithium-ion batteries degrade after 2–5 years or 300–500 cycles.
Typical LED clues (Dyson models vary):
– Fast flashing blue: no charge/low battery.
– Slow flashing blue: charging.
– Solid blue then off: normal operation.
– Solid amber: temporary fault/too hot or cold.
– Flashing red: battery fault (service/replace).
Refer to your model’s manual for exact LED codes.
Fix Steps
1) Confirm charge
– Charge 3–4 hours. The charger should get slightly warm. If cold and lights don’t indicate charging, suspect the charger or port.
2) Try another outlet/charger
– If possible, borrow a compatible charger. If it charges with another charger, replace the original.
3) Temperature check
– If the battery is hot or cold, let it sit at room temperature for 1 hour, then retry charging.
4) Reseat or replace battery
– Click-out batteries: press release tabs and reseat firmly.
– Screw-in batteries: power off, remove screws, reseat or replace. Use the correct Dyson OEM pack or a reputable compatible pack with the right voltage and connector.
5) Reduce startup load
– Attempt start in Eco mode to reduce current draw.
Testing
- If it runs only while on the charger (rare) or shuts off immediately, the battery likely can’t supply current. Replace the battery.
Method 5: Trigger, Switches, and Connections
Diagnosing the Issue
The trigger microswitch or power button can wear or the internal connection can loosen, causing the vacuum to “light up” without actually driving the motor.
Fix Steps (Cordless)
1) Trigger feel test
– If the trigger feels mushy or inconsistent, it may be failing.
2) Inspect for debris around trigger
– Dust can impede trigger travel. Blow out with compressed air lightly.
3) Check wand/neck electrical contacts
– Clean the metal contacts on the motor unit and wand with a dry cloth.
Fix Steps (Uprights)
1) Power button test
– Toggle the power button multiple times. If the motor doesn’t attempt to start, you may have a switch or PCB fault.
2) Handle and hose connections
– Some uprights won’t start if certain connections aren’t properly seated. Reseat the hose, handle, and bin.
3) Thermal reset
– Unplug for 30 minutes to allow thermal cut-out to reset.
Testing
- If lights respond to the switch but motor never spins despite a known good battery and clean airflow, proceed to Method 6.
Method 6: Brush Bar, Motorhead, and Jam Protection
Diagnosing the Issue
A jammed brush bar or failed motorhead can stop the vacuum from starting or shut it down instantly when attached.
Fix Steps
1) Run without the motorized head
– If the vacuum runs bare but stops when the head is attached, the head is likely the issue.
2) Clear brush bar and end caps
– Remove the bar. Clean hair from bearings and ends. Spin by hand; it should rotate freely.
3) Inspect drive belt or gear train (model dependent)
– Look for stripped gears or melted belt smell.
4) Check head cable and pins
– Ensure the head’s cable isn’t damaged and the connector pins are clean and straight.
Testing
- Try another compatible motorhead if available. If the vacuum runs with a different head, replace the original head.
Method 7: Overheating and Thermal Cut-Out Recovery
Diagnosing the Issue
If the vacuum ran and then stopped, and now only lights come on, it may have overheated. This is often due to clogs or dirty filters.
Fix Steps
1) Cool-down period
– Leave the machine off and unplugged for 30–60 minutes.
2) Restore airflow
– Perform Methods 2 and 3 to ensure filters and passages are clear.
3) Room temperature operation
– Avoid running in Boost/Max for long periods on thick carpets; use Medium/Eco for longer sessions.
Testing
- After cooling and cleaning, test in Eco first, then step up modes.
Method 8: Software/Logic Reset (Models with Displays)
Diagnosing the Issue
Some V11/V15 models can bug out after a fault condition.
Fix Steps
1) Mode cycle
– Switch between Eco/Med/Boost several times, then attempt to run.
2) Battery remove/reseat reset
– Remove the battery for 30 seconds, then reinstall.
3) Full discharge/recharge
– Run down the battery if it runs intermittently, then perform a full uninterrupted charge.
Testing
- Observe the LCD error prompts. Follow on-screen guidance (filter, airway block, temperature).
Prevention Tips and Maintenance Advice
- Clean filters monthly (or more often for heavy use); dry fully 24–48 hours.
- Empty the bin before it reaches MAX line to maintain airflow.
- Detangle the brush bar weekly if you have pets or long hair.
- Avoid vacuuming wet materials; never reinstall damp filters.
- Store and charge the vacuum at room temperature (15–30°C / 59–86°F).
- Use Eco/Med for routine cleaning to reduce battery stress.
- Check the wand and head for blockages after picking up large debris.
Pro Tips
- Keep a spare filter set to avoid downtime while one set dries.
- Label your battery purchase date; expect 2–4 years of typical lifespan.
- If you smell burning or see melted plastic near the head, stop immediately—replace the head or have it serviced.
- Use short bursts of Boost mode only for stubborn dirt; continuous Boost accelerates battery wear.
- For homes with lots of hair, consider a Dyson “Animal” or anti-tangle head upgrade compatible with your model.
- Periodically clean electrical contacts with a dry microfiber cloth to ensure good power transfer.
- If you frequently trip thermal cut-out, your filters are overdue for cleaning or your carpets are too dense for high mode.
When to Seek Professional Help
Signs you need service:
– Flashing red battery light persists after battery replacement.
– The motor never spins despite full charge, clean filters, and no blockages.
– Burning smell, smoke, or unusual grinding noises.
– Visible damage to wiring, charger, or battery swelling.
– Repeated immediate shutoff without error codes.
What to look for in a provider:
– Authorized Dyson service center or technician experienced with your model.
– Genuine Dyson parts and warranty-backed repairs.
– Clear diagnostic fees and turnaround times.
Typical costs (varies by region/model):
– Replacement battery: $45–$129 (OEM typically higher).
– Motorhead assembly: $60–$150.
– Main motor/PCB repair: $120–$250.
– Diagnostic fee: $25–$60 (often applied to repair).
Warranty considerations:
– Dyson cordless models often carry 2-year warranties; uprights may have 5-year limited warranties. Register your product and check coverage before paying out-of-pocket.
– Using non-OEM batteries can affect warranty—verify terms.
FAQ
Q: Why does my Dyson show a blue light but won’t start?
A: Often the battery has enough voltage for lights but can’t supply the current to spin the motor. It can also be a blockage, wet/dirty filters, or a jammed brush head. Start with reseating the battery, clearing blockages, and fully drying filters.
Q: My Dyson works without the head but stops when I attach it. What does that mean?
A: The motorized head may be jammed or shorting. Clean the brush bar and bearings, inspect for blockages, and check the head’s connector pins. Try another compatible head to confirm.
Q: Can a wet filter cause my Dyson not to start?
A: Yes. A damp filter restricts airflow and can trigger thermal or pressure faults. Always dry filters for 24–48 hours before reinstalling.
Q: How do I know if my battery is bad?
A: Symptoms include fast flashing blue or red LEDs, very short run times, or the machine only running in Eco and cutting off under load. If a full charge and other fixes don’t help, replace the battery.
Q: Will a clogged cyclone stop the vacuum from turning on?
A: Severe cyclone clogs can prevent startup or cause immediate shutdown. Clear blockages in the bin inlet, wand, and head; gently tap out dust from the cyclone. Don’t wash the cyclone unless the manual says it’s safe.
Q: My Dyson overheated and stopped. How long until I can use it again?
A: Let it cool 30–60 minutes. Clean filters and remove blockages before trying again. Persistent overheating indicates restricted airflow.
Q: Is it safe to use third-party batteries?
A: Many users do, but quality varies. Choose reputable brands with proper certifications and thermal protection. Note that non-OEM parts may affect warranty coverage.
Alternative Solutions
If repairs don’t make sense for your unit (out of warranty, costly motor/PCB failure), consider these options:
| Solution | Pros | Cons | Best For |
|---|---|---|---|
| OEM Battery Replacement | Reliable, correct fit, preserves performance | Higher cost | Owners with healthy motors needing longer life |
| Third-Party Battery | Lower cost, higher capacity options | Quality varies, possible warranty impact | Budget fixes on older units |
| Replace Motorhead Only | Restores brush performance | Can be pricey | Head-specific failures and jams |
| Upgrade to New Model | New warranty, better runtime/performance | Most expensive | Heavily used homes, aging units with multiple faults |
Get Your Dyson Working Again
By following this guide, you now have multiple solutions to fix a Dyson vacuum that shows a light but won’t start:
– Quick resets and battery reseating
– Clearing blockages and ensuring proper airflow
– Cleaning and fully drying filters
– Checking the motorhead, brush bar, and connections
– Diagnosing battery and charger health
– Knowing when to seek professional service
Don’t let a silent Dyson slow you down. Start with the simple checks and work through the methods in order. In most cases, proper airflow and a healthy battery get your Dyson vacuum working again quickly.
Still stuck? Describe your model and the exact light pattern in the comments for tailored advice. Found this helpful? Bookmark it for future troubleshooting and share with someone battling the same issue. You’ve got this—solve your Dyson vacuum light coming on but not starting today.