
Is your pool vacuum not moving and leaving debris at the bottom? You’re not alone. Whether you’re using a suction-side vacuum, a pressure-side cleaner, or a robotic unit, a stalled cleaner is frustrating—especially on a hot day. Quick fix first: for suction vacuums, clean the skimmer basket, pump basket, and filter, then check the suction at the cleaned line; for robotic cleaners, power cycle the unit and clean the filter canister; for pressure-side cleaners, confirm the booster pump is on and the wall screen is clear.
In this guide, you’ll learn the most common reasons a pool vacuum stops moving and step-by-step solutions for each cleaner type. We’ll cover quick diagnostics, detailed fixes, and prevention tips so by the end you can get your cleaner cruising again and keep it that way.
Common Causes of a Pool Vacuum Not Moving
- Clogged skimmer or pump basket reducing flow
- Dirty or clogged filter (high filter pressure or flow restriction)
- Air leaks in suction lines or at pump lid O-ring
- Blocked vacuum head, hose, or line
- Incorrect valve positions at the pool equipment pad
- Worn or stuck vacuum parts (wheels, tracks, gears, diaphragms, turbine)
- Low water level causing air ingestion
- Weak or off booster pump (pressure-side cleaners)
- Power supply or cord issues (robotic cleaners)
- Debris-choked cleaner filter canister (robotic) or wall screen (pressure-side)
- Incorrect hose length or tangling
- Flow not adjusted properly (too low or too high)
How to Fix a Pool Vacuum Not Moving
Below are separate methods for each cleaner type. Identify your type first:
- Suction-side cleaner: Connects to a skimmer or dedicated suction port; uses the pool pump’s suction.
- Pressure-side cleaner: Connects to a return jet (usually with a booster pump); uses water pressure.
- Robotic cleaner: Self-contained with power supply, plugged into GFCI outlet; does not use pool system.
Method 1: Suction-Side Pool Vacuum Not Moving
Diagnosing the Issue
- Symptoms: Cleaner sits still, moves intermittently, or stalls at shallow/deep ends.
- Check: Is the pump basket full of air? Is the filter pressure high? Is the cleaner hose collapsing or full of air?
Fix Steps
1) Restore proper flow
– Turn off pump. Empty skimmer basket(s) and pump basket.
– Inspect pump lid O-ring: clean and lubricate with silicone pool lube; ensure a perfect seal.
– Backwash/clean your filter:
– Sand/DE: Backwash until sight glass runs clear (2–3 minutes), then rinse. Recharge DE per manufacturer.
– Cartridge: Remove and hose off thoroughly; soak in filter cleaner if heavily scaled; reinstall when dry.
– Restart pump and note filter pressure. Aim for normal operating pressure per your system. If pressure spikes quickly, filter is still dirty or there’s heavy debris load.
2) Eliminate air leaks
– With pump running, look for bubbles at returns or air in pump lid.
– Tighten pump lid. Ensure water level is 1/2 to 2/3 up the skimmer opening.
– Check skimmer weir door is not stuck closed.
– Inspect suction hose connections for tight fit; replace cracked or flattened hose sections.
– Check dedicated suction port fitting for a snug seal.
3) Clear obstructions
– Disconnect cleaner from pool. Inspect vacuum head, throat, and tires/wheels. Remove rocks, leaves, or string.
– Flush each hose section with water from a hose nozzle to eject blockages.
– If using a dedicated suction line, purge it by switching valves to isolate that line and run pump briefly to check flow. Use a Drain King or line blower if clogged.
4) Set valves correctly
– At equipment pad, adjust Jandy/ball valves to favor the cleaner line. Commonly, partially close the main drain to increase skimmer/dedicated vacuum line suction.
– Only one skimmer should be used when vacuuming via skimmer; close the unused skimmer to boost suction.
5) Adjust flow to cleaner
– Use the cleaner’s flow gauge, if provided. Most suction cleaners need about 25–35 GPM.
– If moving too fast or climbing and falling repeatedly, reduce flow using the regulator valve at the skimmer.
6) Check wearable parts
– Diaphragm (Baracuda-style): Remove and inspect for tears; replace if split.
– Footpad, wings, shoes, tracks, turbine/gearbox: Replace worn parts that cause slipping or stalling.
– Hose weight placement: Adjust per manual so cleaner sits at a 45-degree angle on the floor.
7) Hose length and buoyancy
– Hose should be long enough to reach the farthest corner plus one extra section. Too short and it stalls; too long causes tangles.
– Ensure hose floats are present and positioned per manufacturer, especially near the head.
Testing
- Start the pump. Submerge the cleaner and purge all air from the hose before connecting.
- Observe for 5–10 minutes: It should move steadily, climb walls occasionally, and not get stuck repeatedly.
- Fine-tune suction via regulator valve until motion is smooth and consistent.
Method 2: Pressure-Side Cleaner Not Moving (e.g., Polaris 280/380/3900, Pentair Racer)
Diagnosing the Issue
- Symptoms: Cleaner not moving, wheels not spinning, bag not inflating, or weak tail sweep.
- Verify booster pump is running (if your model requires one).
Fix Steps
1) Confirm booster pump and water flow
– Turn on the system and ensure the booster pump starts after the main pump. If not, check timer settings and circuit breaker/GFCI.
– Inspect the wall quick-disconnect screen and internal filter—clean debris thoroughly.
2) Clear water pathway
– Remove the cleaner bag and clear any blockages.
– Check the thrust jet on the back; ensure it’s not clogged and is angled per manual (often 11 o’clock).
– Inspect hoses for kinks or micro-leaks that spray water—replace damaged sections.
3) Wheel and drive system
– Lift cleaner slightly underwater: Do the wheels spin? If not, check the drive belt/chain and gears for wear or breakage.
– Replace worn tires for proper traction; verify wheel bearings turn freely.
4) Adjust pressure and balance
– The bag should inflate firmly. If limp, increase flow at the wall fitting or clean the wall screen again.
– Use provided pressure relief valve to avoid over-pressurizing; too much pressure reduces traction.
– Add/adjust hose floats to keep the hose neutral; adjust tail sweep valve so the tail moves but doesn’t whip excessively.
5) Check the backup valve
– Lift the backup valve: It should cycle a strong jet every few minutes. If stuck open or not cycling, replace the valve; a stuck-open valve will halt forward motion.
6) Internal blockages
– Disassemble water management unit (as per manual) to clear debris from internal screens or orifices.
Testing
- With the system running, observe: Wheels should turn 28–32 RPM for many Polaris models. Use an RPM test mark or count revolutions in 1 minute.
- The cleaner should traverse the pool and periodically reverse via the backup valve. Adjust thrust jet to improve coverage.
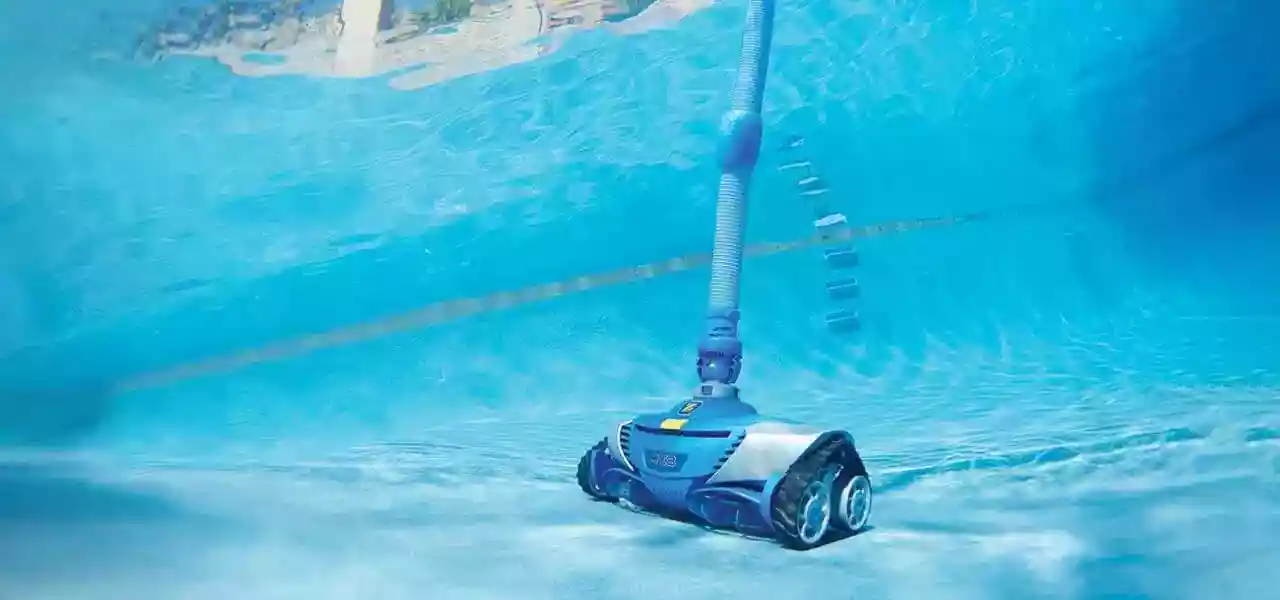
Method 3: Robotic Pool Cleaner Not Moving (e.g., Dolphin, Polaris, Hayward AquaVac)
Diagnosing the Issue
- Symptoms: Won’t start, starts then stops, or moves a few inches and dies.
- Check power: Is the power supply light on? GFCI tripped?
Fix Steps
1) Power cycle and basic resets
– Unplug the power supply from GFCI and the robot from the supply. Wait 60 seconds. Reconnect firmly.
– Try a different GFCI outlet. Reset any tripped GFCI or breaker.
2) Clean filters and impeller
– Remove and rinse the filter canister or filter panels thoroughly. Clogged filters can trigger safety stops.
– Access the impeller (top cover on many models). Remove hair, string, or leaves from the impeller and axle.
3) Cable management
– Fully uncoil the floating cable. Lay it straight in the sun for 15–20 minutes to relax twists.
– Connect to robot, submerge, and release only the length needed to reach the farthest point; keep excess at pool edge to minimize tangles.
4) Brushes, tracks, and drive
– Inspect tracks/belts for wear or slipping. Replace stretched belts and worn tracks/rollers.
– Check side plates and drive pulley for debris. Spin rollers by hand to confirm free movement.
5) Water and sensor checks
– Ensure the robot is fully submerged before starting. Air trapped inside can cause shutdown—tilt underwater to purge air.
– Clean water intake grills. Some models have obstacle sensors—wipe them clean.
6) Firmware and mode
– Verify the cleaning mode/time isn’t set to a quick cycle that ends immediately. For app-enabled models, update firmware and reset defaults.
7) Power supply and motor issues
– Inspect the cable for nicks or water ingress. If the power supply powers on but the robot doesn’t, the motor unit may be faulty—contact manufacturer service.
Testing
- Run a full cycle. The robot should move steadily, climb walls (if model supports), and not stop prematurely.
- If it stops within minutes again, recheck filter/impeller and consider motor or power supply replacement.
Method 4: Manual Vacuum Head Not Moving (Attached to Telescopic Pole)
Diagnosing the Issue
- Symptoms: Vacuum head sticks to floor, won’t roll, or has no suction.
Fix Steps
1) Restore proper suction
– Clean skimmer and pump baskets; backwash/clean filter.
– Fill hose fully with water before connecting to avoid airlock.
2) Head and roller condition
– Inspect wheels/ball bearings; replace if seized.
– For vinyl pools, use a vacuum head with proper wheels to avoid sticking. For gunite, use a weighted head with brushes.
3) Adjust suction to prevent sticking
– Partially open main drain or second skimmer to reduce vacuum intensity if the head sticks to the floor.
4) Hose and pole
– Replace flattened or overly flexible hose sections that collapse under suction.
– Ensure swivel cuff is connected at the head to prevent hose twist.
Testing
- Move the head slowly across the floor in overlapping passes. Suction should be steady without sticking or bouncing.
Prevention Tips and Maintenance Advice
- Clean skimmer and pump baskets weekly during heavy debris seasons.
- Backwash or clean filters when pressure rises 20–25% above clean pressure; keep a log of “clean pressure.”
- Maintain correct water level to avoid air ingestion.
- Inspect hoses, seals, and O-rings monthly; lubricate pump lid O-ring with silicone lube.
- For suction cleaners, replace diaphragms, shoes, and tracks annually or as worn.
- For pressure cleaners, rinse wall screen and bag after every use; check backup valve function monthly.
- For robotic cleaners, rinse filters after every cycle and store the power supply out of direct sun.
- Avoid excessive stabilizer/cyanuric acid buildup and heavy algae—poor water chemistry increases filter clogging.
- Trim overhanging trees and use a leaf canister inline if your pool gets heavy leaf drop.
Pro Tips
- Mark your filter’s “clean pressure” with a sharpie on the gauge; service when it rises 20–25%.
- Use a leaf canister inline with suction cleaners to prevent pump basket and impeller clogs.
- For Polaris-style cleaners, count wheel RPMs monthly and adjust pressure to stay in spec.
- Store robotic cleaners out of the pool between uses; UV degrades plastic and tracks faster if left submerged constantly.
- Add hose floats and swivel joints to reduce tangles; replace non-swiveling connectors on older hoses.
- If your cleaner repeatedly gets stuck on the main drain, add a drain cover dome or adjust thrust settings.
- After storms, run your cleaner in short bursts, emptying filters/bags frequently to prevent overload shutdowns.
When to Call a Professional
- Persistent air in pump despite sealing and proper water level (possible underground suction leak).
- Suction line or return line clogs that won’t clear with standard flushing.
- Booster pump not starting, noisy bearings, or leaking seals.
- Robotic cleaner with water intrusion in motor housing or damaged cable.
- Repeated GFCI trips when powering a robotic cleaner or booster pump.
- Excessive filter pressure after cleaning (possible internal filter failure or multiport valve issues).
What to look for in a service provider:
– Licensed/insured pool technician with experience on your cleaner brand.
– Mobile service that carries common wear parts (belts, diaphragms, tires).
– Clear diagnostics fee and parts warranty; typical service calls range $90–$200 plus parts. Robotic motor blocks often cost $250–$500; booster pump replacements $300–$700 installed.
Warranty considerations:
– Using non-OEM parts can affect warranty claims on some robotic models.
– Keep receipts and serial numbers; many brands offer 2–3 year limited warranties.
FAQ
Q: Why is my pool vacuum not moving but I have strong suction at the skimmer?
A: The suction at the skimmer may not translate to the cleaner if there’s an air leak, clogged hose section, or incorrect valve position. Purge air from the hose, inspect for kinks or cracks, and adjust valves to favor the vacuum line. Also check for a torn diaphragm or worn shoes/tracks on the cleaner.
Q: My Polaris cleaner bag inflates but the wheels don’t turn. What’s wrong?
A: Likely a drive issue—worn belts/chains, stripped gears, or seized wheel bearings. Also confirm the backup valve isn’t stuck on. Inspect and replace worn drive components and verify 28–32 RPM wheel speed.
Q: Why does my robotic cleaner stop after a few minutes?
A: Clogged filter or impeller causes overheating or safety shutdown. Clean both thoroughly. If it persists, check cable for damage and try another outlet. A failing motor block or power supply is also possible.
Q: The vacuum head sticks to the pool floor and won’t move. How do I fix it?
A: You have excessive suction. Partially open another suction source (main drain or second skimmer), or use a head with wheels appropriate for your surface. Ensure the hose isn’t collapsing.
Q: How long should my cleaner hose be?
A: Long enough to reach the farthest point plus one additional section. Too short restricts coverage; too long causes tangles and stalls.
Q: How often should I clean my pool filter to keep the cleaner moving?
A: Clean whenever pressure rises 20–25% above the clean baseline. In leaf-heavy seasons, that might be weekly; otherwise monthly to quarterly depending on filter type.
Q: Can low water level cause my vacuum to stop moving?
A: Yes. Low water lets air into the skimmer, introducing air to the pump and reducing suction. Keep water mid-skimmer.
Alternative Solutions
If your existing cleaner repeatedly fails or is high-maintenance, consider alternatives.
| Solution | Pros | Cons | Best For |
|---|---|---|---|
| Robotic Cleaner | Independent of pool system, energy efficient, best fine debris removal | Higher upfront cost; electronics can fail | Owners wanting plug-and-play cleaning |
| Suction-Side Cleaner | Lowest cost, simple plumbing | Depends on filter cleanliness and pump suction; can clog | Budget-friendly, simple pools with light debris |
| Pressure-Side Cleaner (with booster) | Excellent for leaves and large debris, robust | Requires booster pump; higher energy use | Leafy yards and larger pools |
| Manual Vacuuming | Full control, cheapest | Time-consuming; depends on you | Occasional use, small pools or spas |
Get Your Pool Vacuum Working Again
By following this guide, you can quickly diagnose why your pool vacuum is not moving and apply targeted fixes:
– Restore flow: empty baskets, clean/backwash filter, and set valves correctly
– Eliminate air leaks and hose obstructions
– Adjust flow and replace worn parts (diaphragms, belts, tracks, tires)
– For pressure cleaners: verify booster pump, clean wall screen, check backup valve
– For robotic units: reset power, clean filter/impeller, inspect tracks and cable
Don’t let a stalled cleaner keep your pool dirty. Work through the steps for your cleaner type and you’ll have it running smoothly again, often in under an hour.
Have you fixed your pool vacuum not moving? Share what worked in the comments to help other pool owners. Found this helpful? Bookmark it for your next pool season.